




















Diamond Blade Testing Series: From Test Objective to Confident Decision
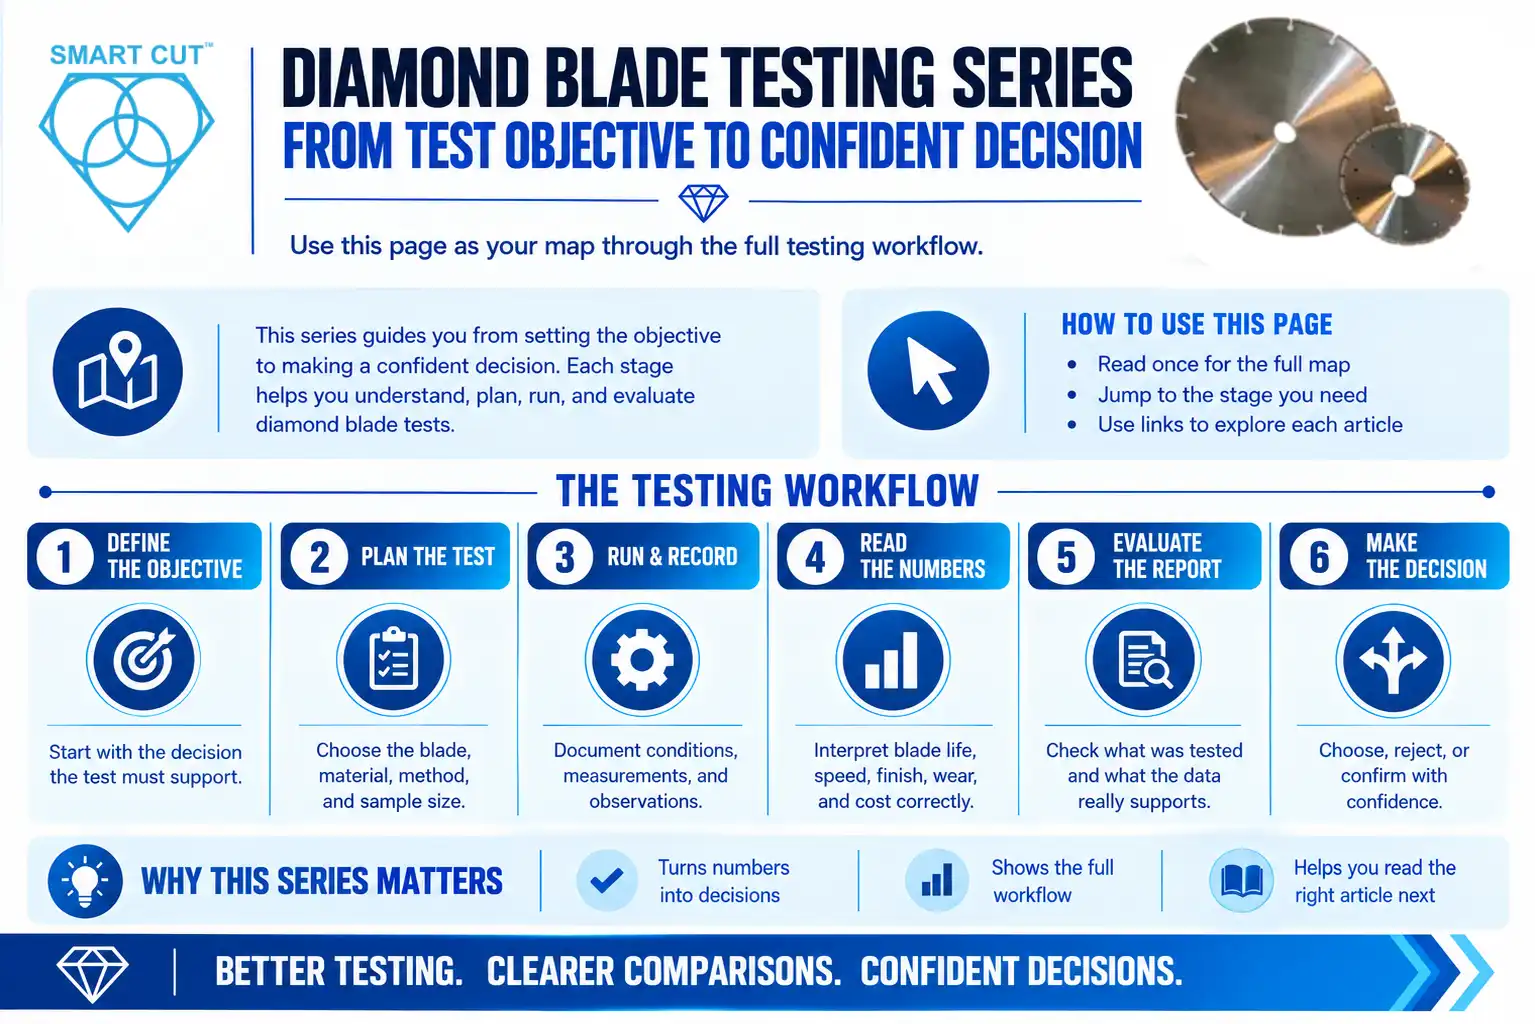
Table of Contents
ToggleA diamond blade test should end with a decision. You choose a blade, reject one, or confirm that a supplier change is safe. Many tests fail at that goal. They produce numbers, but the numbers do not support a decision.
This series fixes that problem. It walks through the full testing workflow, one stage at a time. Each article covers a single question in depth. This page shows how the pieces fit together, so you know where to start and what to read next.
Use this page as your map. Read it once, then jump to the stage you need. Bookmark it, because it links to every article in the series.
Trusted by Tens of Thousands of Manufacturers, Laboratories Research Institutions Worldwide Since 1990

American Based Manufacturer

Established in 1990


Custom manufacturing


Why Blade Testing Goes Wrong
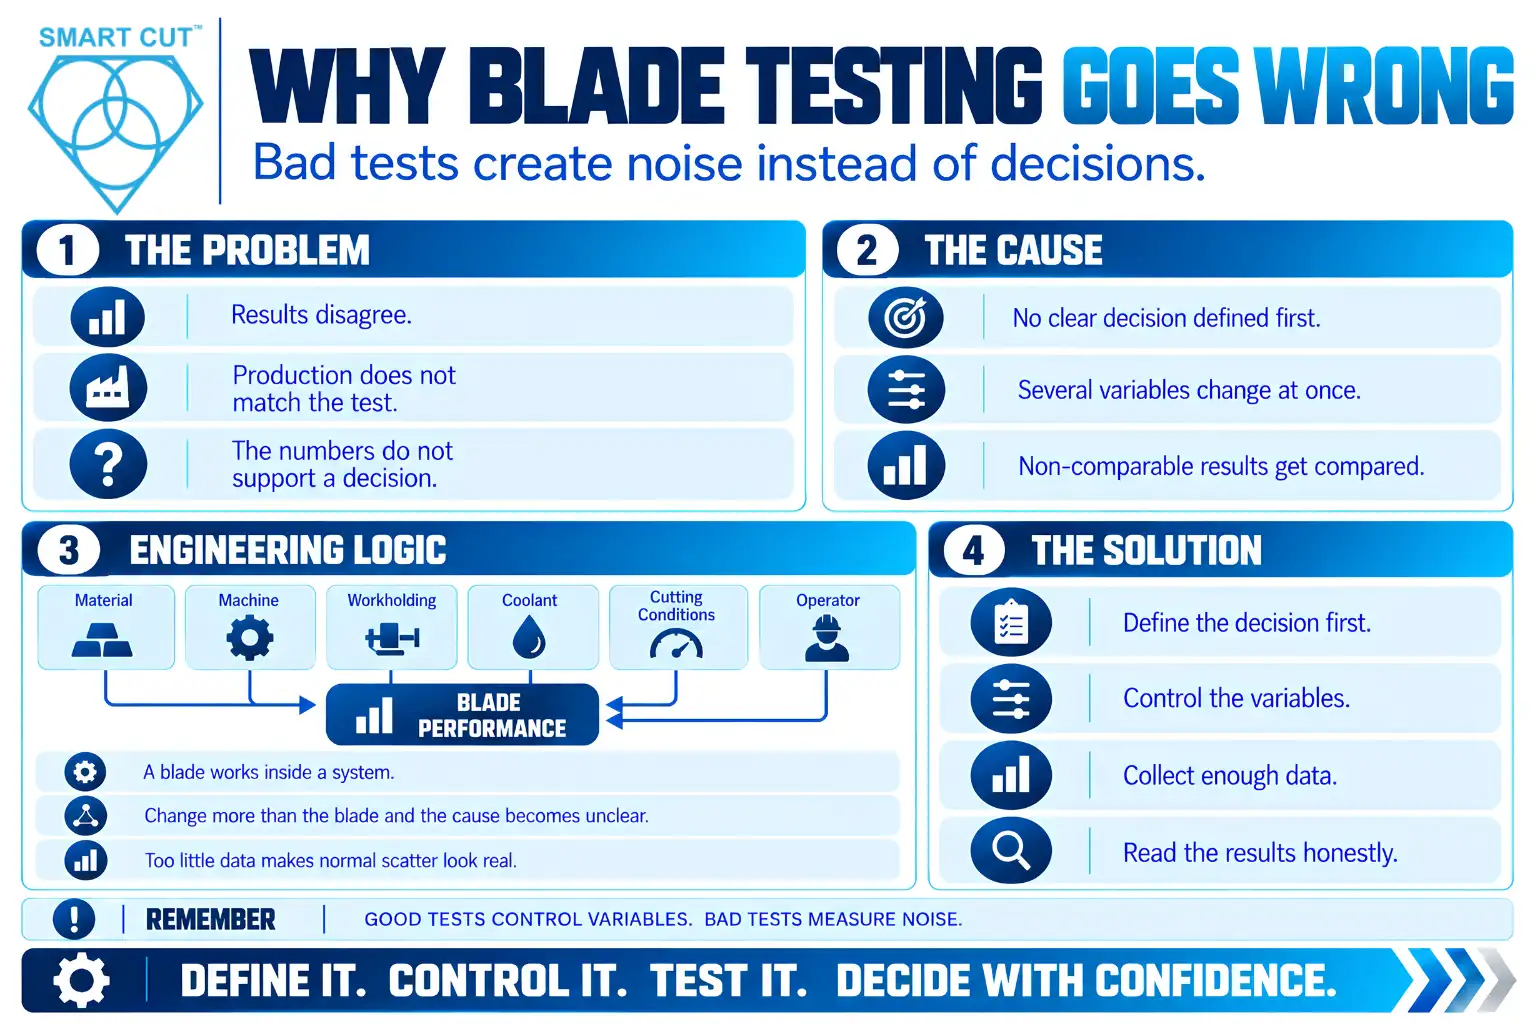
Problem: Test results disagree with each other, or with production.
Cause: Teams test without a defined decision, change several variables at once, and compare results that were never comparable.
Engineering logic: A diamond blade works inside a system. The material, machine, workholding, coolant, cutting conditions, and operator all shape the result. If you change more than the blade, you cannot tell what caused the difference. Likewise, if you run too few cuts, normal scatter can look like a real effect. A test that ignores these facts measures noise.
The same blade can also behave differently on different machines and materials. Our article on why the same diamond blade performs differently explains the system effects behind that.
Solution: Treat testing as a process with stages. Define the decision first. Then control the variables, collect enough data, and read the results honestly.
Four Reasons to Test a Blade
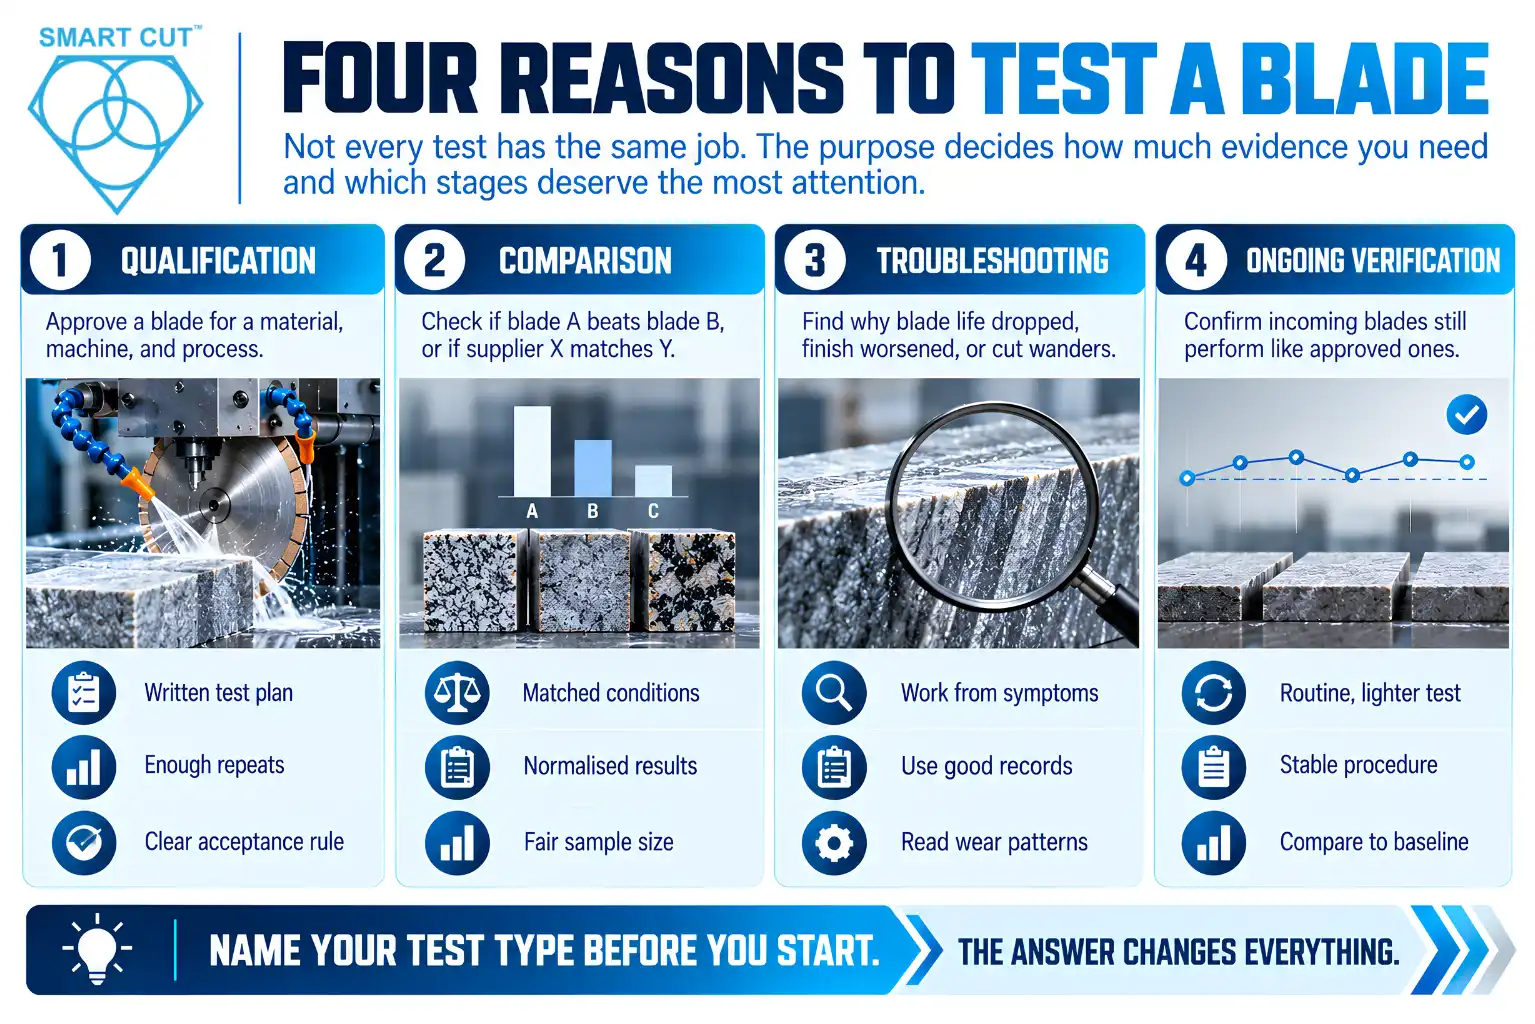
Not every test has the same job. The purpose decides how much evidence you need and which stages deserve the most attention. Most tests fall into one of four types.
Qualification. You want to approve a blade for a material, machine, and process. The bar is high, because a wrong approval costs production time. Qualification needs a written plan, enough repeats, and a clear acceptance rule. Expect to use every stage in this series.
Comparison. You want to know whether blade A beats blade B, or whether supplier X matches supplier Y. The key risk is an unfair comparison. Matched conditions, normalized results, and honest sample sizes matter most here.
Troubleshooting. Blade life dropped, the finish got worse, or the cut started to wander. You need to find what changed. Troubleshooting works backward from symptoms, so it relies on good records and a clear reading of wear patterns.
Ongoing verification. You want to confirm that incoming blades still perform like the ones you approved. This is a lighter, routine test. It depends on a stable procedure and a baseline you can compare against.
Name your test type before you start. The answer changes everything that follows.
The Testing Roadmap at a Glance
The table below maps each stage to the question it answers and the article that covers it.
| Stage | Question it answers | Read this |
|---|---|---|
| 1. Define | What decision must this test support? | How to Verify Diamond Blade Performance |
| 2. Design | How do I build a test that I can repeat? | How to Design a Repeatable Diamond Blade Test |
| 3. Standardize | How do I make every run follow the same rules? | How to Create a Diamond Blade Testing SOP |
| 4. Run | What steps do I follow during the test? | Diamond Blade Testing Procedure |
| 5. Compare | How do I compare two blades fairly? | How to Compare Two Diamond Blades Fairly |
| 6. Size | How many tests do I need? | How Many Diamond Blade Tests Do You Need |
| 7. Transfer | Will lab results hold in production? | Laboratory vs. Production Testing of Diamond Blades |
| 8. Interpret | What do the results actually say? | How to Read and Evaluate Diamond Blade Test Reports |
| 9. Avoid errors | What mistakes ruin tests? | 10 Common Diamond Blade Testing Mistakes |
The sections below explain each stage and show how it connects to the others.
The Variables Every Test Must Control
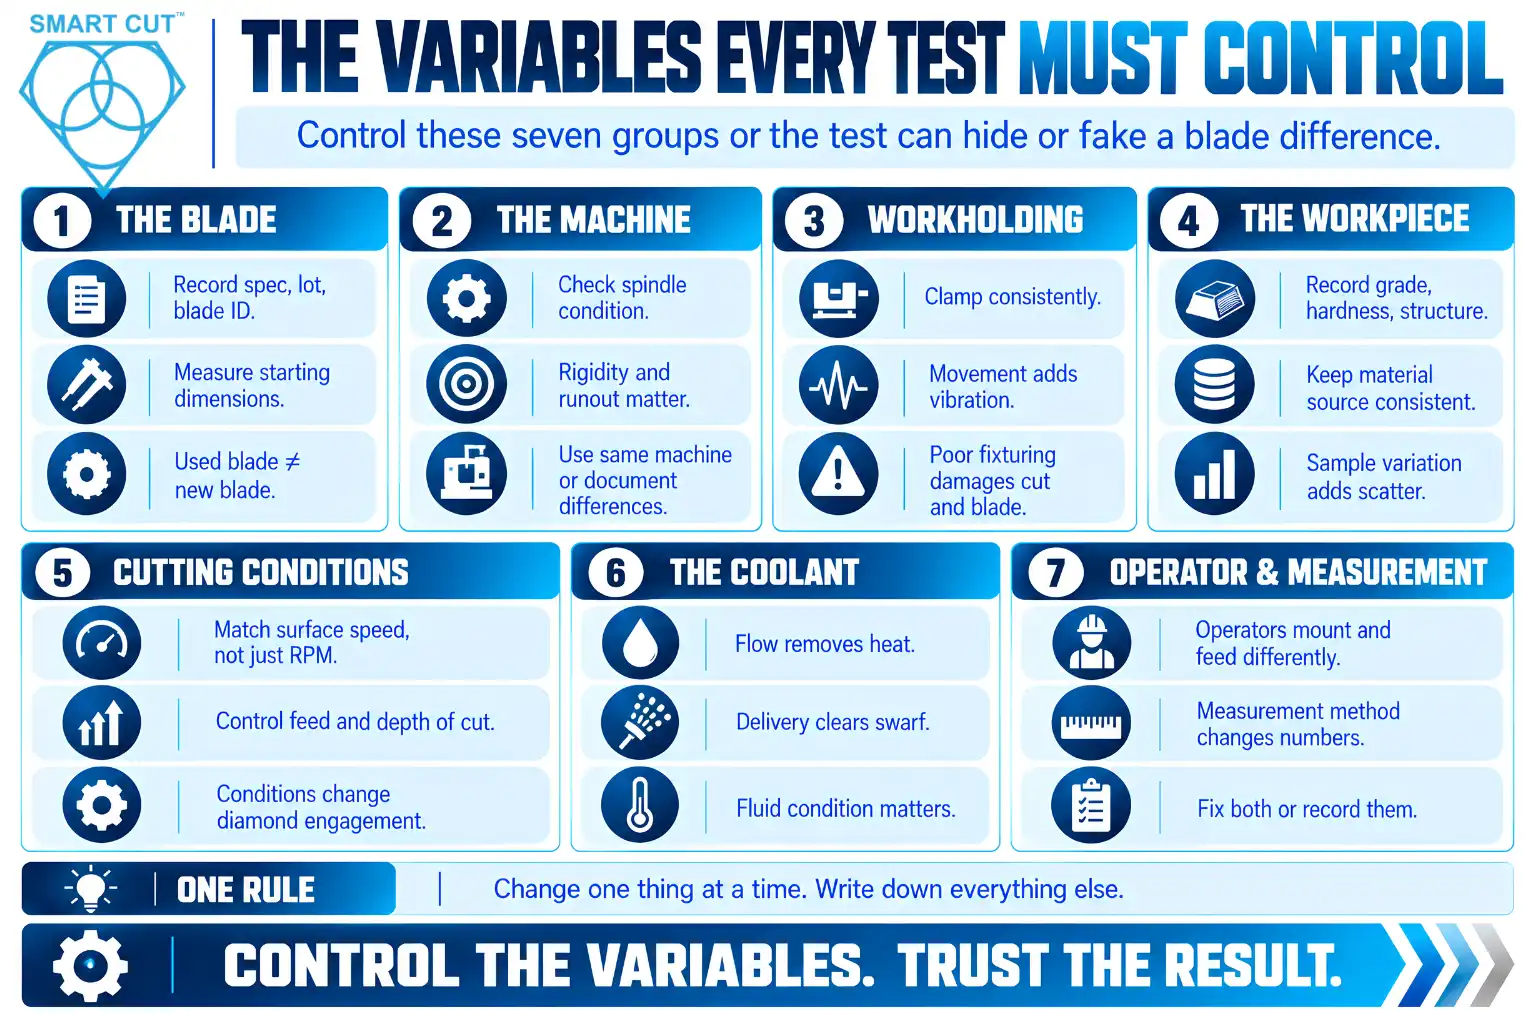
Before you read the stages, understand the seven groups of variables. Every article in the series builds on them. If you do not control a group, it can hide or fake a blade difference.
- The blade. Record the specification, diameter, thickness, arbor size, lot, and individual blade identity. Measure the starting dimensions. A blade with prior use is a different test article from a new one.
- The machine. Spindle condition, rigidity, and runout all affect the cut. A worn spindle adds vibration, and vibration adds load variation at the rim. Test on the same machine, or document the differences.
- The workholding. How you clamp the workpiece changes the cut. Poor fixturing lets the part move or vibrate, which damages the cut and the blade. See workholding for precision diamond sectioning and dicing for how fixturing shapes the result.
- The workpiece. Material grade, hardness, and structure change how a blade wears. Sample-to-sample variation inside the same material also adds scatter. Use consistent material and record its source.
- The cutting conditions. Surface speed, feed rate, and depth of cut define how each diamond engages the material. Surface speed depends on RPM and diameter together, so match surface speed, not just RPM, when blade sizes differ. Depth of cut changes the load, as our article on how depth of cut affects diamond blade life explains. For the interaction between conditions, read how feed rate, RPM, and coolant affect diamond blade performance.
- The coolant. Coolant removes heat and clears swarf. Flow, delivery point, and fluid condition all matter. Our guide on how coolant flow affects blade life and cut quality covers this in detail.
- The operator and the measurement method. Different operators mount, feed, and read the cut differently. Different measurement methods give different numbers. Fix both, or record them.
If you remember one rule, remember this one: change one thing at a time, and write down everything else.
What to Measure
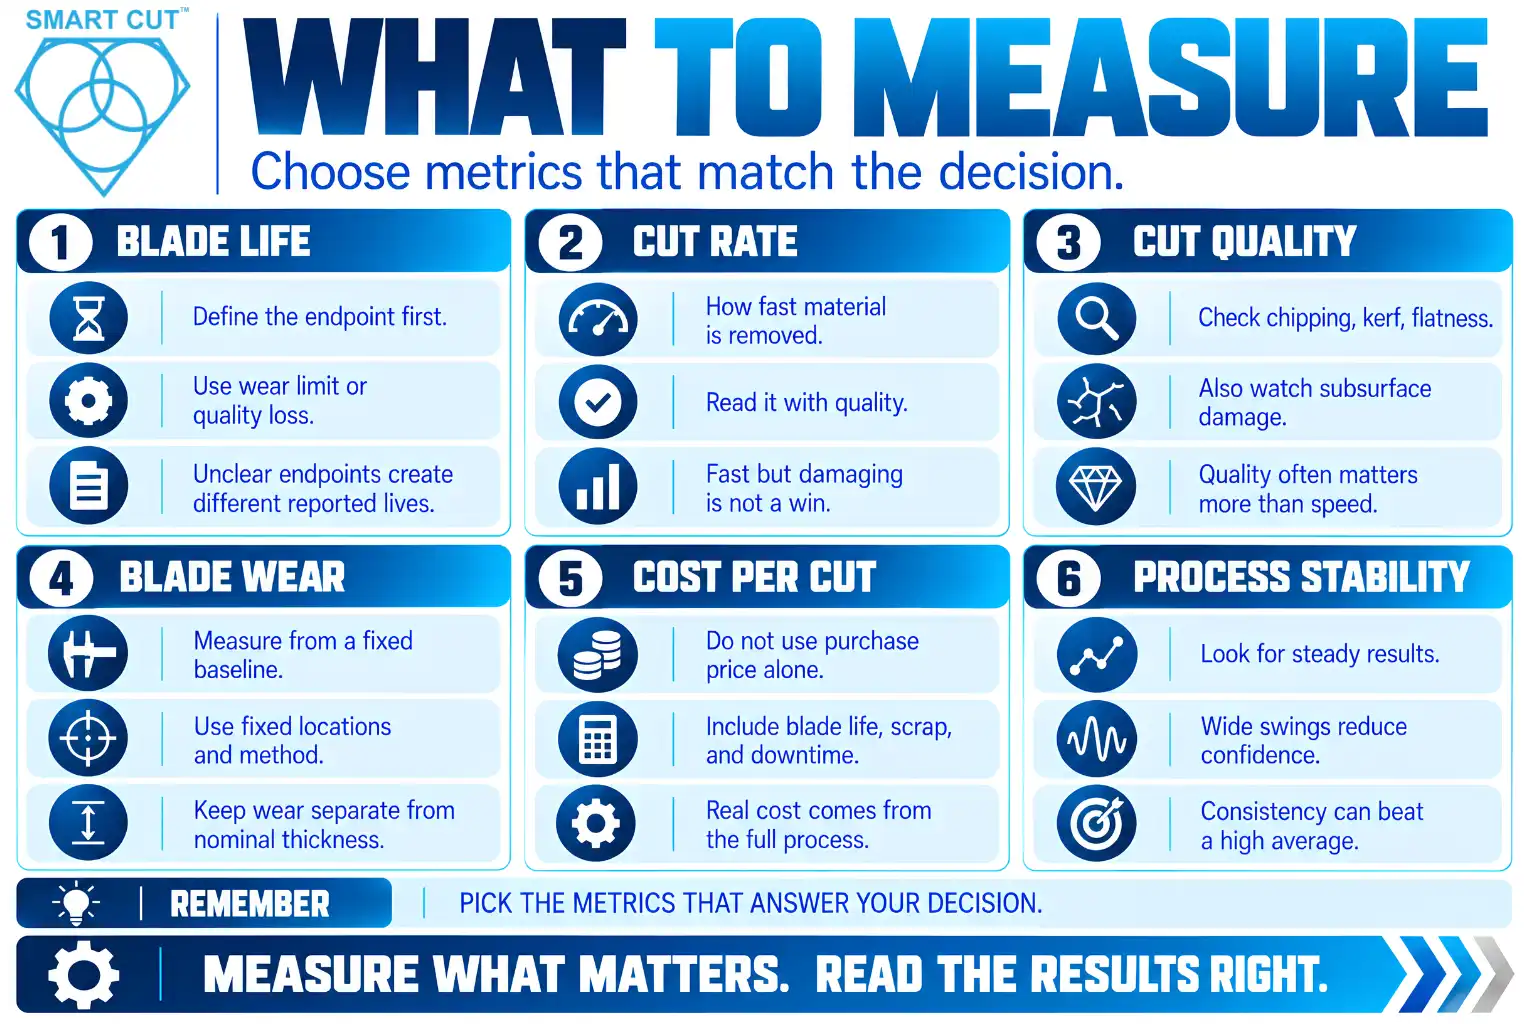
Tests fail when they measure only what is easy. Choose metrics that match your decision. Most blade tests draw from the following set.
Blade life. Define the endpoint before you start. An endpoint might be a wear limit or the loss of a required cut quality. Without a defined endpoint, two people will stop the same test at different points and report different lives.
Cut rate. This shows how fast the blade removes material under the set conditions. A fast cut that damages the part is not a win, so read cut rate beside quality.
Cut quality. Precision work often depends on chipping, kerf, flatness, and subsurface damage more than on speed. Our guide on how to measure diamond blade cut quality shows how.
Blade wear. Measure the dimension that matters, from a fixed baseline, at fixed locations, with a fixed method. Keep measured kerf separate from nominal blade thickness.
Cost per cut. Purchase price alone misleads. Blade life, cut rate, scrap, and downtime all enter the real cost. See diamond blade cost per cut for how to calculate it.
Process stability. A blade that gives steady results is often worth more than one that gives a high average with wide swings.
Pick the metrics that answer your decision. Then state them in the test plan, so nobody adds or drops metrics after seeing the data.
Stage 1: Define the Decision
Every test starts with a decision. Examples include qualifying a new blade, comparing two suppliers, or finding out why blade life dropped. The decision tells you what to measure and how much evidence you need.
Without a decision, teams collect whatever data is easy. They then argue about what it means. A clear decision prevents that argument.
What to decide here: the decision itself, the metrics that inform it, and the evidence that would change your mind.
Typical trap: starting to cut before agreeing on what a good result looks like.
Start with How to Verify Diamond Blade Performance. It explains how to separate useful engineering evidence from general performance claims.
Stage 2: Design a Repeatable Test
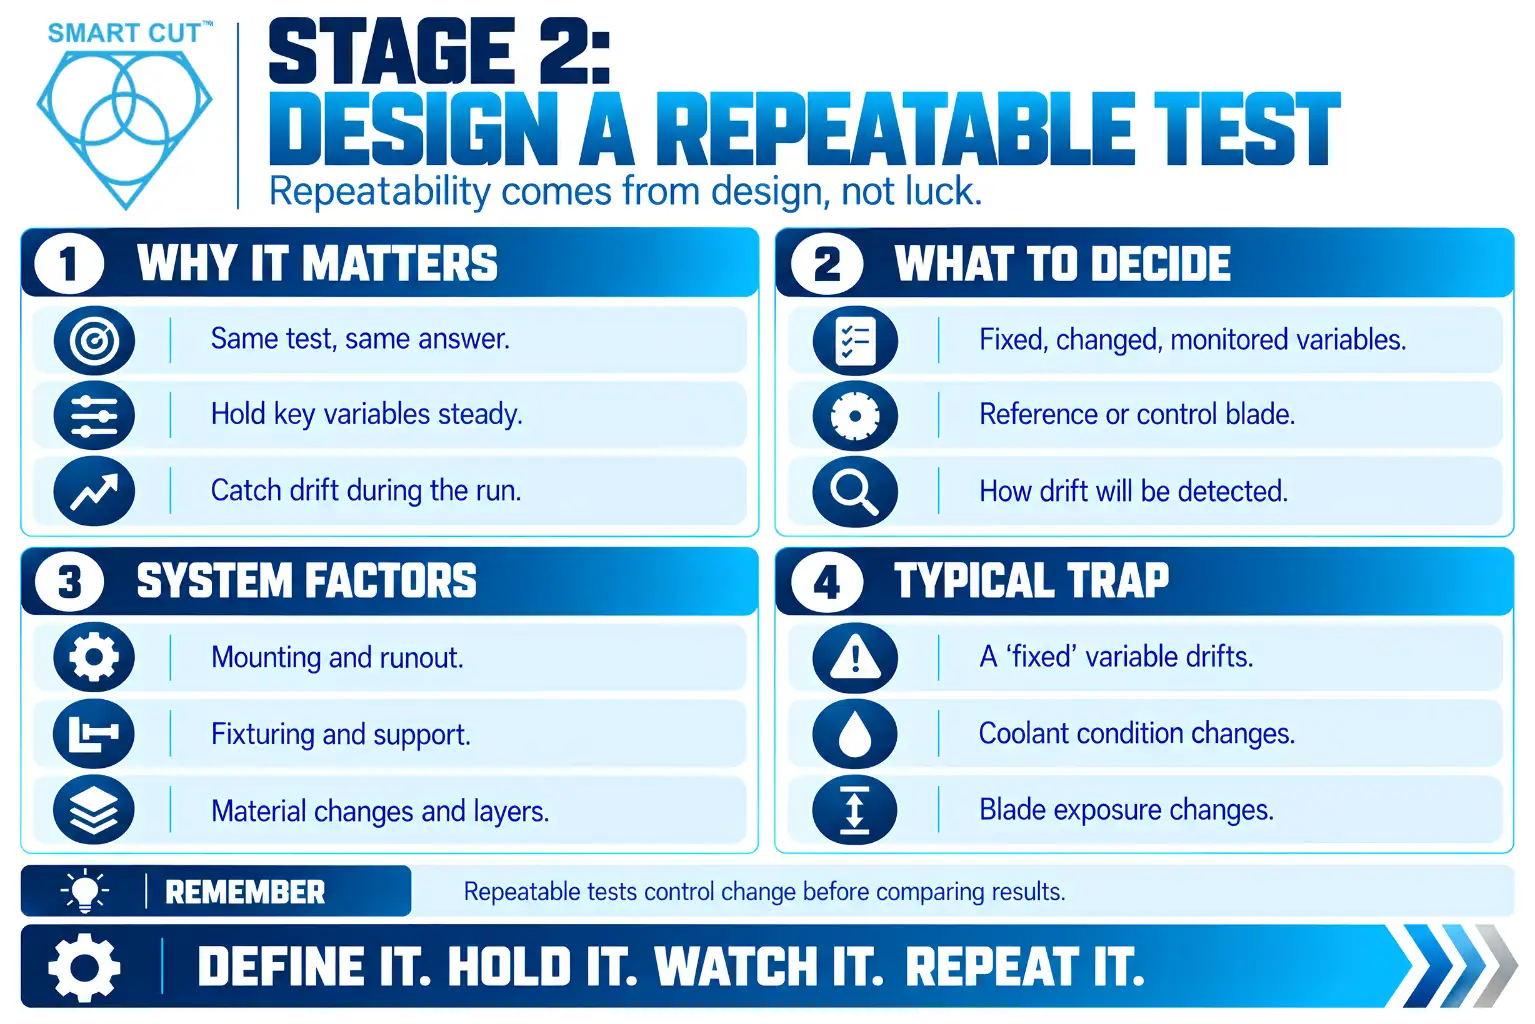
A repeatable test gives the same answer when you run it again. That quality comes from design, not luck. You decide which variables to hold fixed, which one to change, and how to catch drift during the run.
Repeatability also depends on the setup around the blade. Mounting quality, runout, and fixturing all feed into it. Material changes matter too, so read the precision sectioning of coated, composite, and multilayer materials if your samples have layers or interfaces.
What to decide here: the variable roles (fixed, changed, or monitored), a reference or control blade, and how you will detect drift.
Typical trap: treating a variable as fixed when it drifts, such as coolant condition or blade exposure.
Read How to Design a Repeatable Diamond Blade Test for the full design method.
Stage 3: Write It Down as an SOP
A good design still fails if each operator interprets it differently. A standard operating procedure fixes that. It records the blade identity, mounting, cutting conditions, measurements, and the endpoint, so every run follows the same rules.
An SOP also protects you later. When a result looks odd, you can check whether the run followed the procedure. If it did not, you know where to look.
What to decide here: the exact steps, the acceptance criteria, and the rules for handling an interrupted run.
Typical trap: writing the SOP after the test, so it describes what happened instead of what should happen.
See How to Create a Diamond Blade Testing SOP for what a testing SOP should contain.
Stage 4: Run the Test with a Clear Procedure
Now you cut. The procedure article covers the operational workflow: preparing the blade, setting conditions, recording data, and measuring blade life, cut rate, and quality.
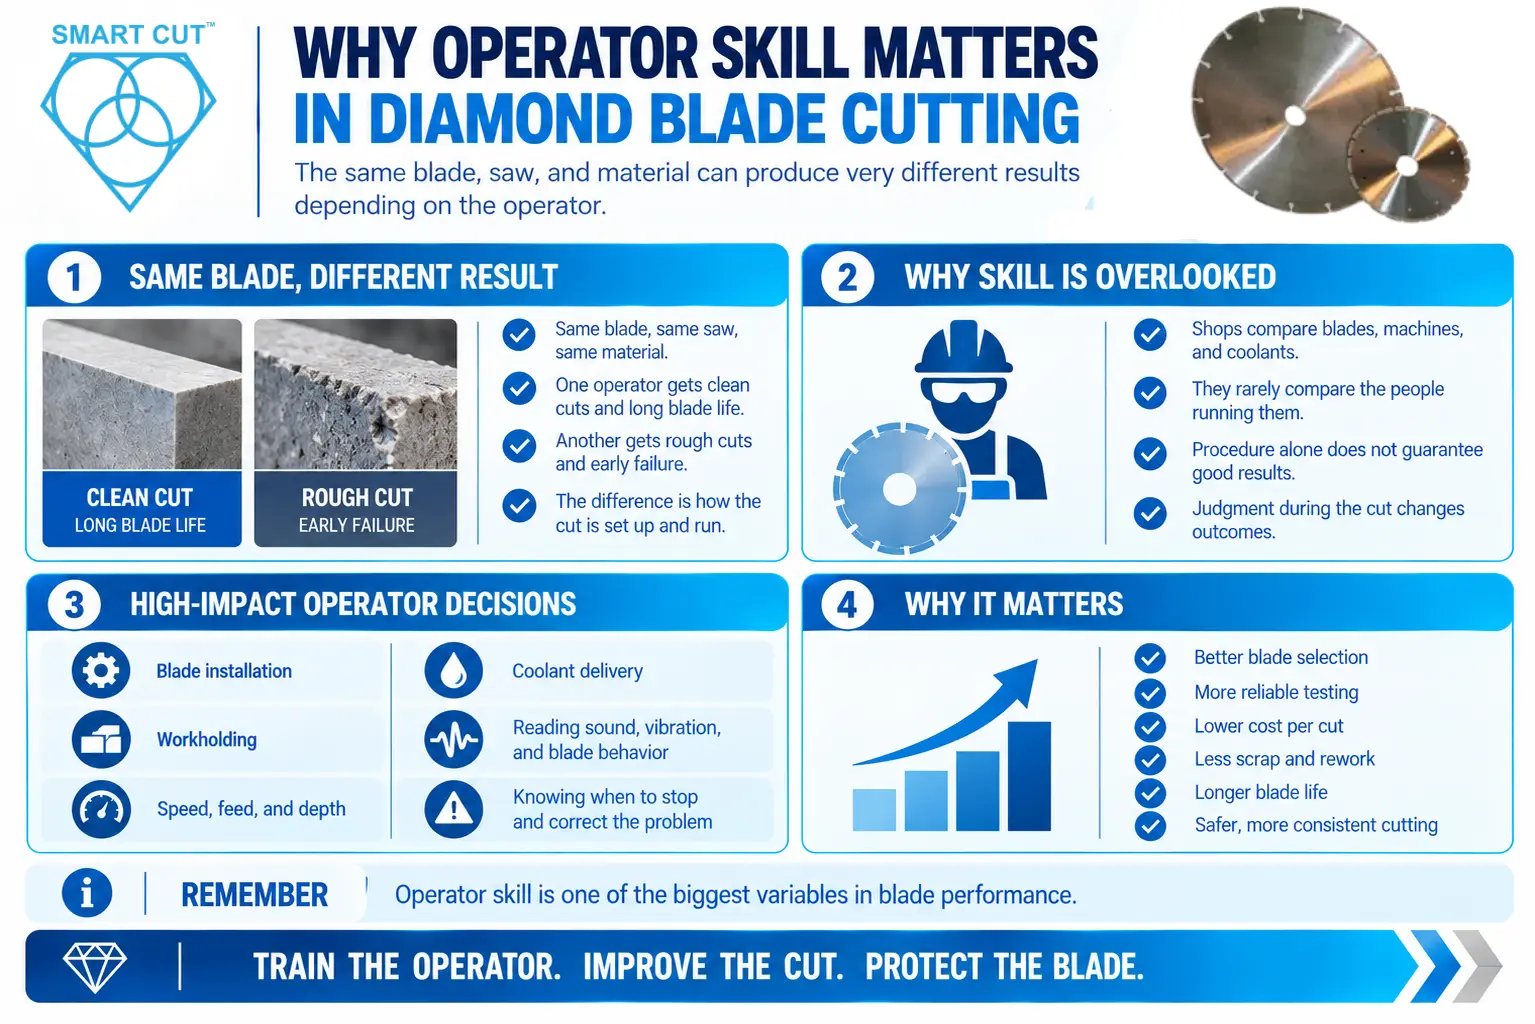
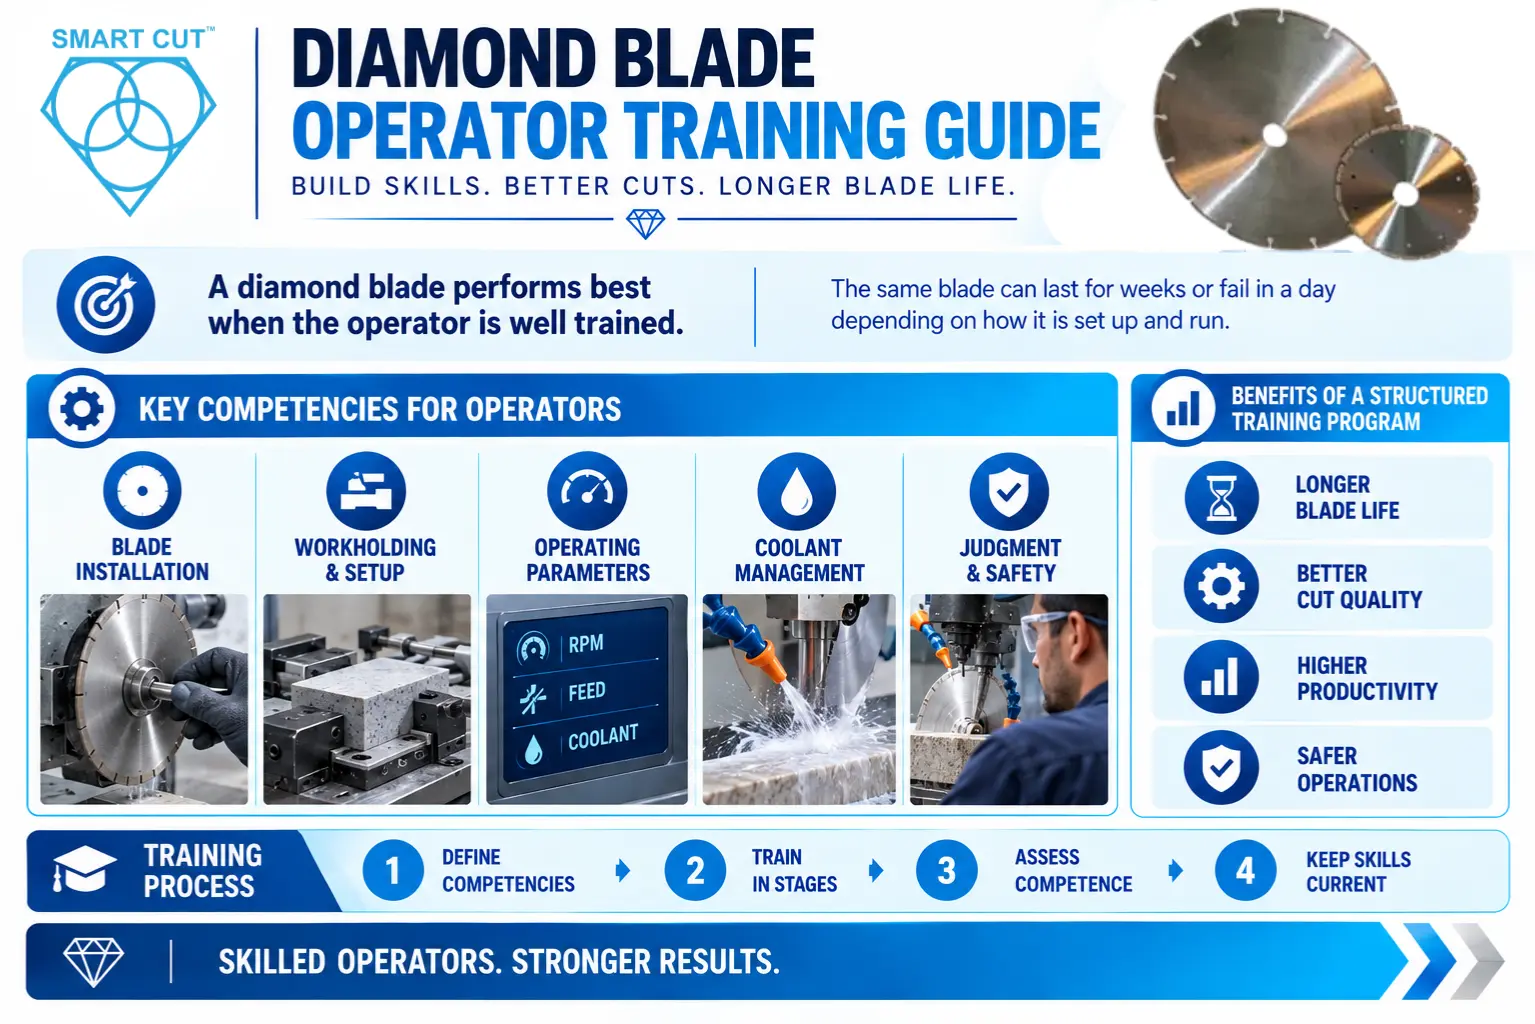
Operator practice matters most at this stage. Mounting, coolant checks, and reading the cut all depend on the person at the machine. A structured procedure reduces that dependence but does not remove it.
What to decide here: the order of operations, the data you record on every cut, and the stop conditions.
Typical trap: changing a setting mid-run to “fix” a problem, which breaks the comparison.
Follow the steps in the Diamond Blade Testing Procedure. Before each session, a short pre-run check helps, and our precision diamond saw pre-operation checklist gives a good starting point.
Stage 5: Compare Blades Fairly
Comparison is where most tests go wrong. Two blades can look different only because they ran under different conditions. A fair comparison matches the conditions and normalizes the results. For example, blades of different diameters need the same surface speed, not just the same RPM.
Normalization also protects against unfair wins. A larger or cheaper blade can look better on raw numbers while losing on cost per unit of work. Compare on the basis that matches your decision.
What to decide here: which conditions to match, which results to normalize, and what counts as a meaningful difference.
Typical trap: declaring a winner from a difference that sits inside the normal scatter.
Read How to Compare Two Diamond Blades Fairly. If you are comparing suppliers, see also how to compare diamond blade suppliers using measurable test data.
Stage 6: Decide How Many Tests You Need
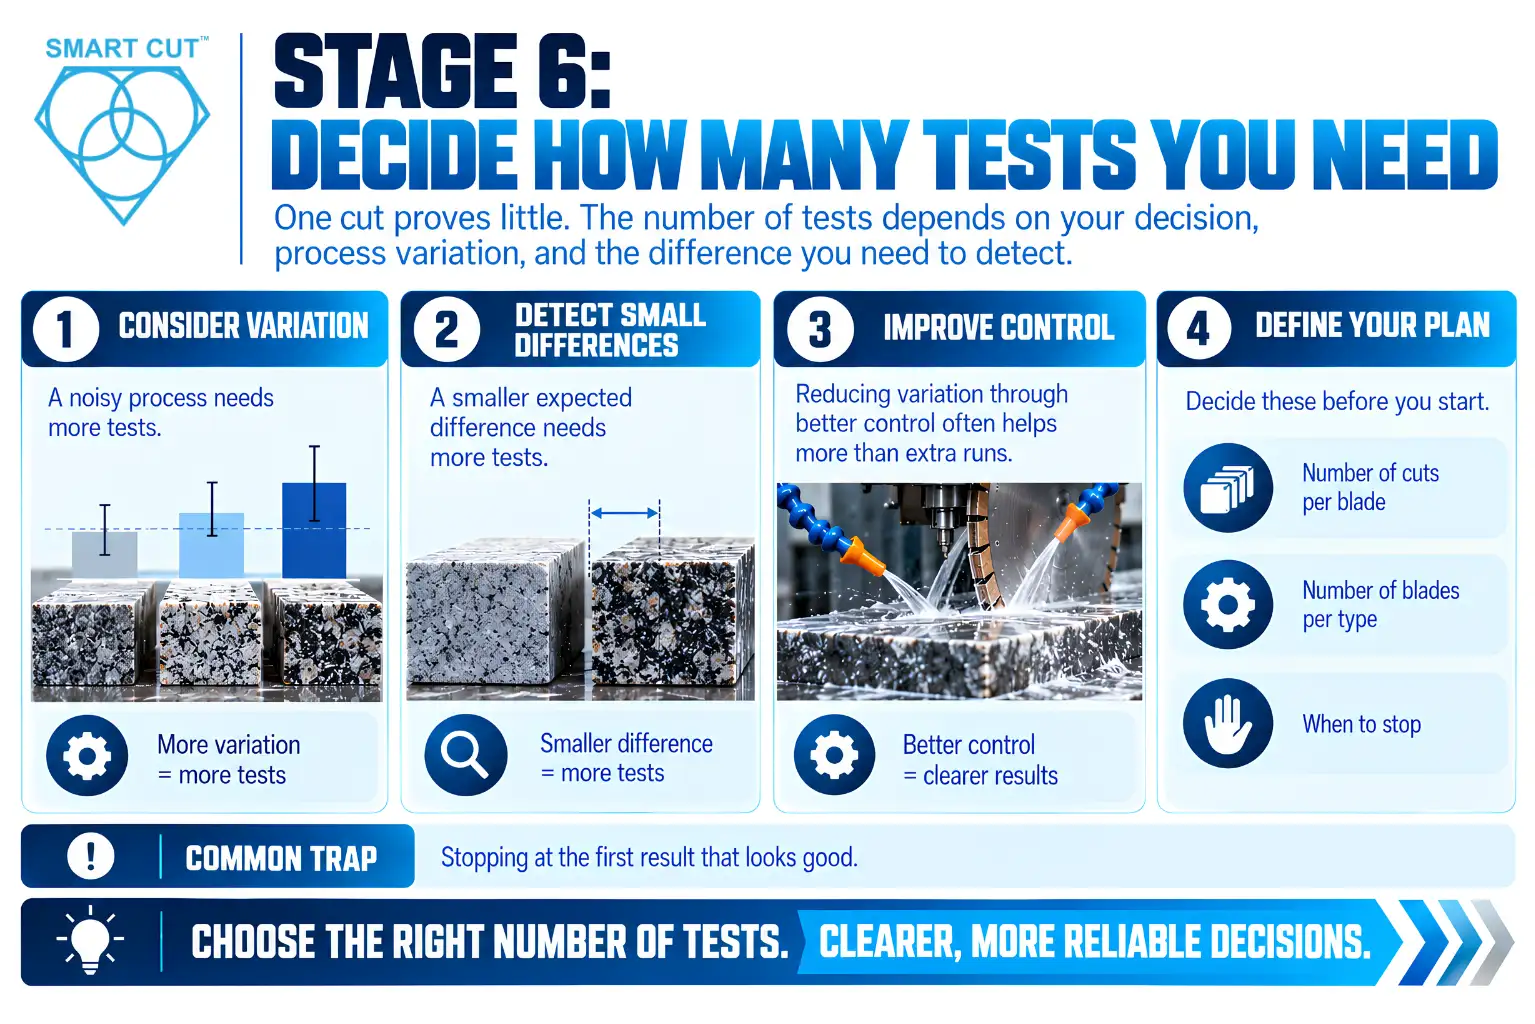
One cut proves little. Cut-to-cut scatter and blade-to-blade variation both affect the result. The number of tests depends on the decision you face, how noisy the process is, and how small the difference is that you need to detect.
A noisy process needs more tests. A small expected difference needs more tests too. Reducing variation through better control often helps more than adding extra runs.
What to decide here: the number of cuts per blade, the number of blades per type, and when to stop.
Typical trap: stopping at the first result that looks good.
Our article on how many diamond blade tests you need explains how to size a test without guessing.
Stage 7: Check That Lab Results Transfer to Production
A blade can perform well in the lab and differently on the shop floor. Machines, operators, materials, and duty cycles all change. Therefore, treat lab results as evidence, not as a promise.
The reverse also happens. A blade that disappoints in a poorly controlled production trial may do well under controlled conditions. In both cases, ask what differed between the two settings before you blame the blade.
What to decide here: which lab conditions must carry over, and how you will confirm the result on the production machine.
Typical trap: approving a blade from lab data alone for a very different production setup.
See Laboratory vs. Production Testing of Diamond Blades for why results differ and how to bridge the gap. For a wider process view, read diamond blade cutting process qualification.
Stage 8: Read the Results Honestly
Numbers do not speak for themselves. A report needs context: the conditions, the sample size, the scatter, and the endpoint. A difference counts only if it exceeds the normal variation.
Equally, “no clear difference” is a valid result. Two blades that perform about the same may let you choose on price, availability, or service instead.
What to decide here: whether the evidence meets the acceptance rule you set before testing.
Typical trap: reading the data after the fact to fit the outcome you hoped for.
Use How to Read and Evaluate Diamond Blade Test Reports to judge any report, whether you wrote it or a supplier sent it. When a test shows unusual wear, troubleshooting common diamond blade wear patterns helps you read what the blade is telling you.
Stage 9: Avoid the Common Mistakes
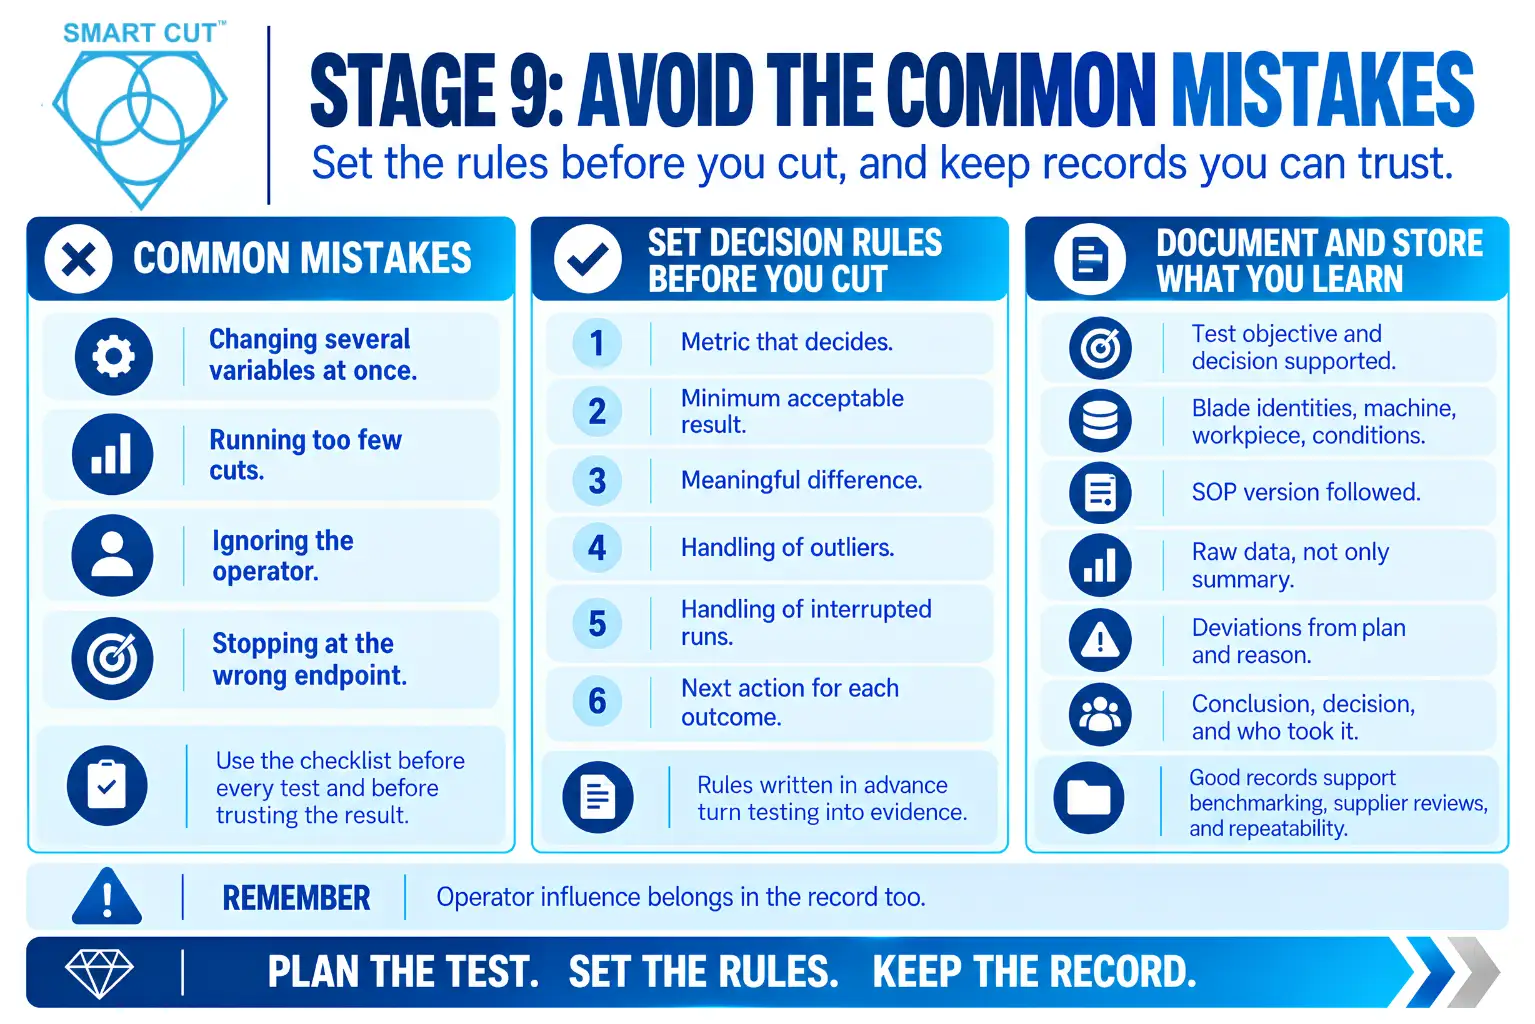
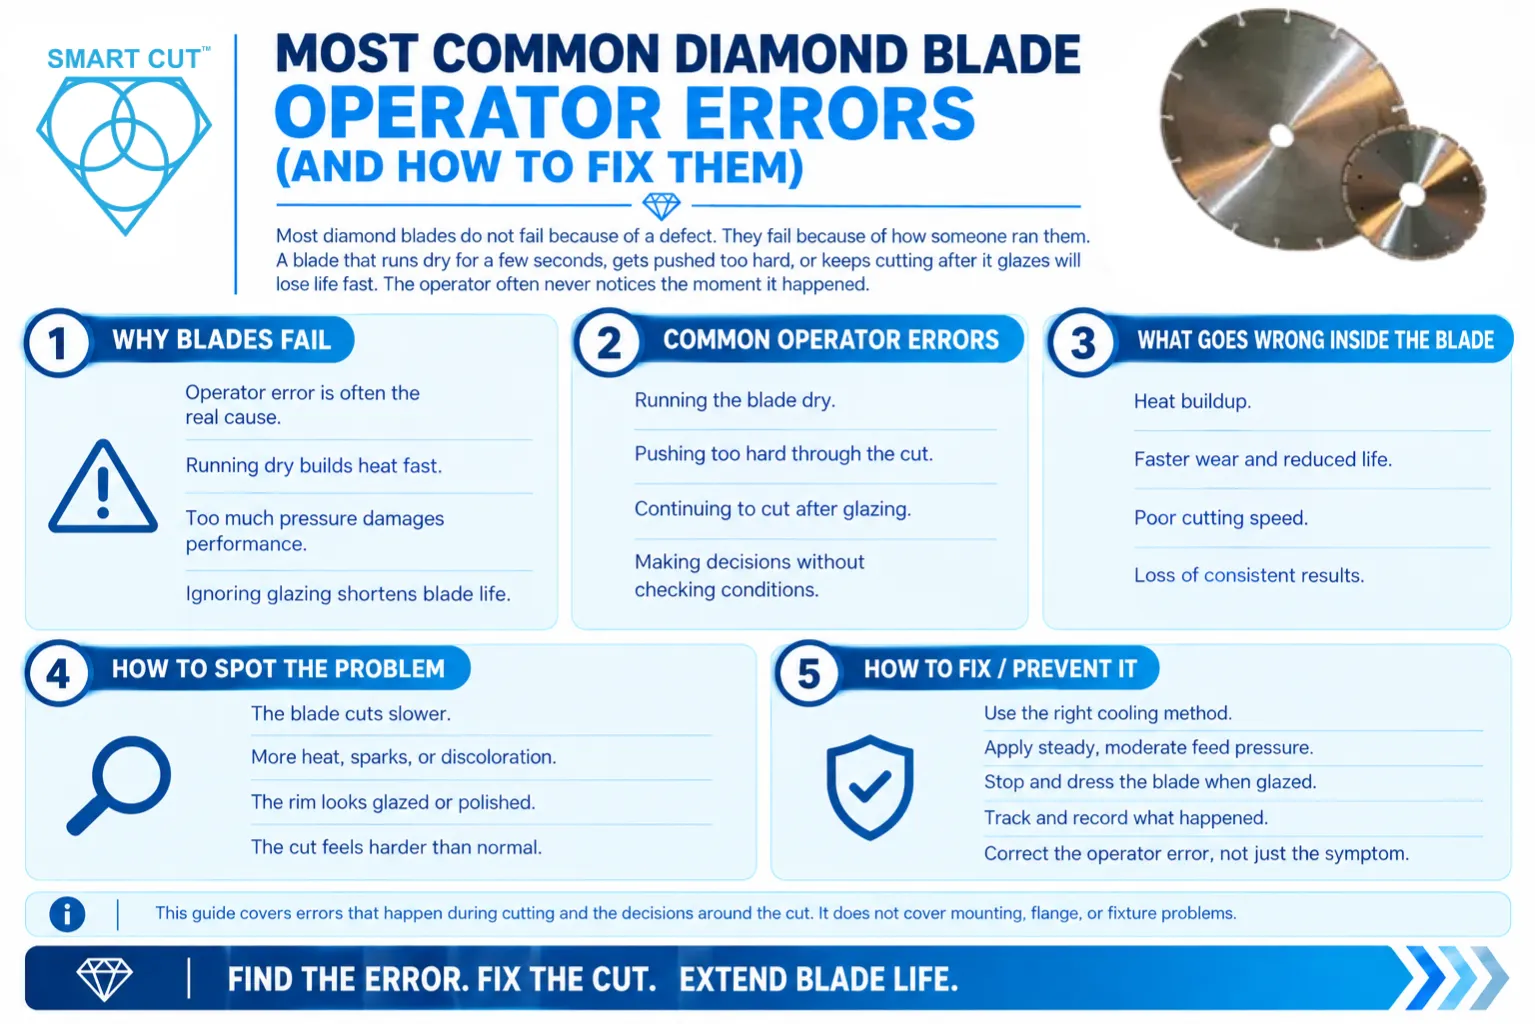
Even careful teams repeat the same errors: changing several variables at once, running too few cuts, ignoring the operator, or stopping at the wrong endpoint. Our checklist article, 10 Common Diamond Blade Testing Mistakes and How to Avoid Them, lists them with fixes.
Run through that list before every test and again before you trust the result. It takes minutes and often saves days.
Set Decision Rules Before You Cut
Decide how you will judge the result before you see it. Otherwise, the data tempts you to pick whichever interpretation you like. Write the rules into the test plan.
Good decision rules cover the following points.
- The metric that decides. Name the primary metric, such as blade life to a defined endpoint, or cost per cut at acceptable quality.
- The minimum acceptable result. State the threshold a blade must meet to pass.
- The size of a meaningful difference. Decide how large a gap must be before it changes your choice.
- The handling of outliers. Investigate the cause of an odd result. Exclude it only for a documented reason, and never delete data because it is inconvenient.
- The handling of interrupted runs. An interrupted run may not represent uninterrupted blade life. Mark it, do not report it as a completed result, and repeat it if the decision needs it.
- The next action for each outcome. Say in advance what you will do if the blade passes, fails, or lands in between.
Rules written in advance turn testing into evidence. Rules written afterward turn it into justification.
Document and Store What You Learn
A test that nobody can find or repeat has little value. Build a simple record for every test.
Keep the following together in one place.
- The test objective and the decision it supported.
- The blade identities, machine, workpiece, and conditions.
- The SOP version you followed.
- The raw data, not only the summary.
- Any deviation from the plan, with the reason.
- The conclusion, the decision taken, and who took it.
Raw data matters because summaries hide scatter. Deviations matter because they explain odd results later. Consistent records also let you compare tests across months or operators, and they feed directly into benchmarking and supplier reviews. Operator influence belongs in these records too, because operator practice enters the data whether you track it or not.
Build a Testing Program, Not Just a Test
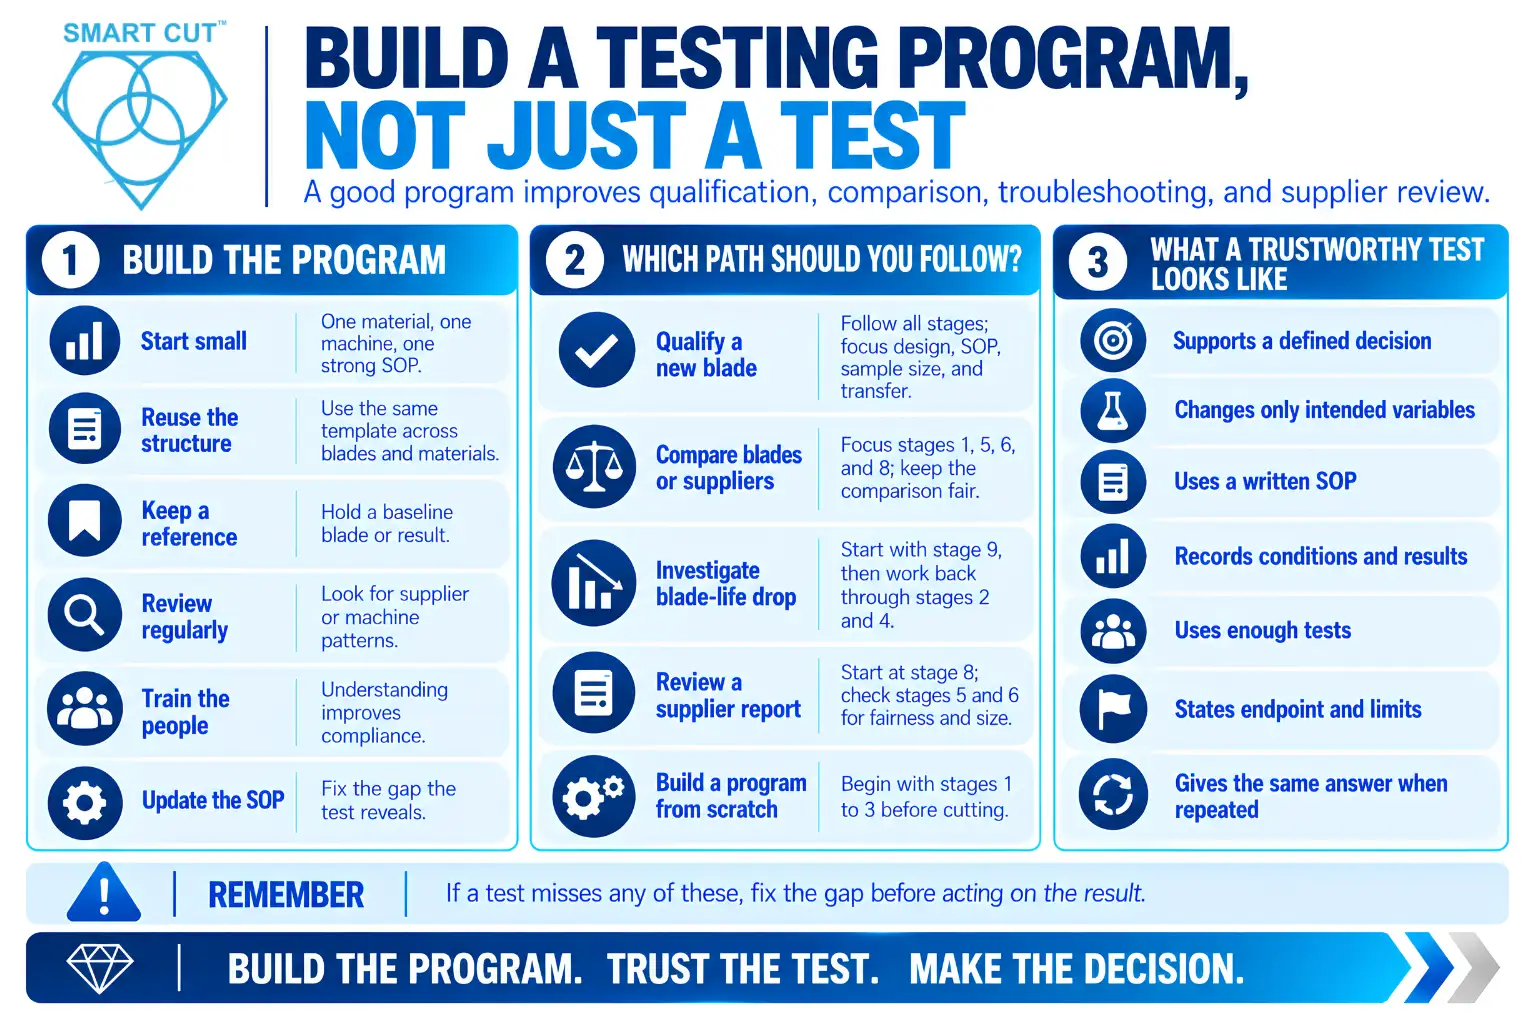
One good test helps once. A program helps every time you buy, qualify, or troubleshoot. Grow your program in steps.
Start small. Pick your most common material and machine. Write one SOP and run one well-designed test.
Reuse the structure. Apply the same plan template to new blades and materials. Reuse makes results comparable over time.
Keep a reference. Hold a baseline blade or a baseline result so you can tell when something drifts.
Review regularly. Look at past tests for patterns, such as a supplier whose lots vary or a machine that shows more scatter.
Train the people. Operators who understand why the test works follow it more faithfully.
Update the SOP. When a test exposes a gap, fix the procedure so the next test benefits.
Which Path Should You Follow?
Not every test needs every stage in full depth. Use the guide below.
You are qualifying a new blade for production. Follow all stages. Pay extra attention to design, SOP, sample size, and lab-to-production transfer.
You are comparing two blades or two suppliers. Focus on stages 1, 5, 6, and 8. Fair comparison and honest interpretation matter most.
You are investigating a sudden drop in blade life. Start with stage 9 and the wear-pattern article. Then work back through stages 2 and 4 to find what changed.
You are evaluating a supplier’s test report. Go straight to stage 8, then check stages 5 and 6 to see whether the comparison was fair and large enough.
You are building a testing program from scratch. Begin with stages 1 to 3. Define the decision, design the test, and write the SOP before you cut anything.
What a Trustworthy Test Looks Like
Regardless of purpose, a trustworthy test shares these traits.
- It supports a defined decision.
- It changes only what it intends to change.
- It uses a written procedure that any trained operator can follow.
- It records the conditions along with the results.
- It uses enough tests to separate real differences from scatter.
- It reports the endpoint and the limits of what it proves.
- It gives the same answer when someone repeats it.
If your test misses any of these, treat its conclusions with caution. Then fix the gap before you act on the result.
How Testing Connects to Selection and Process Qualification
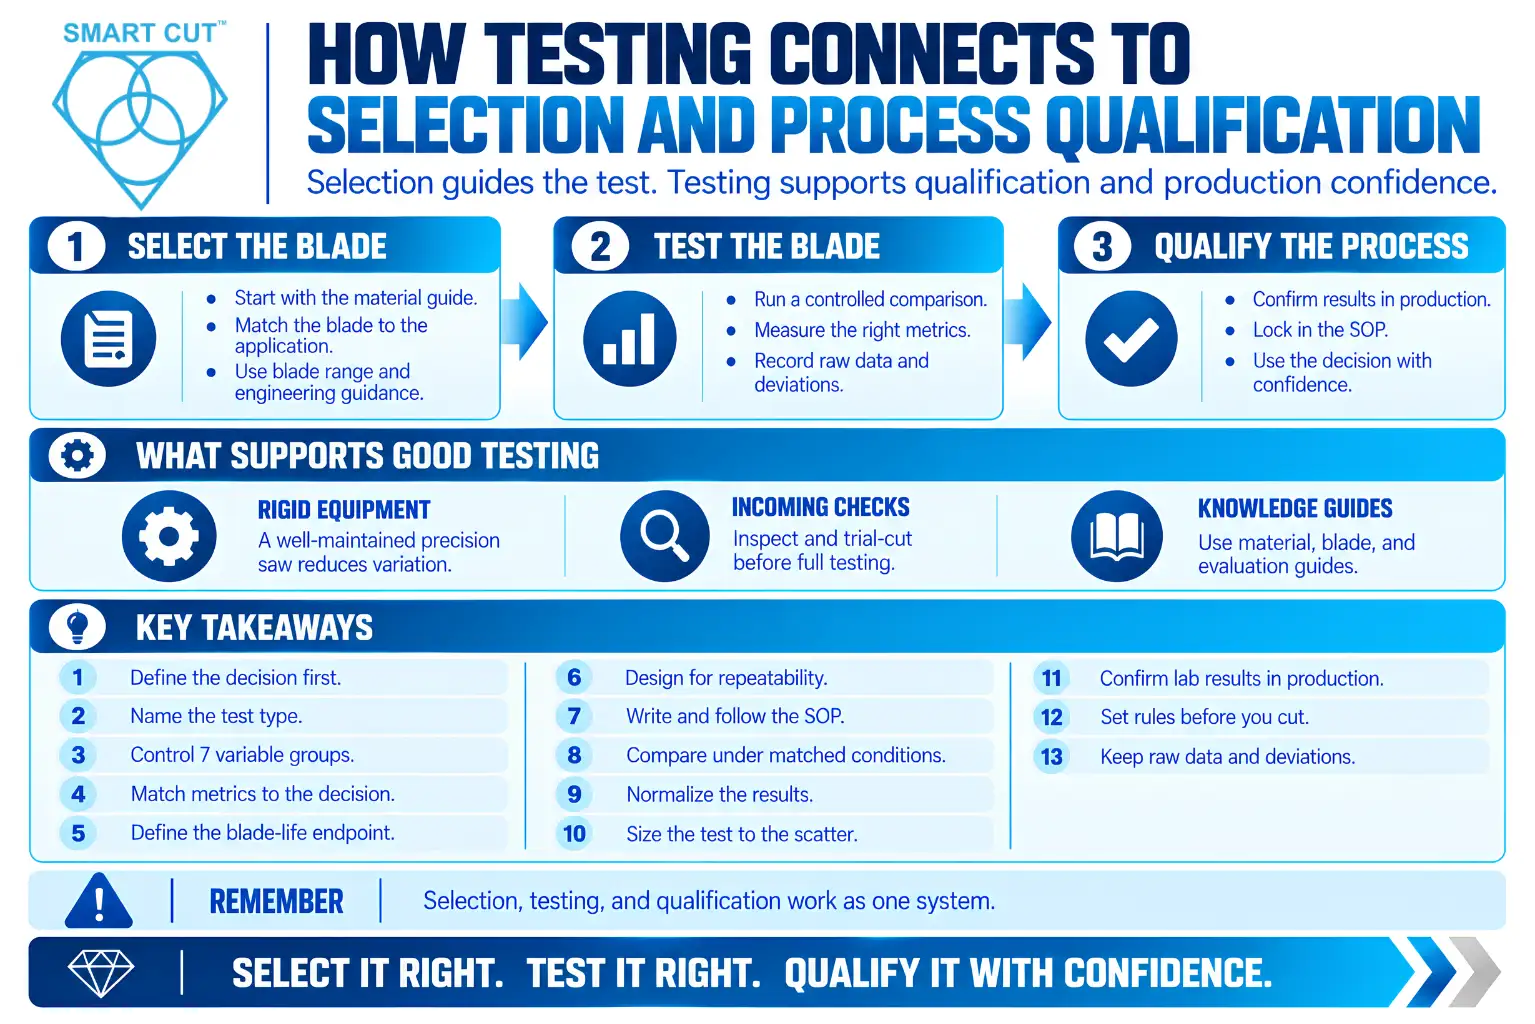
Testing sits inside a larger process. First, you select a blade for a material and application. Then you test it. Finally, you qualify the process for production.
For selection, start with the material guide and the diamond and CBN blade range. For a broader engineering framework, visit the Evaluating and Comparing Diamond Blades guide in the Knowledge Center.
Equipment also matters. A rigid, well-maintained precision saw removes sources of variation that testing cannot fully correct afterward. Incoming checks help as well, and our incoming diamond blade inspection and trial-cut checklist shows how to catch problems before a blade reaches a real test.
Key Takeaways
- A blade test must end in a decision, so define the decision first.
- Name the test type: qualification, comparison, troubleshooting, or ongoing verification.
- Control seven variable groups: blade, machine, workholding, workpiece, conditions, coolant, and operator or measurement method.
- Choose metrics that match the decision, and define the blade life endpoint in advance.
- Design for repeatability, then lock the design into a written SOP.
- Compare blades under matched conditions and normalize the results.
- Size the test to the decision and the process scatter.
- Treat lab results as evidence and confirm them in production.
- Set decision rules before you cut, and keep raw data and deviations on record.
Frequently Asked Questions
Define the decision the test must support.
Lab conditions often differ from production in machine, operator, material, and duty cycle.
Match the conditions, change only the blade, and normalize results for differences like diameter.
It depends on the decision, the process scatter, and the size of the difference you need to detect.
An SOP makes every run follow the same rules, which keeps results comparable.
No, because surface speed also depends on blade diameter.
No, because cut quality, cut rate, and cost per cut also affect the decision.
Fixed variables, a written procedure, and checks that catch drift during the run.
Check the conditions, sample size, scatter, and endpoint before you trust the conclusion.
Changing more than one variable at once.
Yes, because operator practice adds variation that can hide real blade differences.
Before you commit to a purchase or a process change that depends on them.
Without a fixed endpoint, different people stop the same test at different points.
Only with a documented reason, and only after you investigate the cause.
Keep the objective, conditions, SOP version, raw data, deviations, and the decision taken.
Start with the decision, the test design, and the SOP, in that order.
Yes, you can request a consultation to discuss your material and process.
Conclusion
Good blade testing is a process, not a single event. It begins with a decision, moves through design, standardization, and controlled cutting, and ends with an honest reading of the data. Skip a stage, and the result becomes harder to trust.
Use this series as your roadmap. Start at the stage that matches your situation, follow the links, and build a test that supports a real decision. Over time, turn single tests into a program, so every new blade and every supplier change meets the same fair standard.
If you want help planning a test or matching a blade to your material and process, request a consultation with the UKAM team, or explore the diamond and CBN wafering and cut-off blades.
Trusted by Tens of Thousands of Manufacturers, Laboratories,
Research Institutions Worldwide Since 1990
American Based Manufacturer
Established in 1990
Custom manufacturing
RELATED ARTICLES


Brian is an experienced professional in the field of precision cutting tools, with over 27 years of experience in technical support. Over the years, he has helped engineers, manufacturers, researchers, and contractors find the right solutions for working with advanced and hard-to-cut materials. He’s passionate about bridging technical knowledge with real-world applications to improve efficiency and accuracy.
As an author, Brian Farberov writes extensively on diamond tool design, application engineering, return on investment strategies, and process optimization, combining technical depth with a strong understanding of customer needs and market dynamics.