


















Setup Mistakes That Damage Diamond Blades (and How to Prevent Them)
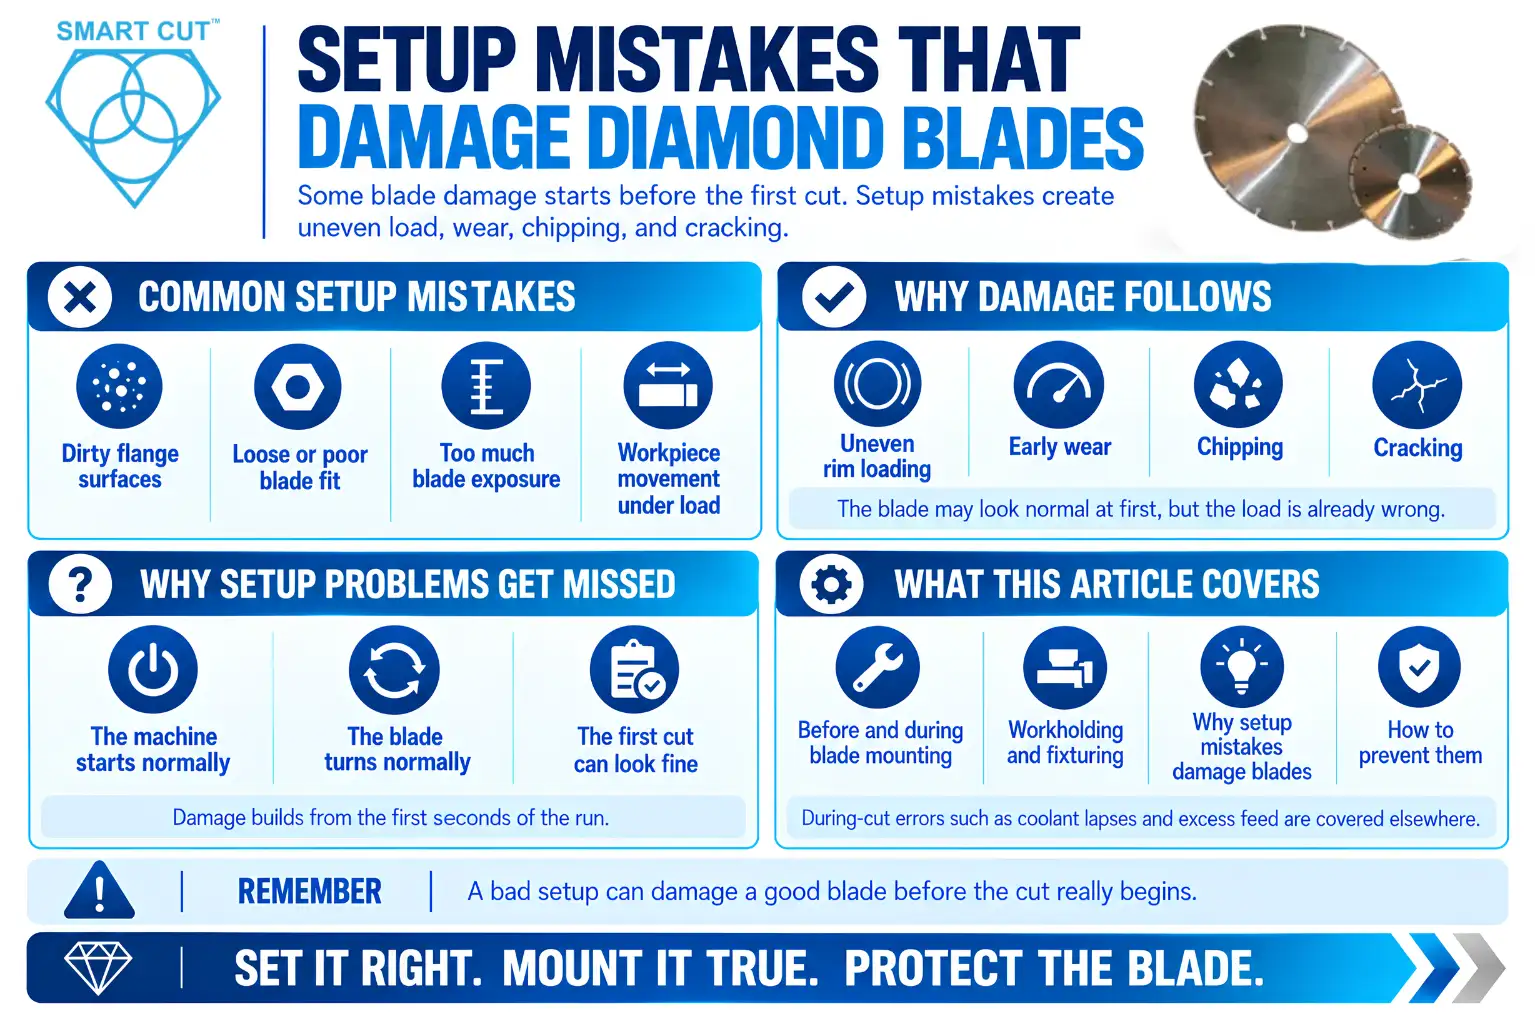
Table of Contents
ToggleSome blades are damaged before the first cut. The harm comes from the setup: a dirty flange, a loose fit, too much blade sticking out, a part that moves under load. The blade then runs badly from the first second, and it never recovers.
Setup problems are easy to miss. The machine starts, the blade turns, and the cut looks normal at first. Meanwhile, uneven load builds in the rim, and wear, chipping, or cracking follows. Operators then blame the blade.
This article covers mistakes that happen during setup, before and while you mount the blade and fix the workpiece. It does not cover errors made during the cut, such as coolant lapses, excess feed, and ignored warning signs. For those, see our operator-errors article. For a quick pre-run list, see our precision diamond saw pre-operation checklist. Here, the focus is on why each setup mistake damages the blade and how to prevent it.
Trusted by Tens of Thousands of Manufacturers, Laboratories Research Institutions Worldwide Since 1990
Established in 1990
Why Setup Decides What Happens in the Cut
Problem: Blades chip, wander, or wear unevenly even when the cutting conditions look correct.
Cause: The setup gave the blade an unstable, uneven, or unsupported working condition.
Engineering logic: A thin diamond blade depends on its surroundings. Four conditions must hold at once.
- The blade must run true, with no wobble at the rim.
- The blade must have firm, even support at the center.
- The blade must meet the workpiece squarely and steadily.
- The cut must receive coolant at the right place.
If any one fails, load stops spreading evenly around the rim. Some sections carry more than their share. They wear faster, heat up, and sometimes break. A thin core also has little stiffness of its own, so it relies on the flanges and the machine for rigidity. A weak setup removes that support.
Once a setup creates uneven load, no cutting parameter fixes it. You can only fix the setup. That is why setup deserves the same attention as speed and feed.
UKAM’s own usage guidance reflects this principle. It treats the machine, the mounting, and the process as part of the cutting system, not as background details. You can read the full guidance in our article on how to properly use precision diamond and CBN blades.
Solution: Set up the blade deliberately, in a fixed order, and verify the result before you cut.
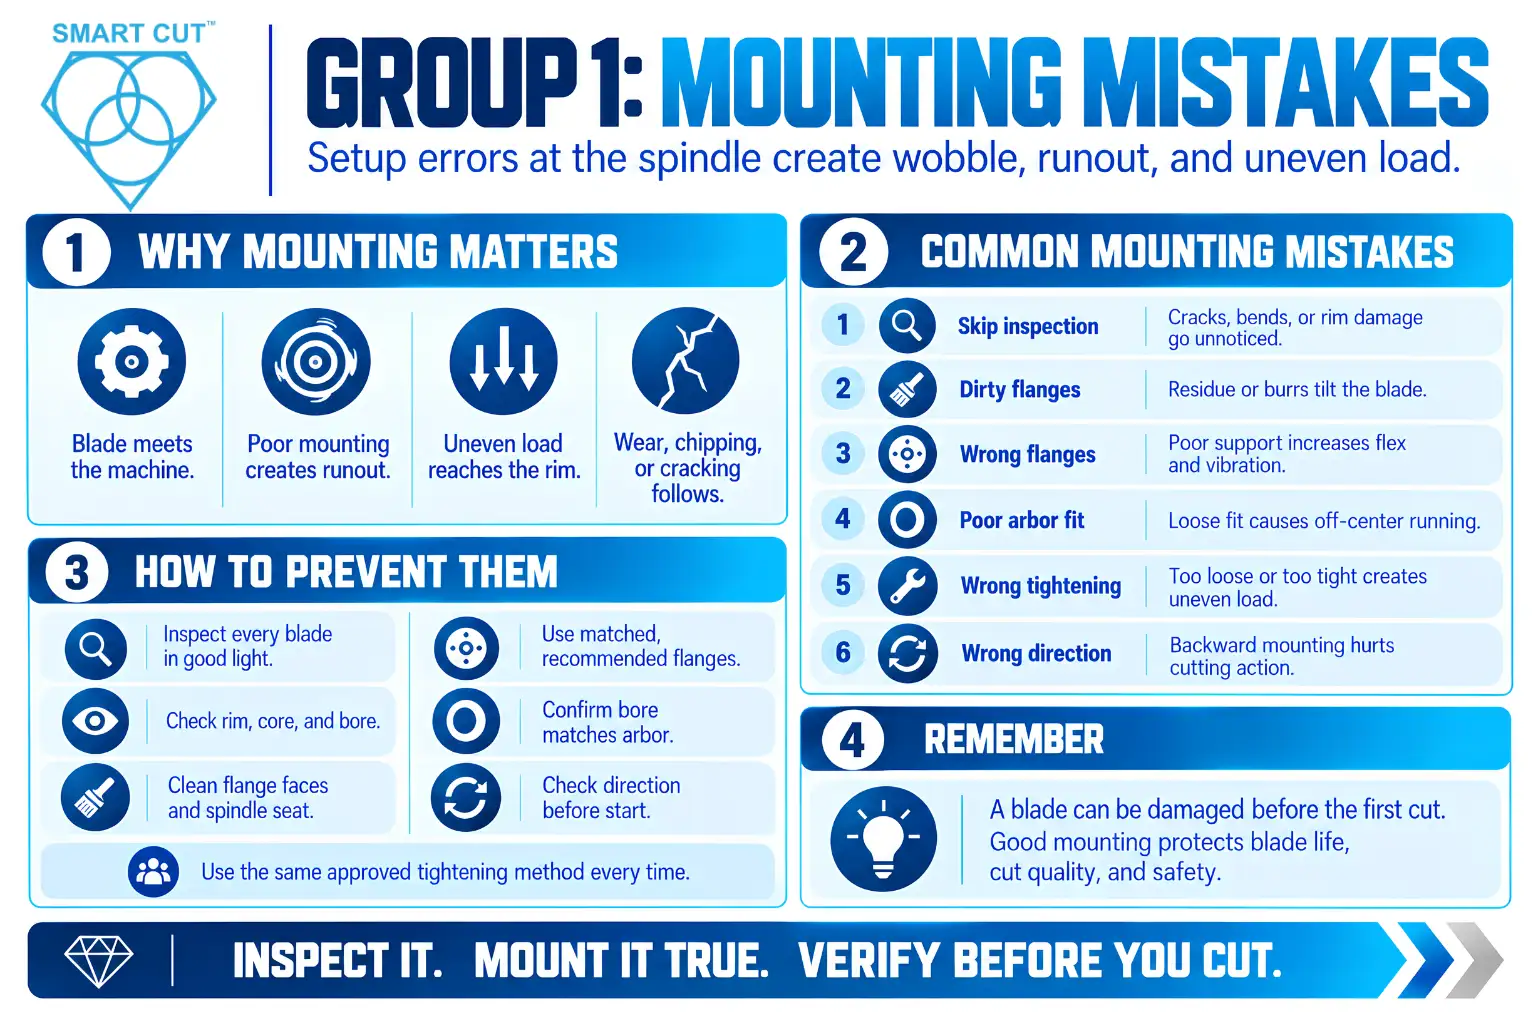
Group 1: Mounting Mistakes
These mistakes happen at the spindle, where the blade meets the machine.
Mistake 1: Skipping the Pre-Mount Inspection
What goes wrong: A blade with a crack, a bent core, or a damaged rim goes onto the machine. Rotation then loads the defect. A crack can grow, and a bent core adds wobble.
Why it happens: Time pressure, or trust that “it was fine last time.”
How to prevent it:
- Inspect every blade before mounting, in good light.
- Look at the rim for chips, at the core for bends or cracks, and at the bore for damage.
- Remove any doubtful blade from service. Do not try it “just once.”
For a fuller approach to checking incoming blades, see our incoming diamond blade inspection and trial-cut checklist.
Mistake 2: Dirty or Damaged Flange Faces
What goes wrong: Swarf, dried coolant residue, or small burrs on a flange face tilt the blade slightly. That small tilt becomes runout at the rim. The blade then cuts unevenly and wears on one side.
Why it happens: Operators clean the blade but not the flanges, or they reuse worn flanges because they “still fit.”
How to prevent it:
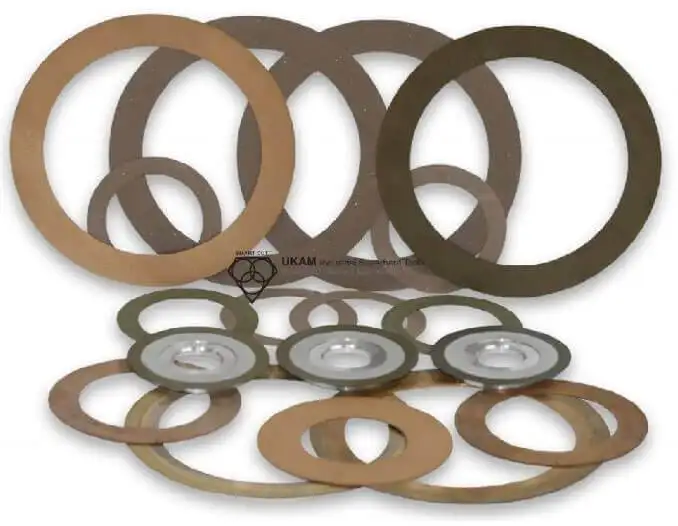
- Clean both flange faces and the spindle seat at every blade change.
- Inspect the faces for scratches, burrs, and wear.
- Replace flanges that no longer seat flat.
Mistake 3: Wrong or Mismatched Flanges
What goes wrong: Flanges that are too small leave the blade core under-supported. Unsupported core sections flex and vibrate under load. Mismatched flanges, with different diameters or faces, also load the blade unevenly.
Why it happens: Operators use whatever flanges are at hand, or mix parts from different machines.
How to prevent it:
- Use the flange type and size that the machine and blade manufacturers recommend.
- Always use a matched pair.
- Keep flanges with the machine they belong to.
Mistake 4: Poor Fit on the Arbor
What goes wrong: A loose fit lets the blade shift or run off-center. An adapter or shim that is not seated correctly adds the same problem. The result is wobble and uneven wear.
Why it happens: Operators force a blade onto an arbor that does not match, or stack adapters to make a fit work.
How to prevent it:
- Confirm the blade bore matches the arbor before mounting.
- Avoid improvised shims and stacked adapters.
- If you need a different arbor size, ask for it. UKAM can modify arbor sizes, and the custom manufacturing team can help.
Mistake 5: Wrong Tightening
What goes wrong: Under-tightening lets the blade slip against the flanges. Over-tightening can distort a thin core or damage the flange seat. Both lead to uneven load.
Why it happens: Operators tighten “by feel,” and each person feels differently.
How to prevent it:
- Follow the machine manufacturer’s tightening instructions.
- Use the same method every time.
- Check that the blade stays secure after the first moments of rotation, using your machine’s approved procedure.
Mistake 6: Wrong Rotation Direction or Orientation
What goes wrong: A blade mounted backward runs against its design. Cutting action suffers, and some blades carry direction markings for a reason. The wrong orientation can also loosen certain mounting arrangements.
Why it happens: Operators overlook the markings, or the machine and blade conventions differ.
How to prevent it:
- Read the rotation arrow on the blade and compare it with the machine.
- Confirm direction before you start the spindle.
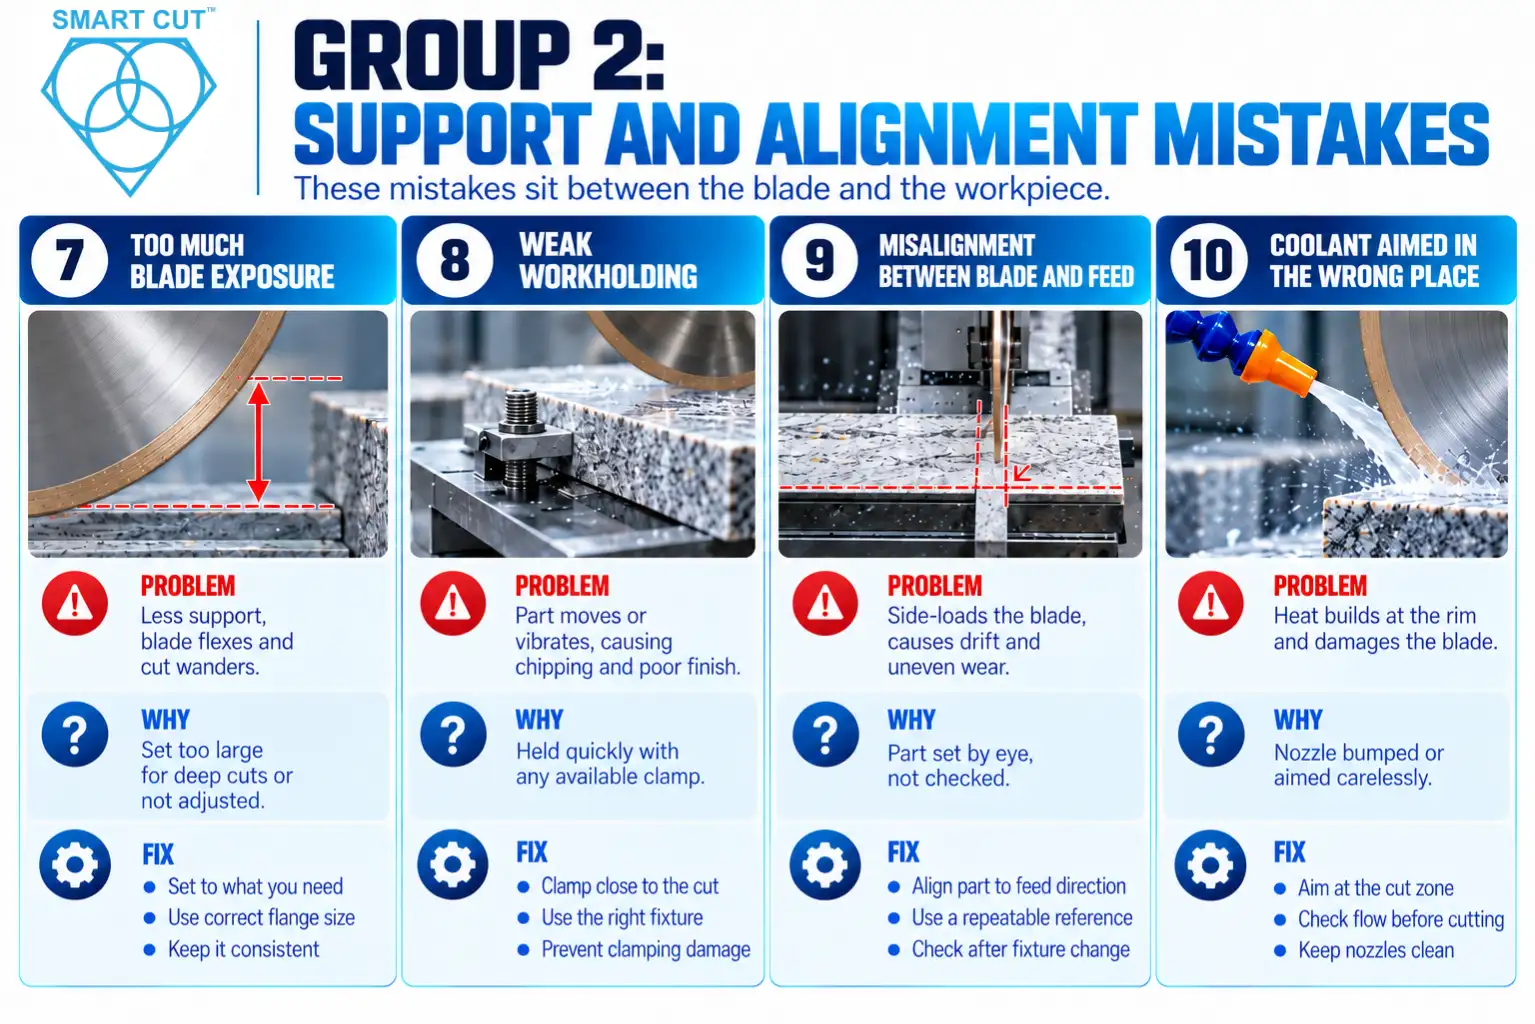
Group 2: Support and Alignment Mistakes
These mistakes sit between the blade and the workpiece.
Mistake 7: Too Much Blade Exposure
What goes wrong: Blade exposure is the part of the blade that extends beyond the flanges. More exposure means less support. A long, unsupported blade section flexes under load, and the cut wanders. Deflection also loads the rim unevenly and raises the risk of cracking.
Why it happens: Operators set a large exposure “to be safe” for deep cuts, or they never adjust it after the last job.
How to prevent it:
- Set exposure to what the cut needs, and no more.
- Choose a flange size that gives good support for the depth you need.
- Treat exposure as a recorded setup variable, so it does not drift between jobs.
Mistake 8: Weak Workholding
What goes wrong: If the workpiece moves, vibrates, or flexes, the blade sees changing load. Pinching, binding, chipping, and poor edge quality follow. A part held at an awkward overhang is a common cause.
Why it happens: Operators hold parts quickly and simply, with whatever clamp is near.
How to prevent it:
- Support the part close to the cut, and clamp it so it cannot shift.
- Use fixtures that suit the part geometry.
- Protect delicate parts from clamping damage.
Our article on workholding for precision diamond sectioning and dicing goes much deeper on this topic. For layered or coated parts, also read precision sectioning of coated, composite, and multilayer materials.
Mistake 9: Misalignment Between Blade and Feed
What goes wrong: If the workpiece is not square to the blade, or the fixture does not line up with the feed direction, the blade side-loads. A side-loaded blade drifts, rubs the kerf wall, and wears on one side.
Why it happens: Operators set the part by eye and do not check the alignment.
How to prevent it:
- Align the part and fixture to the feed direction using a repeatable reference.
- Check alignment again after any fixture change.
- Look for one-sided wear marks on the blade, which point to a persistent alignment problem.
Mistake 10: Coolant Aimed in the Wrong Place
What goes wrong: Coolant that misses the cut does not remove heat. Heat then builds at the rim and damages the bond. This differs from the cutting-time coolant lapse covered in the operator-errors article. Here, the setup puts the nozzle in the wrong place from the start.
Why it happens: Nozzles get bumped, aimed carelessly, or left where the last job needed them.
How to prevent it:
- Aim the nozzle at the cut zone for every new setup.
- Check flow with the blade stationary, then again as the blade starts to turn.
- Keep nozzles clean and free of clogs.
Our guide on how coolant flow affects blade life, cut quality, and process stability explains why delivery matters so much.
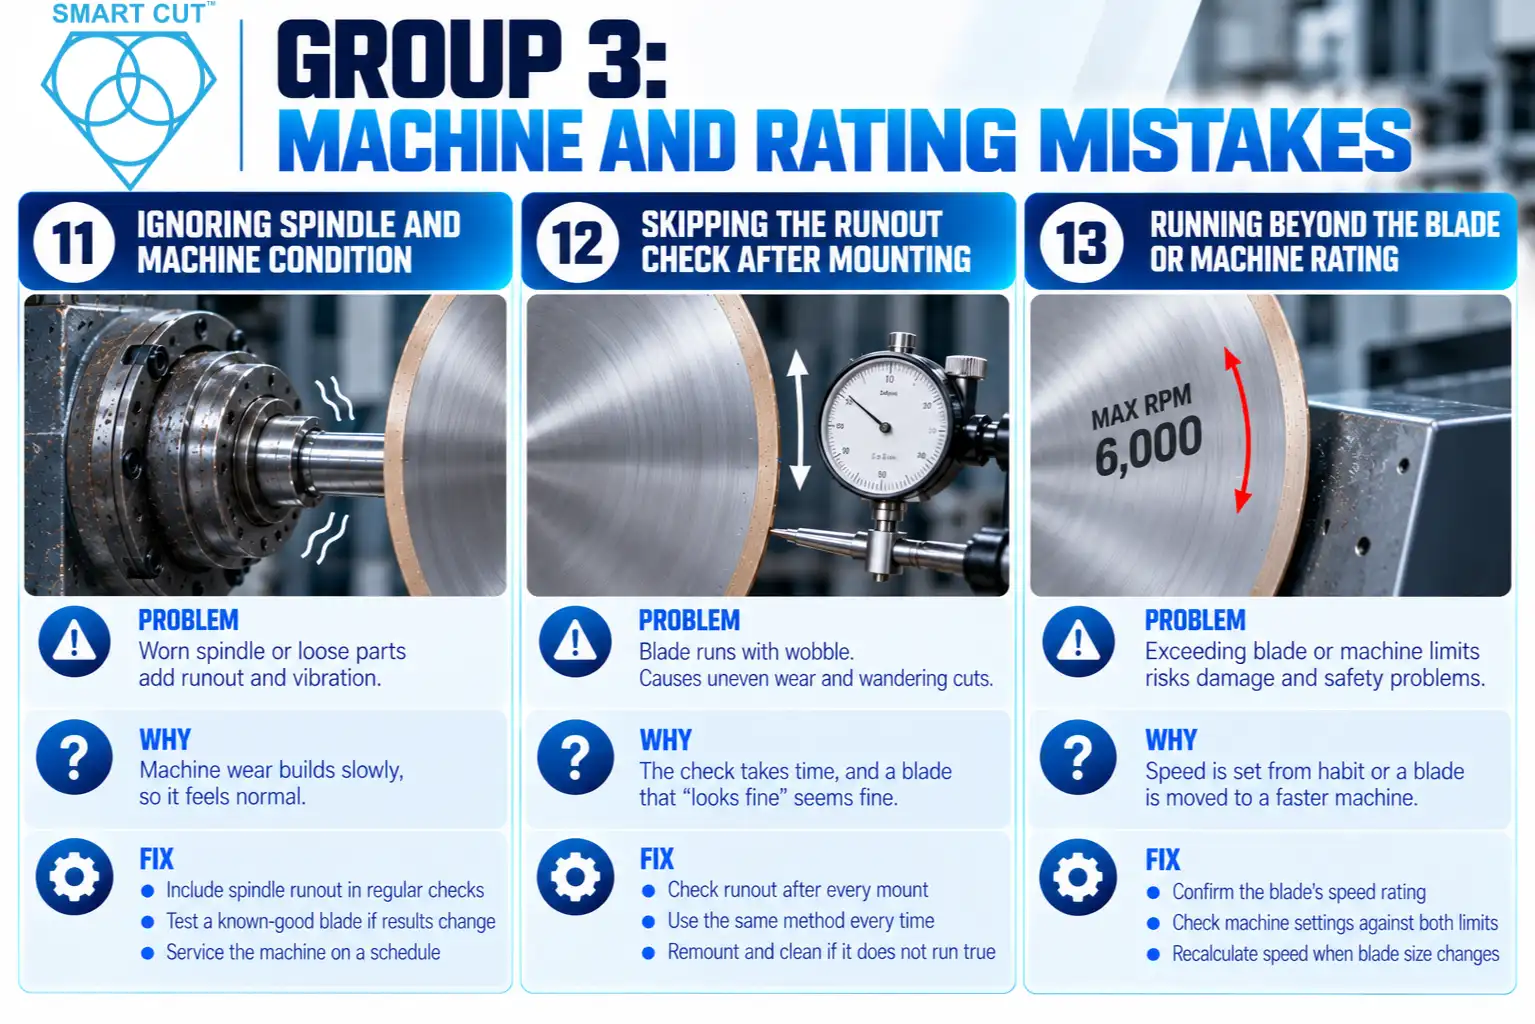
Group 3: Machine and Rating Mistakes
These mistakes involve the machine itself and the limits of the blade.
Mistake 11: Ignoring Spindle and Machine Condition
What goes wrong: A worn spindle or loose machine component adds runout and vibration that no flange can cancel. The blade inherits the machine’s problems. Good blades then look poor.
Why it happens: Machine wear builds slowly, so the problem feels normal.
How to prevent it:
- Include spindle runout in regular machine checks.
- Test a known-good blade when results suddenly change.
- Service the machine on a schedule, not only after failures.
A rigid, well-maintained precision saw removes a large source of variation before the blade ever starts to spin.
Mistake 12: Skipping the Runout Check After Mounting
What goes wrong: Even with careful mounting, some setups still run out. If nobody checks, the blade runs with wobble. Uneven wear and wandering cuts follow.
Why it happens: The check takes time, and a blade that “looks fine” seems fine.
How to prevent it:
- Check runout after every mount, using the method your shop has chosen.
- Apply the same method every time, so results compare.
- Remount and clean the flanges if the blade does not run true.
Mistake 13: Running Beyond the Blade or Machine Rating
What goes wrong: Blades carry maximum speed limits, and machines have their own limits. Exceeding either risks damage and safety problems. It also changes cutting conditions in ways that damage the bond.
Why it happens: Operators set speed from habit, or they move a blade to a faster machine without checking.
How to prevent it:
- Confirm the blade’s speed rating before you mount it.
- Confirm the machine settings against both limits.
- Recalculate speed whenever the blade size changes. See our RPM and feed rate guide for how speed relates to diameter.
Follow the equipment manufacturer’s safety instructions at all times. Never bypass guards or interlocks during setup.
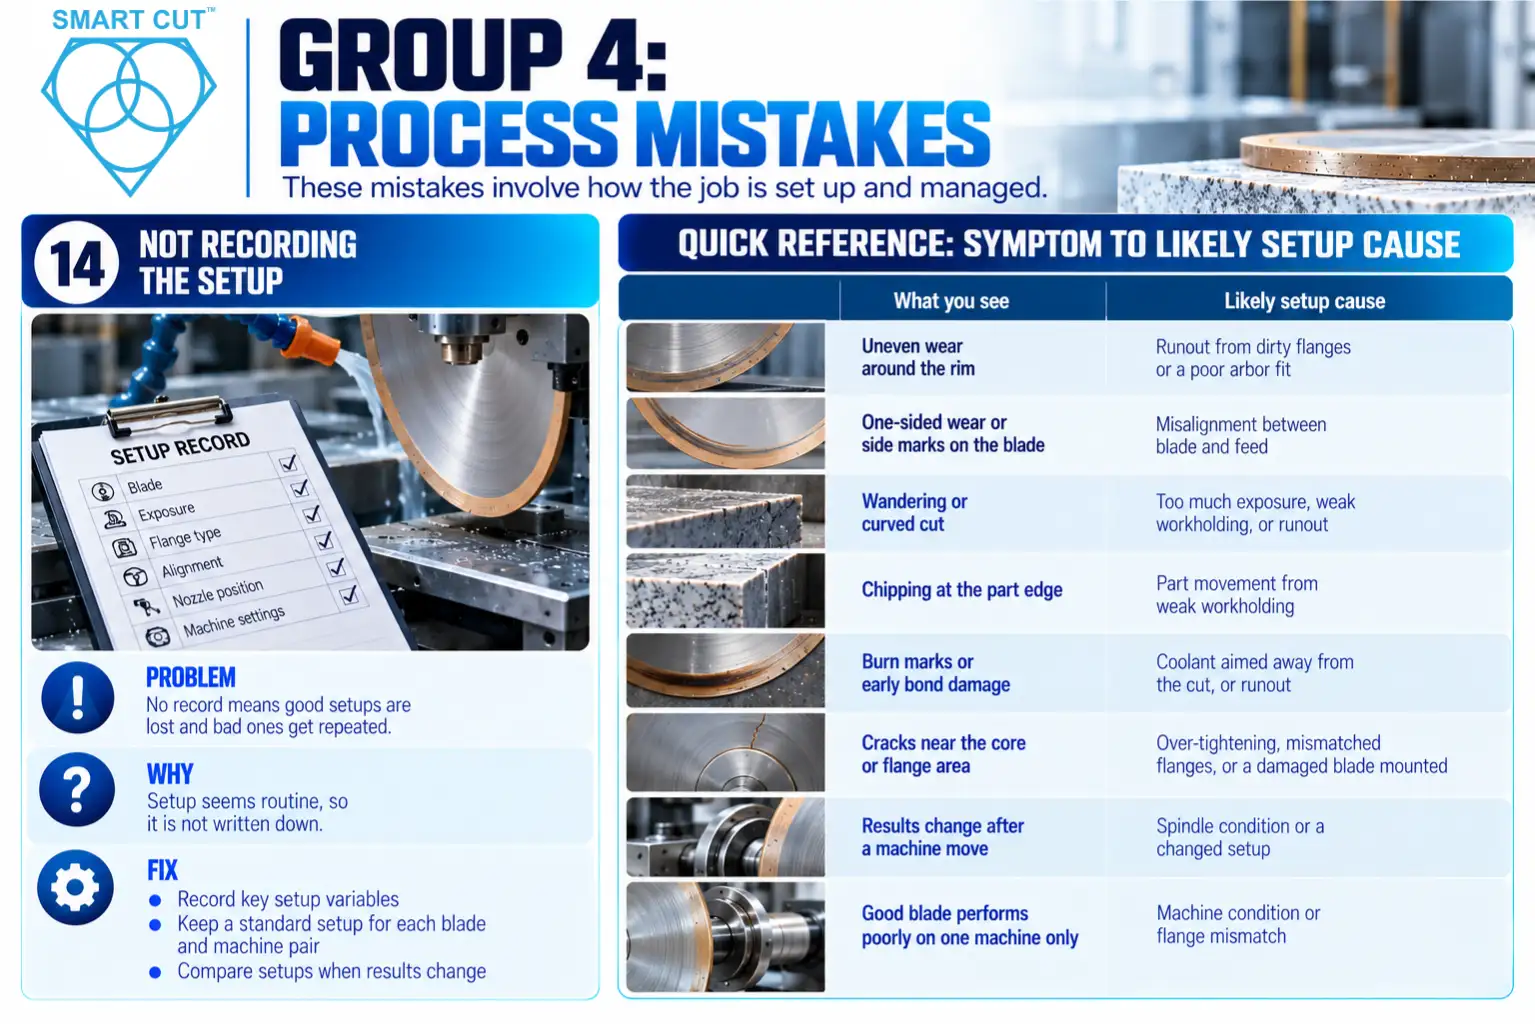
Group 4: Process Mistakes
Mistake 14: Not Recording the Setup
What goes wrong: Without a record of exposure, flange type, alignment method, and nozzle position, nobody can explain a result. A good setup disappears when the operator leaves, and a bad one repeats.
Why it happens: Setup seems routine, so nobody writes it down.
How to prevent it:
- Record the key setup variables with every job.
- Store the standard setup for each blade and machine pair.
- Compare setups when results change.
Quick Reference: Symptom to Likely Setup Cause
Use this table to work backward from what you see. It lists likely causes, not certainties. Always confirm by checking the setup.
| What you see | Likely setup cause |
|---|---|
| Uneven wear around the rim | Runout from dirty flanges or a poor arbor fit |
| One-sided wear or side marks on the blade | Misalignment between blade and feed |
| Wandering or curved cut | Too much exposure, weak workholding, or runout |
| Chipping at the part edge | Part movement from weak workholding |
| Burn marks or early bond damage | Coolant aimed away from the cut, or runout |
| Cracks near the core or flange area | Over-tightening, mismatched flanges, or a damaged blade mounted |
| Results change after a machine move | Spindle condition or a changed setup |
| Good blade performs poorly on one machine only | Machine condition or flange mismatch |
For deeper help with wear marks, read our guide on troubleshooting common diamond blade wear patterns. For a wider view of causes, see why precision diamond blades fail.
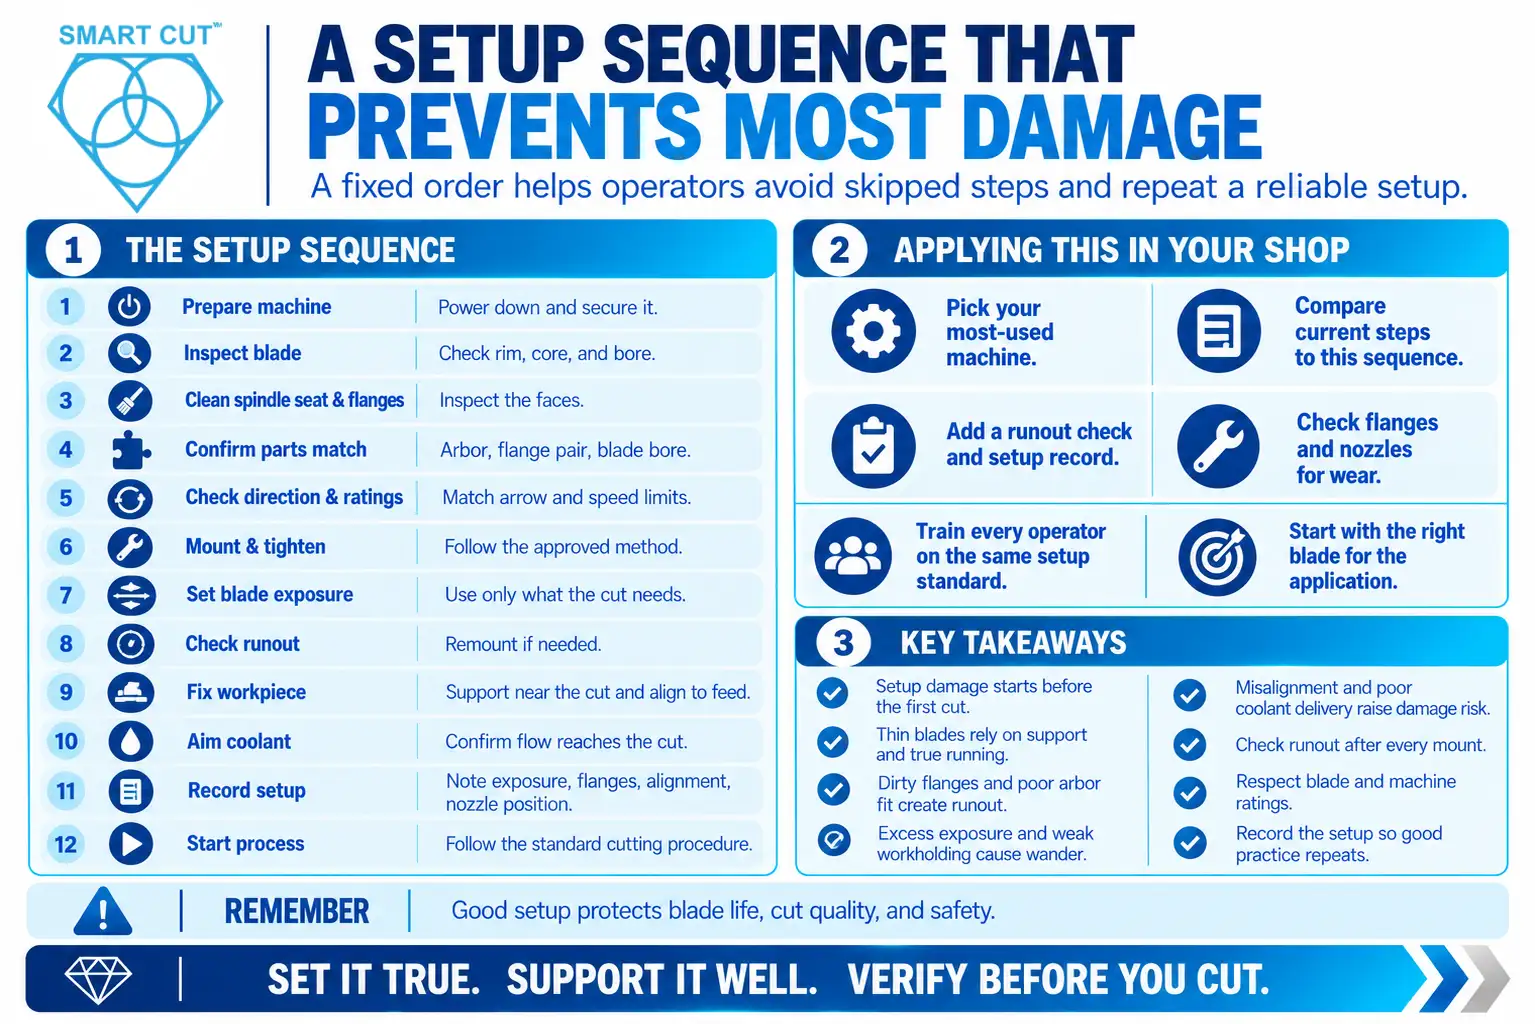
A Setup Sequence That Prevents Most Damage
A fixed order stops operators from skipping steps. Use this sequence as a starting point, then adapt it to your machine.
- Prepare the machine. Power down and secure it following the manufacturer’s instructions.
- Inspect the blade. Check the rim, core, and bore.
- Clean the spindle seat and flanges. Inspect the faces.
- Confirm the parts match. Check arbor, flange pair, and blade bore.
- Check rotation direction and ratings. Compare the blade marking with the machine and confirm the speed limits.
- Mount and tighten. Follow the manufacturer’s method.
- Set blade exposure. Use what the cut needs and no more.
- Check runout. Use your chosen method and remount if needed.
- Fix the workpiece. Support it near the cut and align it to the feed.
- Aim the coolant. Confirm flow reaches the cut.
- Record the setup. Note exposure, flanges, alignment, and nozzle position.
- Start the process. Begin the cut following your standard procedure.
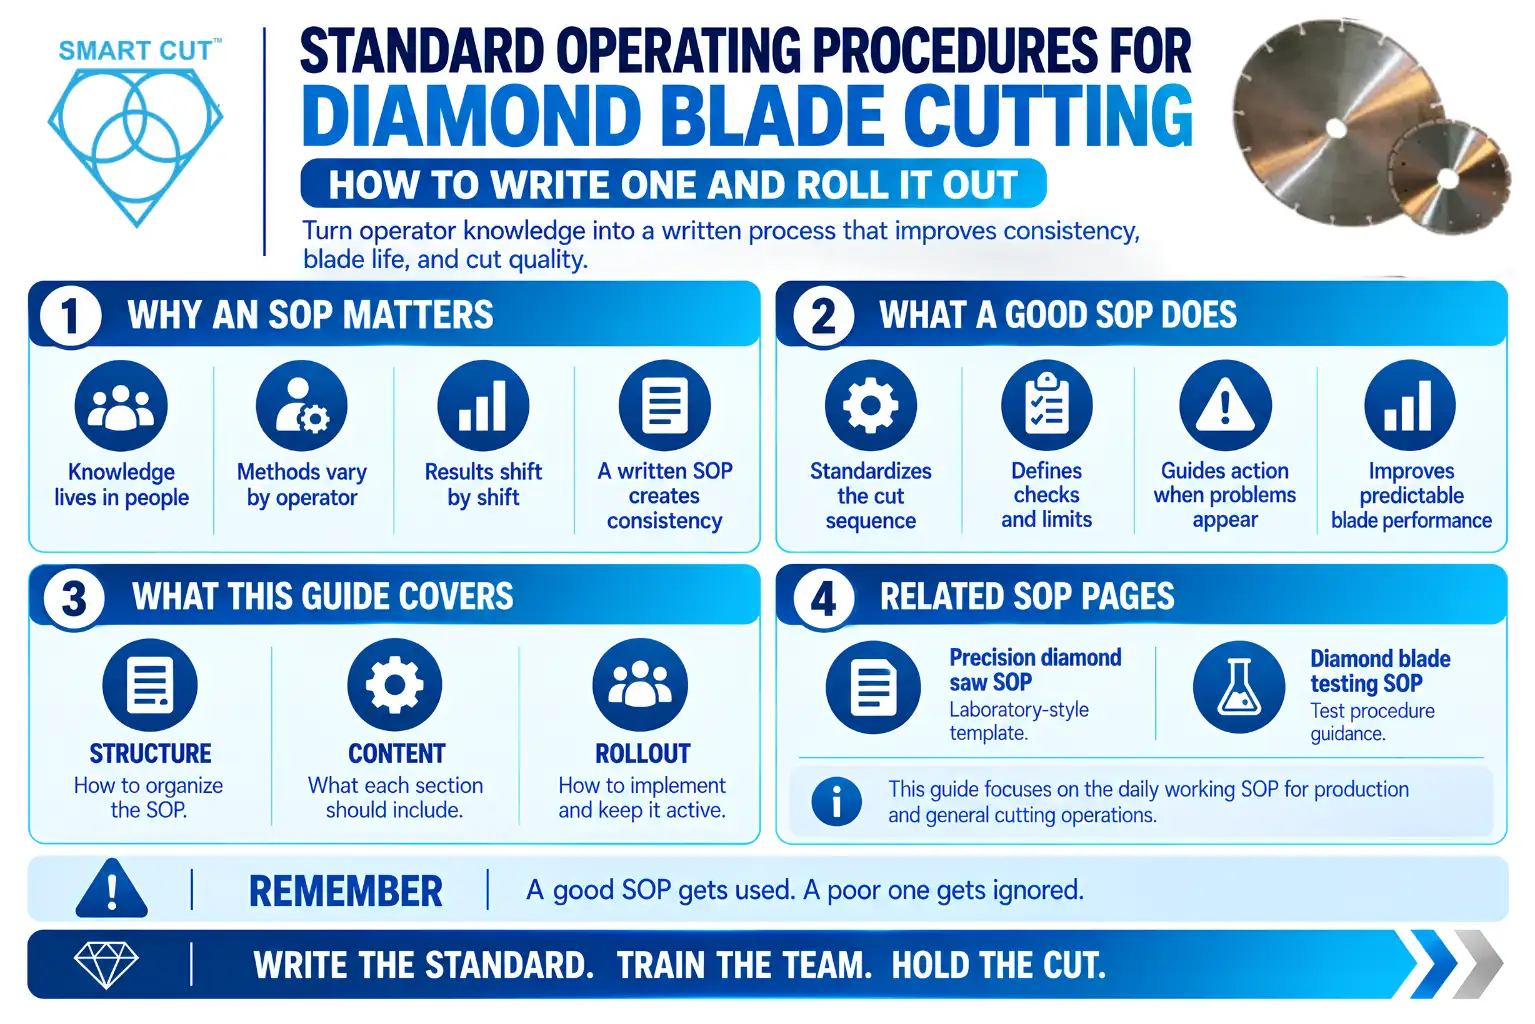
For a formal version of this idea, see our precision diamond saw SOP template.
Applying This in Your Shop
First, pick your most-used machine and write down the current setup steps. Second, compare them with the sequence above and mark the gaps. Third, add a runout check and a setup record if you have none. Finally, check flanges and nozzles for wear, because those parts cause many hidden problems.
Also, train every operator on the same setup standard. Setup skill is learnable, and it pays back quickly in blade life and cut quality. A good match between blade and application helps too. Explore the diamond and CBN wafering and cut-off blades and our material guide to start from the right blade.
Key Takeaways
- Setup damage starts before the first cut and often looks like a blade defect.
- A thin blade relies on flanges, arbor, and machine for support and true running.
- Dirty flanges, wrong flanges, and poor arbor fit create runout and uneven wear.
- Too much exposure and weak workholding cause deflection, wander, and chipping.
- Misalignment side-loads the blade, and misaimed coolant lets heat build.
- Check runout after every mount, and keep the spindle in good condition.
- Respect blade and machine ratings, and follow the manufacturer’s safety instructions.
- Record the setup, so a good one repeats and a bad one gets fixed.
Frequently Asked Questions
Mounting on dirty or damaged flange faces, which creates runout.
It tilts the blade slightly, and that tilt becomes wobble at the rim.
It is the part of the blade that extends beyond the flanges.
A larger unsupported section flexes under load and makes the cut wander.
Yes, because even careful mounting can leave runout that you cannot see.
No, because mismatched flanges support the blade unevenly.
Follow the machine manufacturer’s instructions, and use the same method every time.
Yes, because many blades are marked for one direction and cut best that way.
Yes, because a moving part gives the blade a changing load that causes chipping and binding.
It side-loads the blade, which causes drift and one-sided wear.
Yes, because a nozzle that misses the cut lets heat build from the start.
Yes, because a worn spindle adds runout and vibration that no flange can cancel.
A record lets you repeat a good setup and trace a bad one.
Setup problems appear from the first cut, while operator errors build during the cut.
Conclusion
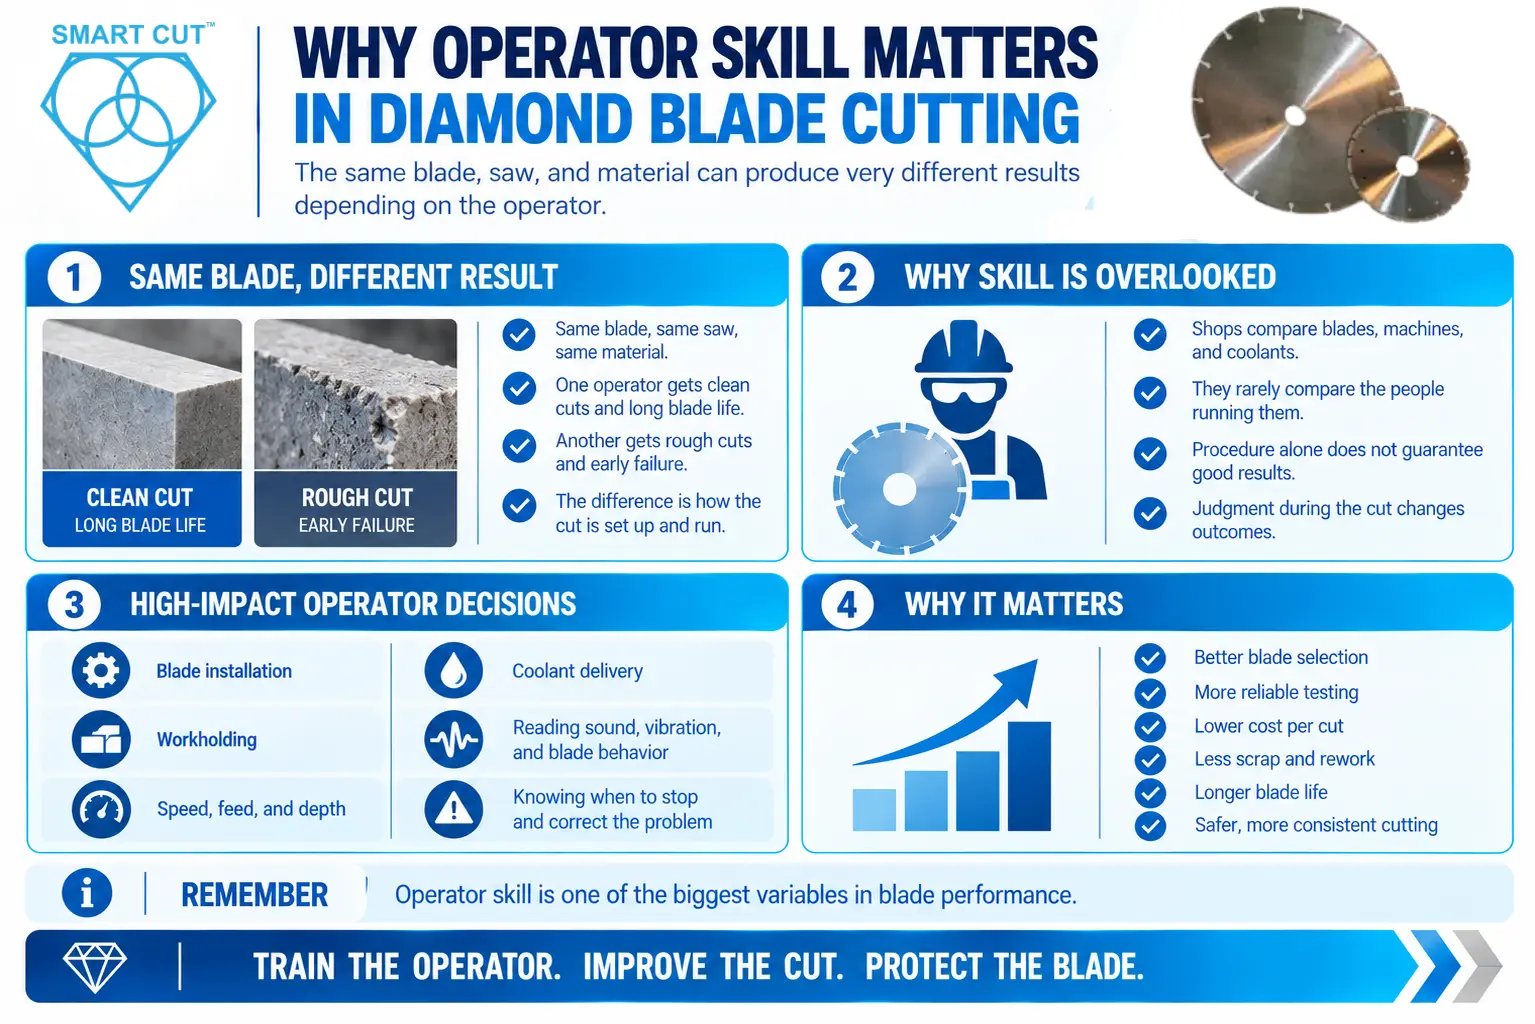
A blade can only perform as well as its setup allows. Runout, weak support, too much exposure, poor workholding, misalignment, and misaimed coolant all load the rim unevenly. That uneven load shortens blade life, regardless of blade quality.
The fix is simple, though it takes discipline. Inspect the blade, clean and match the flanges, set exposure deliberately, check runout, fix the part firmly, aim the coolant, and record what you did. Do this in the same order every time, and many “blade problems” disappear.
If you want help matching a blade, arbor, and setup to your material and process, request a consultation with the UKAM team, or browse the diamond blade range.
Trusted by Tens of Thousands of Manufacturers, Laboratories,
Research Institutions Worldwide Since 1990
Established in 1990
RELATED ARTICLES

Brian is an experienced professional in the field of precision cutting tools, with over 27 years of experience in technical support. Over the years, he has helped engineers, manufacturers, researchers, and contractors find the right solutions for working with advanced and hard-to-cut materials. He’s passionate about bridging technical knowledge with real-world applications to improve efficiency and accuracy.
As an author, Brian Farberov writes extensively on diamond tool design, application engineering, return on investment strategies, and process optimization, combining technical depth with a strong understanding of customer needs and market dynamics.
About Brian Farberov
Brian is an experienced professional in the field of precision cutting tools, with over 27 years of experience in technical support. Over the years, he has helped engineers, manufacturers, researchers, and contractors find the right solutions for working with advanced and hard-to-cut materials. He’s passionate about bridging technical knowledge with real-world applications to improve efficiency and accuracy. As an author, Brian Farberov writes extensively on diamond tool design, application engineering, return on investment strategies, and process optimization, combining technical depth with a strong understanding of customer needs and market dynamics.
View all posts by Brian Farberov