










Skip to navigation Skip to main content
Home > Blog > Standard Operating Procedures for Diamond Blade Cutting: How to Write One and Roll It Out
Diamond Blade Articles, blog

Standard Operating Procedures for Diamond Blade Cutting: How to Write One and Roll It Out

Standard Operating Procedures for Diamond Blade Cutting

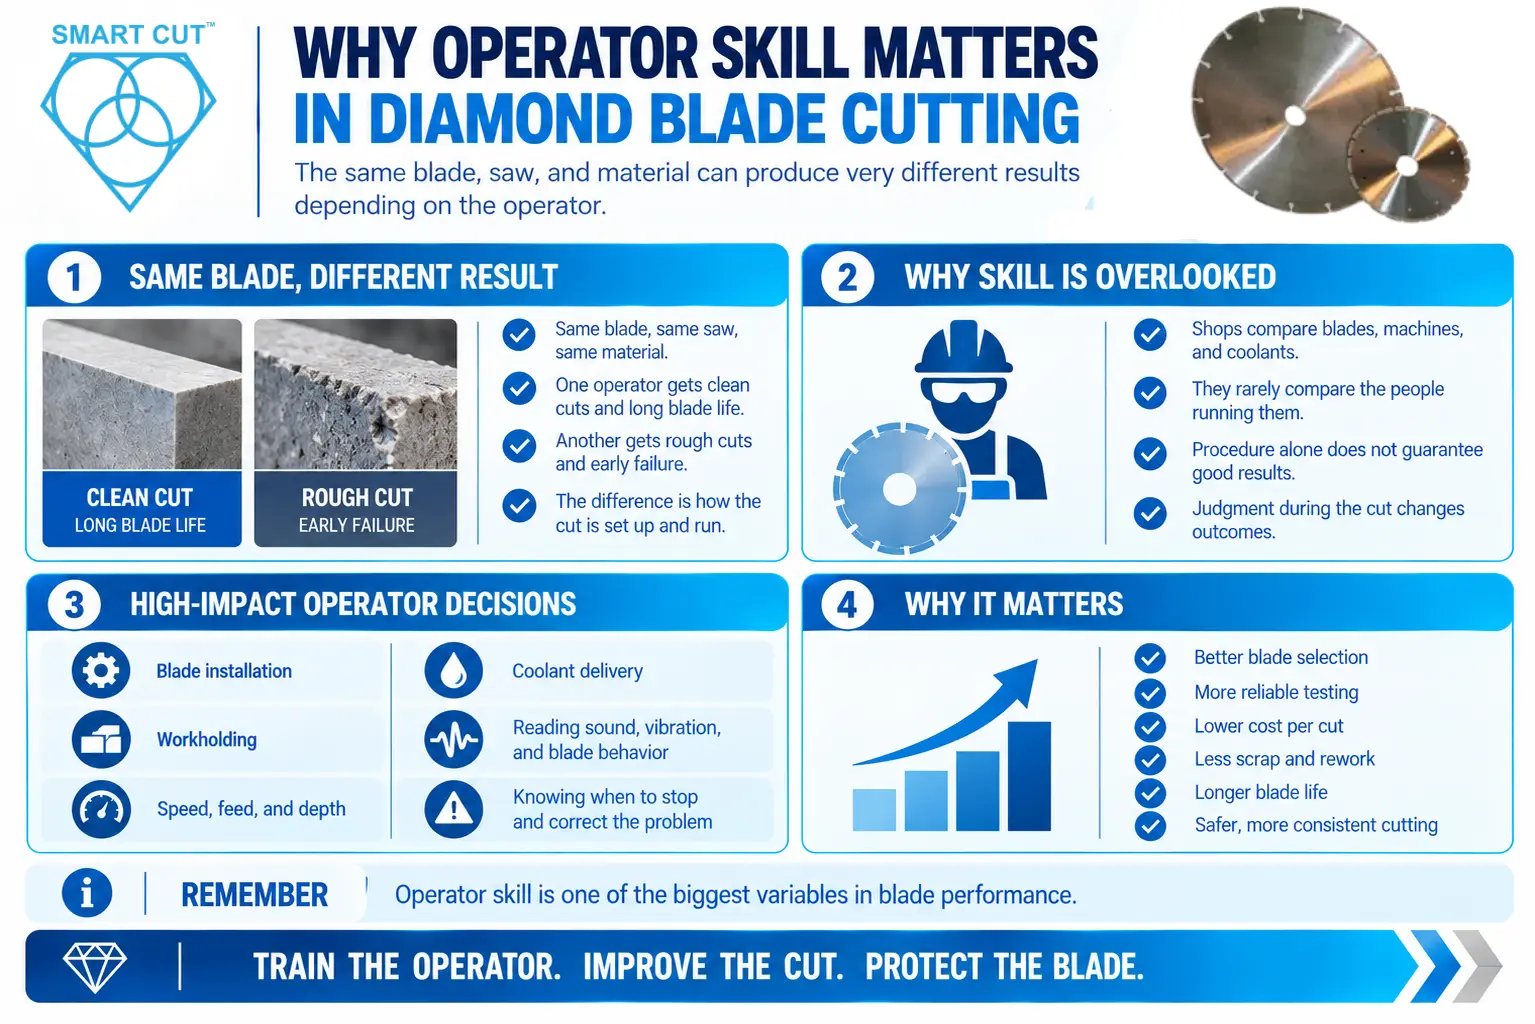
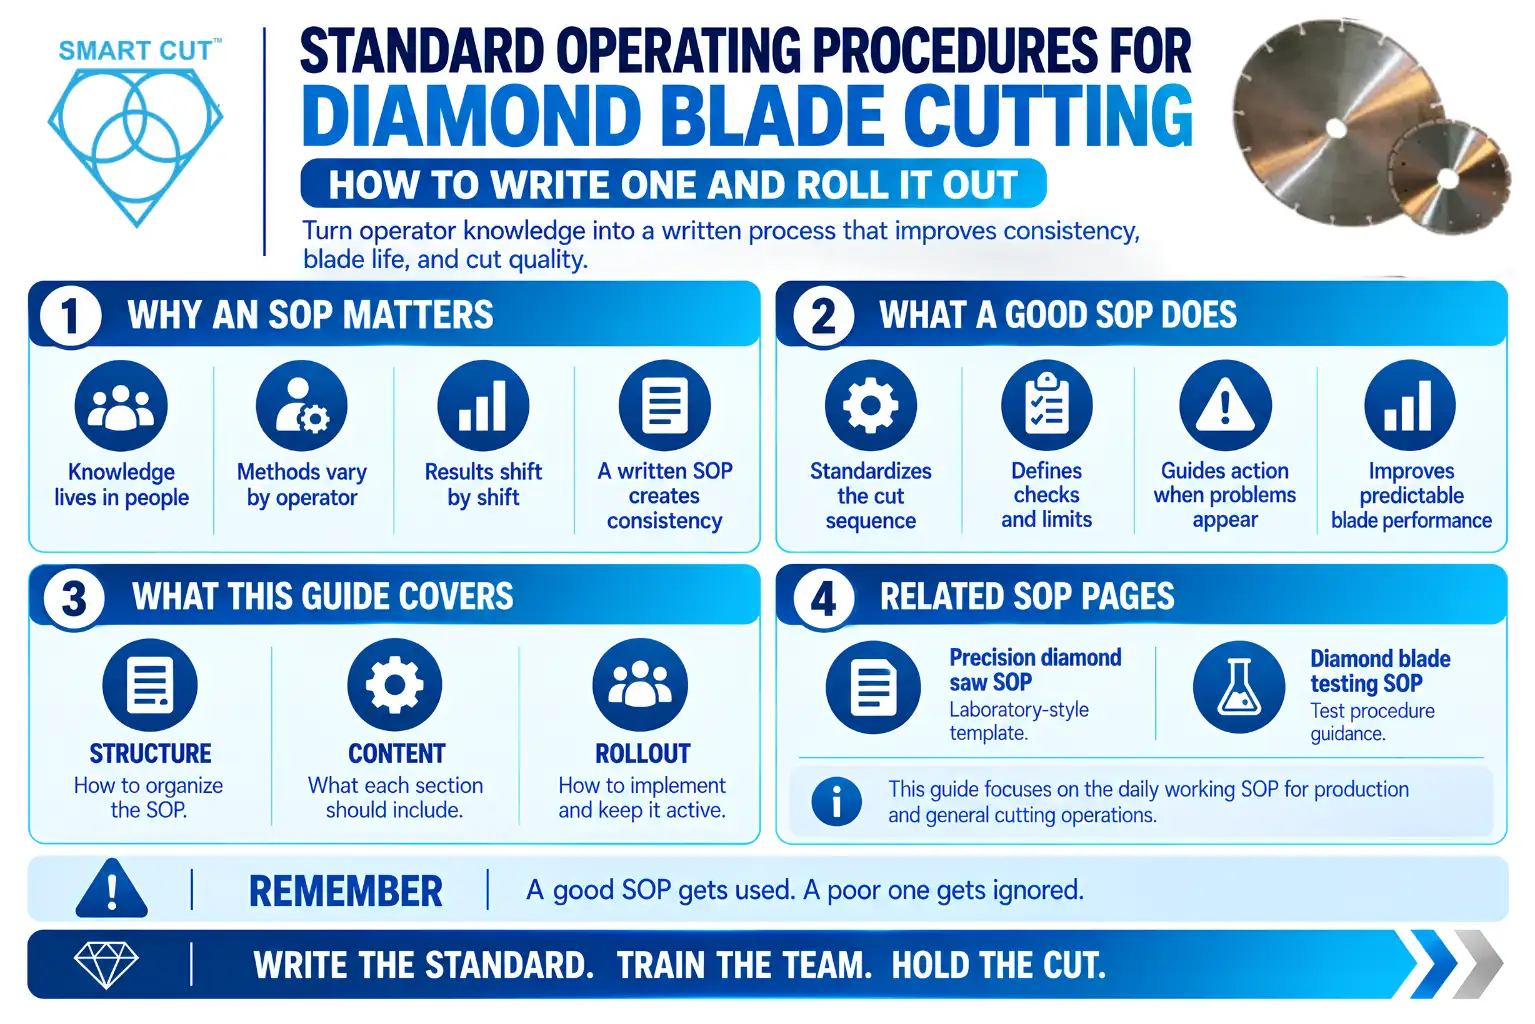
Every shop that cuts with diamond blades already has a procedure. In most shops, it lives in people’s heads. Each operator cuts the way they learned, and results vary from shift to shift.

A written standard operating procedure (SOP) pulls that knowledge into one place. It tells every operator what to do, in what order, and what to do when something looks wrong. A good SOP makes blade life and cut quality more predictable. A poor one sits in a binder and changes nothing.

This article shows how to write a cutting SOP that people use. It covers the structure, the content of each section, and how to roll the SOP out and keep it alive. It focuses on production and general cutting operations.

Two related pages already exist on our site, and this article complements them. For a laboratory-style template, see our precision diamond saw SOP. For test procedures, see how to create a diamond blade testing SOP. Here, the focus is the working cutting SOP for daily operations.

Trusted by Tens of Thousands of Manufacturers, Laboratories Research Institutions Worldwide Since 1990

American Based Manufacturer

Established in 1990

Custom manufacturing

Why Cutting Needs a Written SOP

Why Cutting Needs a Written SOP

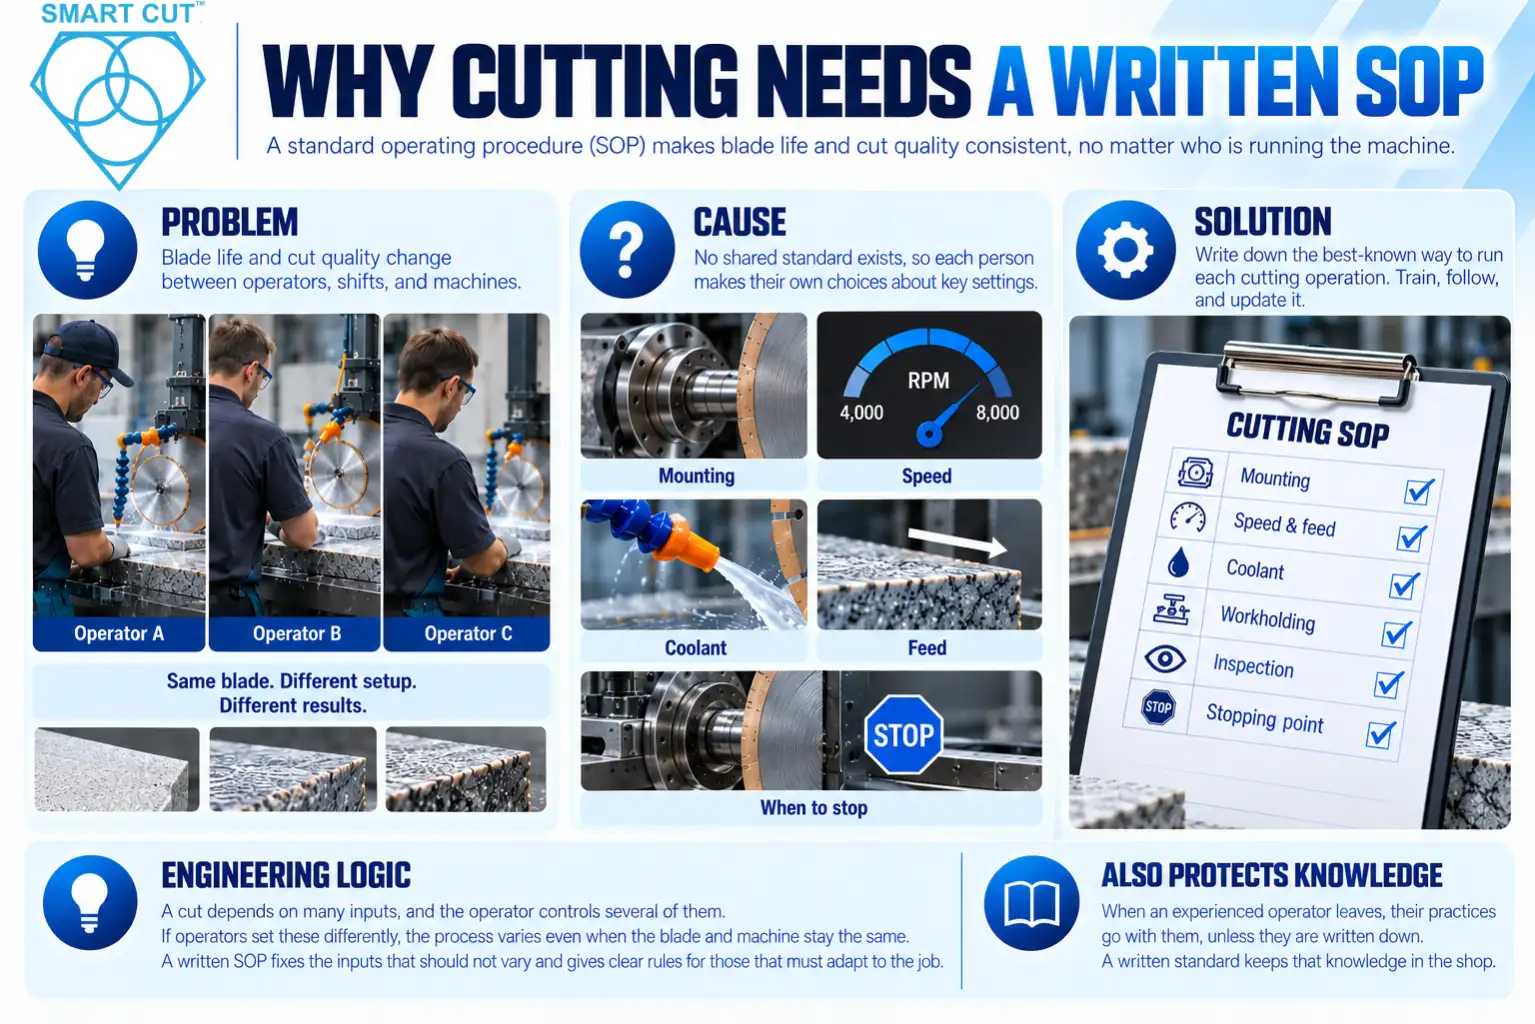
Problem: Blade life and cut quality change between operators, shifts, and machines.

Cause: No shared standard exists, so each person makes their own choices about mounting, speed, feed, coolant, and when to stop.

Engineering logic: A cut depends on many inputs, and the operator controls several of them. Mounting, speed, feed, coolant delivery, and the decision to stop all pass through human hands. If operators set these differently, the process varies even when the blade and machine stay the same. A written SOP fixes the inputs that should not vary and gives clear rules for those that must adapt to the job.

An SOP also protects knowledge. When an experienced operator leaves, the practices they used go with them, unless someone wrote them down. A written standard keeps those practices in the shop.

Solution: Write down the best-known way to run each cutting operation. Train operators on it, check that they follow it, and update it when you learn something new.

What a Good Cutting SOP Does

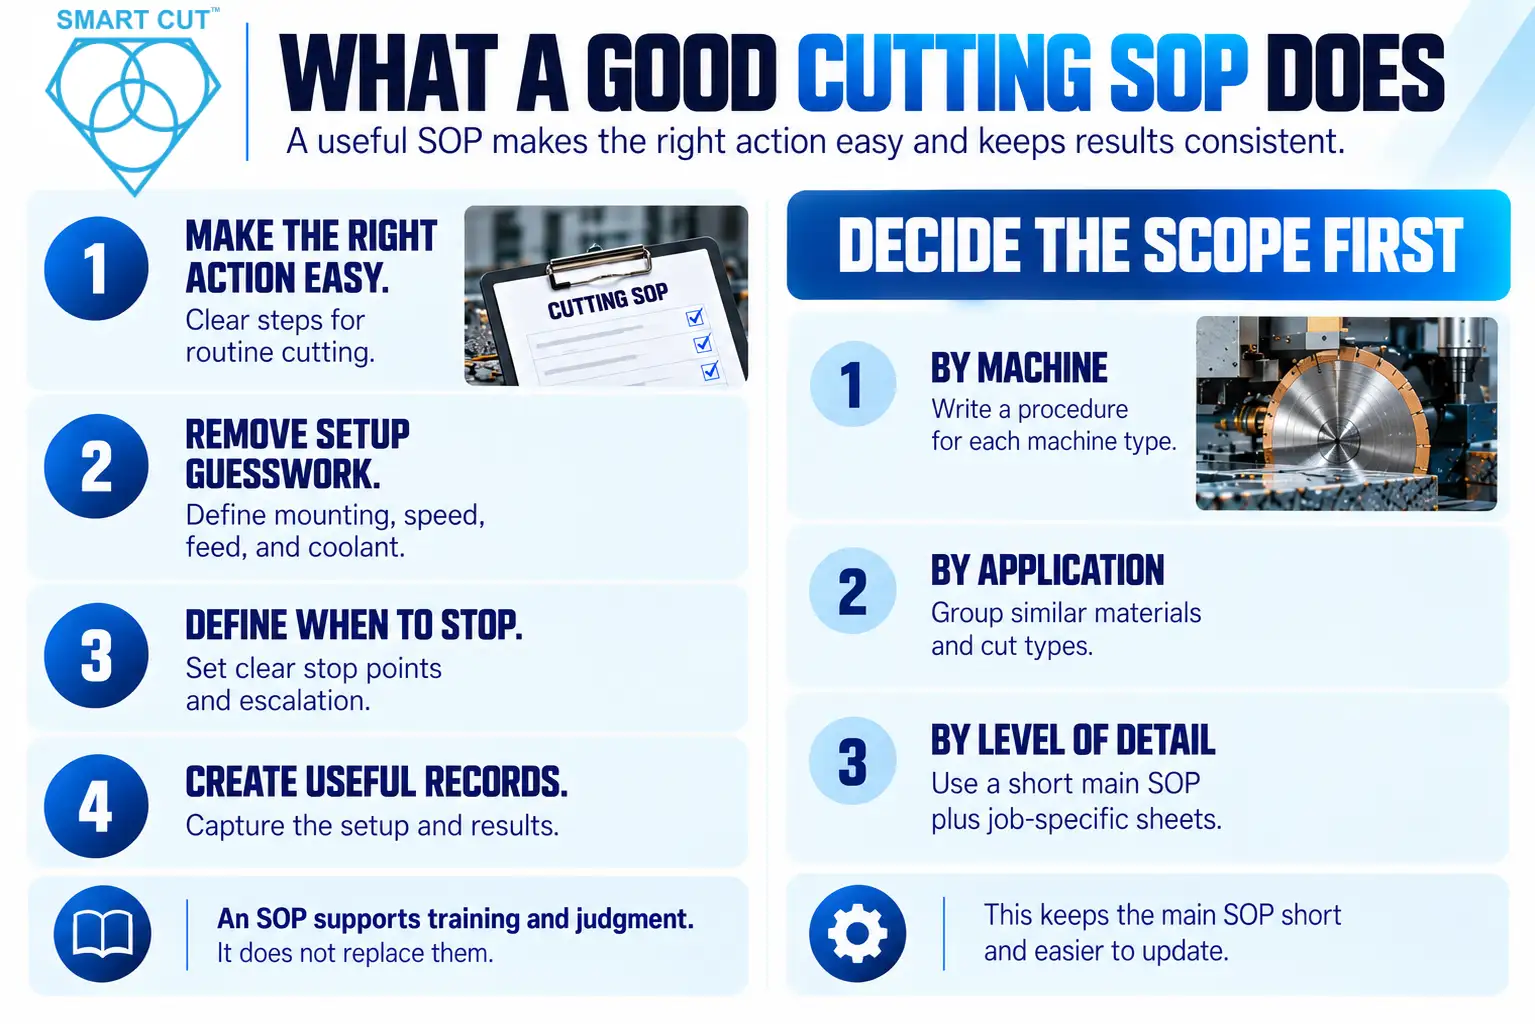
A useful SOP has a clear job. It should do the following.

  • Make the right action the easy action.
  • Remove guesswork from setup and parameters.
  • Define when to stop and who to call.
  • Produce records that explain results later.
  • Stay short enough that operators actually read it.

An SOP does not replace training or judgment. It supports them. Operators still read the cut, hear changes, and decide. The SOP gives them a stable base to work from.

Decide the Scope First

Do not write one giant SOP for everything. Instead, decide the scope before you start.

By machine. Different machines need different steps, so write a procedure for each machine type.

By application. A procedure for cutting ceramics may differ from one for cutting metals. Group applications with similar requirements.

By level of detail. Use a short main SOP for the routine, plus job-specific sheets for each blade and material pair.

This structure keeps the main document short. It also lets you update a single sheet when a blade or material changes, without rewriting everything.

The Core Sections of a Cutting SOP

The table below shows a practical structure. Adapt the headings to your shop.

Section What it contains
1. Purpose and scope What the SOP covers, which machines, and which operations
2. Roles and responsibilities Who runs the cut, who approves changes, who to call
3. Safety Hazards, protective equipment, guards, and stop controls
4. Materials and equipment Blades, flanges, fixtures, coolant, and tools needed
5. Blade and parameter reference Approved blade, speed, feed, and coolant for each job
6. Setup procedure Ordered steps from inspection to a verified mount
7. Cutting procedure Starting, running, and finishing the cut
8. In-process checks What to watch, and the limits that trigger action
9. Stop and escalation rules When to stop, who to tell, and what to record
10. End-of-job steps Cleanup, blade storage, and handoff
11. Records What to log, where, and for how long
12. Revision control Version, owner, date, and change history

The sections below explain what to write in the most important ones.

Section 1 and 2: Purpose, Scope, and Roles

Section 1 and 2: Purpose, Scope, and Roles

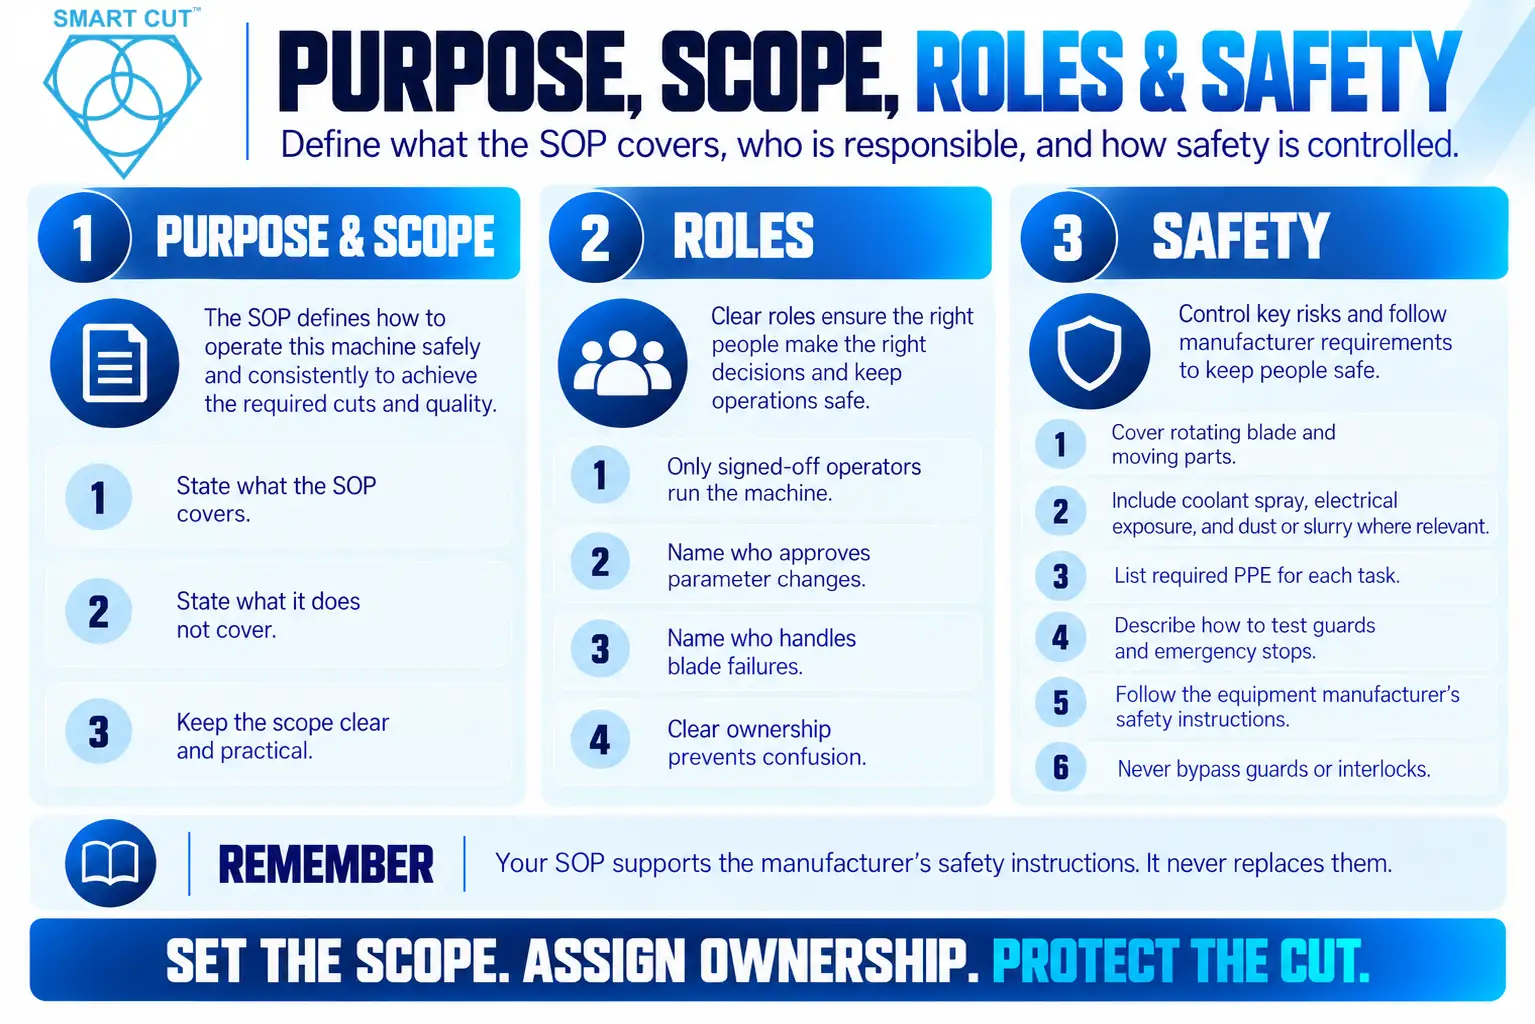
Start with one short paragraph that states what the SOP covers and what it does not. Then name the roles.

State who may run the machine. If your shop uses training sign-off, write that only signed-off operators run the equipment. Name the person who approves parameter changes, and the person who handles blade failures. Clear ownership prevents confusion at the moment you need decisions.

Section 3: Safety

Safety comes before every other step. Write it as part of the SOP, not as a separate document that nobody opens.

Cover the main hazards: the rotating blade, moving parts, coolant spray, electrical exposure, and dust or slurry where they apply. List the protective equipment that each task requires. Describe how to test guards and emergency stops.

Always follow the equipment manufacturer’s safety instructions. Your SOP supplements them and never replaces them. State clearly that nobody bypasses guards or interlocks.

Section 5: The Blade and Parameter Reference

Section 5: The Blade and Parameter Reference

This section does the most to reduce variation. It tells operators which blade and settings to use for each job, so they do not guess.

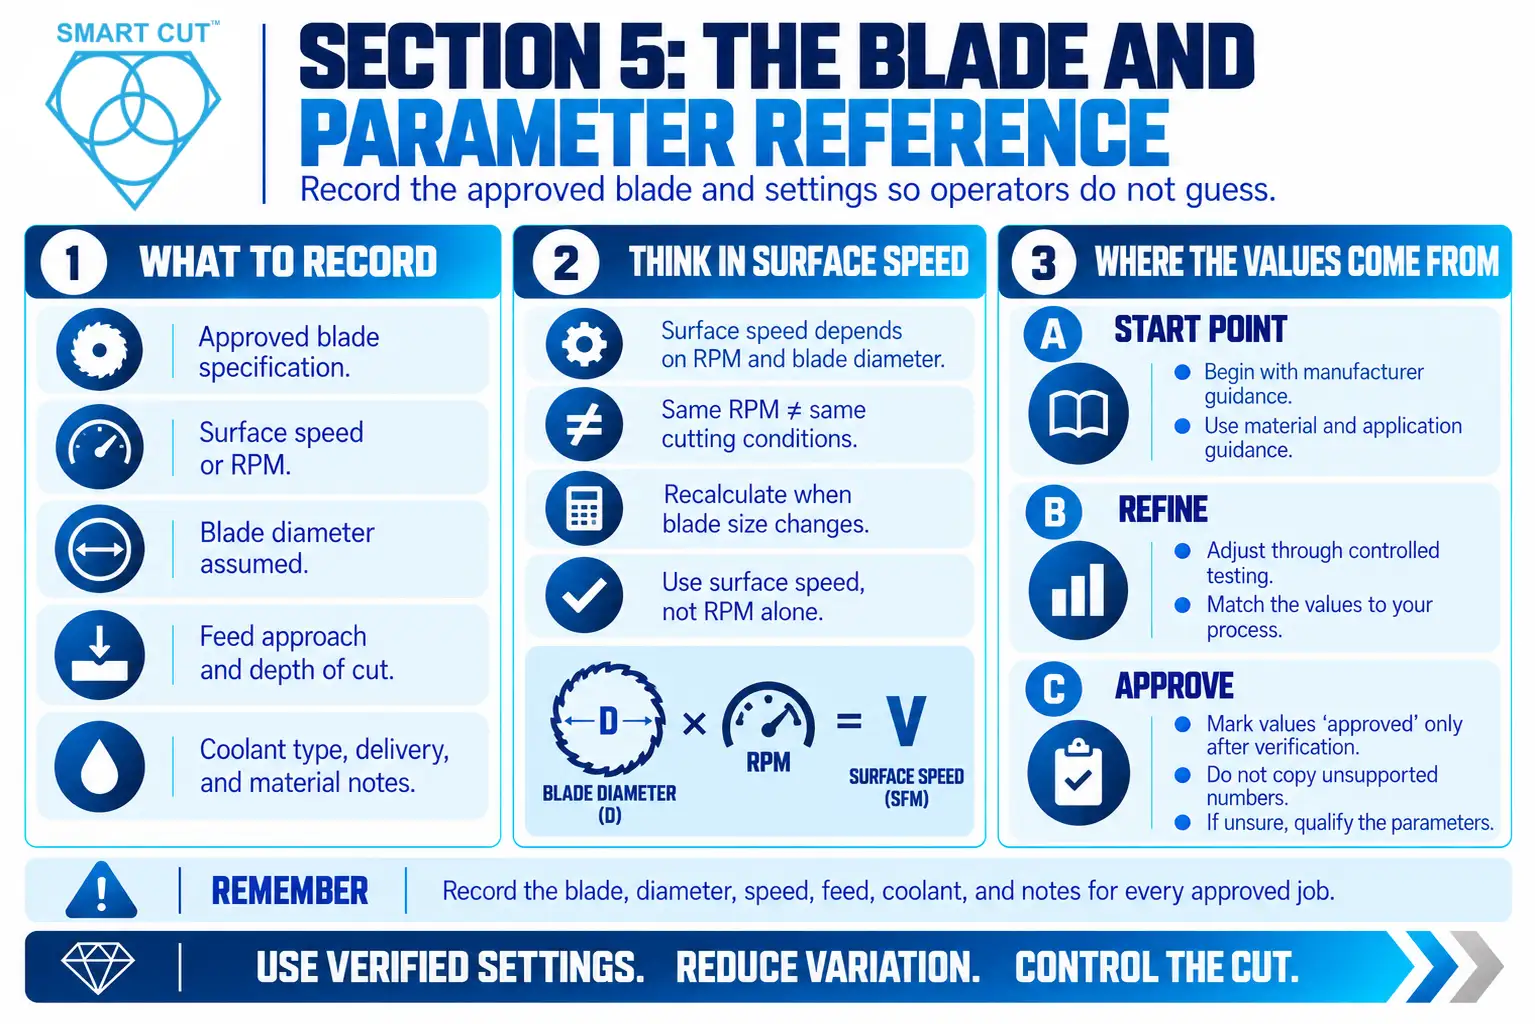
For each application, record the following.

  • The approved blade specification.
  • The surface speed or RPM, with the blade diameter it assumes.
  • The feed approach and the depth of cut.
  • The coolant type and delivery requirement.
  • Any material-specific notes.

Think in surface speed, not RPM alone. Surface speed depends on diameter as well as RPM, so the same RPM gives different conditions on different blade sizes. Our RPM and feed rate guide explains the relationship.

Where do the values come from? Use the blade manufacturer’s guidance as the starting point. For general direction, see our material guide and our article on how to properly use precision diamond and CBN blades. Then refine the values through controlled testing in your own process. Mark each value as “approved” only after you have verified it, and do not copy numbers from a source you cannot back up.

If you are unsure how to qualify parameters, read diamond blade cutting process qualification.

Section 6: The Setup Procedure

Section 6: The Setup Procedure

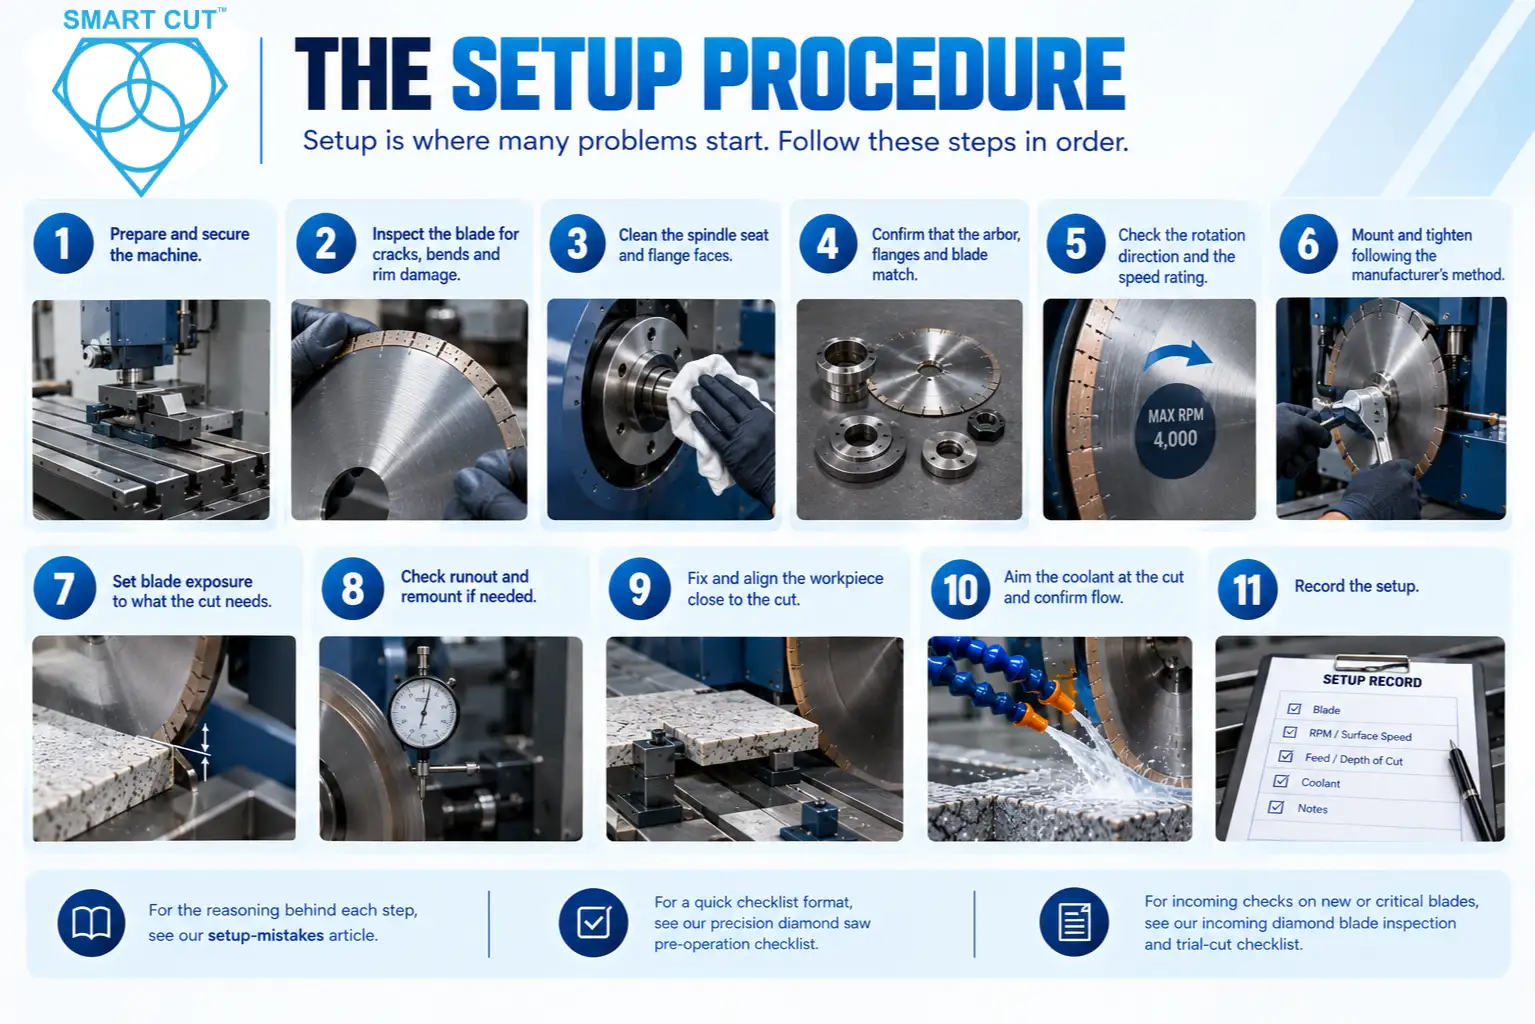
Setup is where many problems start. Write it as a numbered sequence that operators follow in order.

A typical setup covers these steps.

  1. Prepare and secure the machine.
  2. Inspect the blade for cracks, bends, and rim damage.
  3. Clean the spindle seat and flange faces.
  4. Confirm that the arbor, flanges, and blade match.
  5. Check the rotation direction and the speed rating.
  6. Mount and tighten following the manufacturer’s method.
  7. Set blade exposure to what the cut needs.
  8. Check runout and remount if needed.
  9. Fix and align the workpiece close to the cut.
  10. Aim the coolant at the cut and confirm flow.
  11. Record the setup.

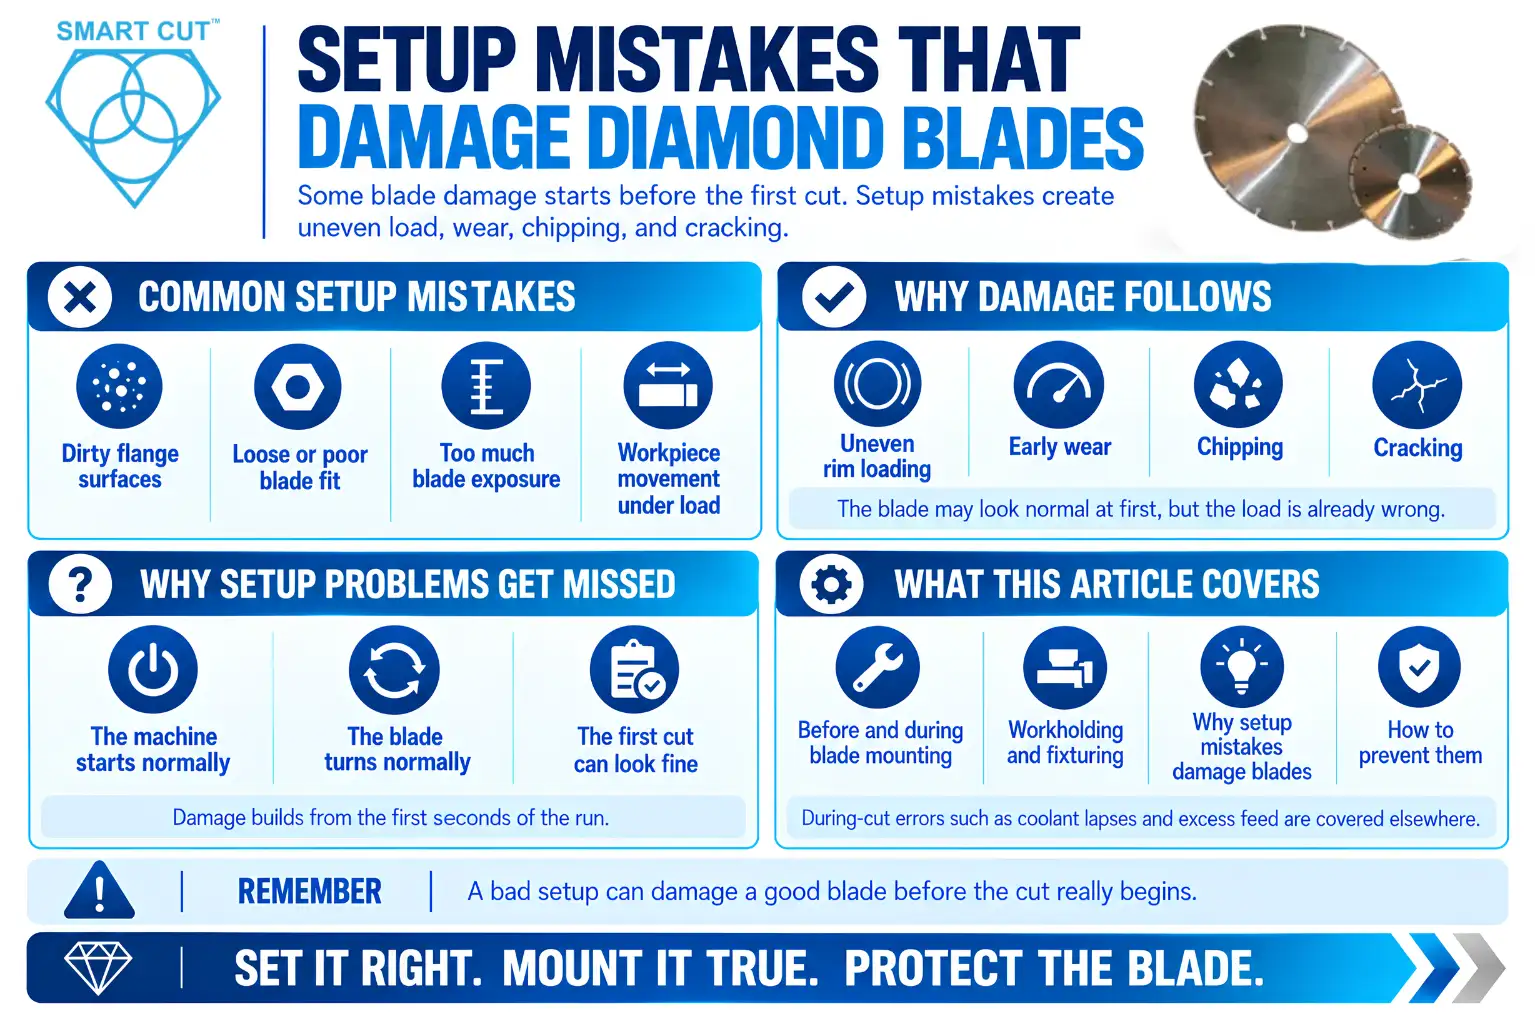
Write each step in short, plain, active sentences. Keep the details specific to your machines. For the reasoning behind each step, see our setup-mistakes article. For a quick checklist format, see our precision diamond saw pre-operation checklist. Also consider the incoming checks in our incoming diamond blade inspection and trial-cut checklist for new or critical blades.

Section 7: The Cutting Procedure

Describe the run from start to finish.

Before the cut: Confirm coolant flow reaches the cut. Confirm that guards are in place. Bring the blade to speed in the way the machine requires.

During the cut: Engage the material using a steady feed. Hold conditions constant. Do not change parameters mid-cut without a reason and a record. Watch coolant flow throughout.

At the end of the cut: Withdraw the blade properly before stopping. Follow the machine’s stop sequence.

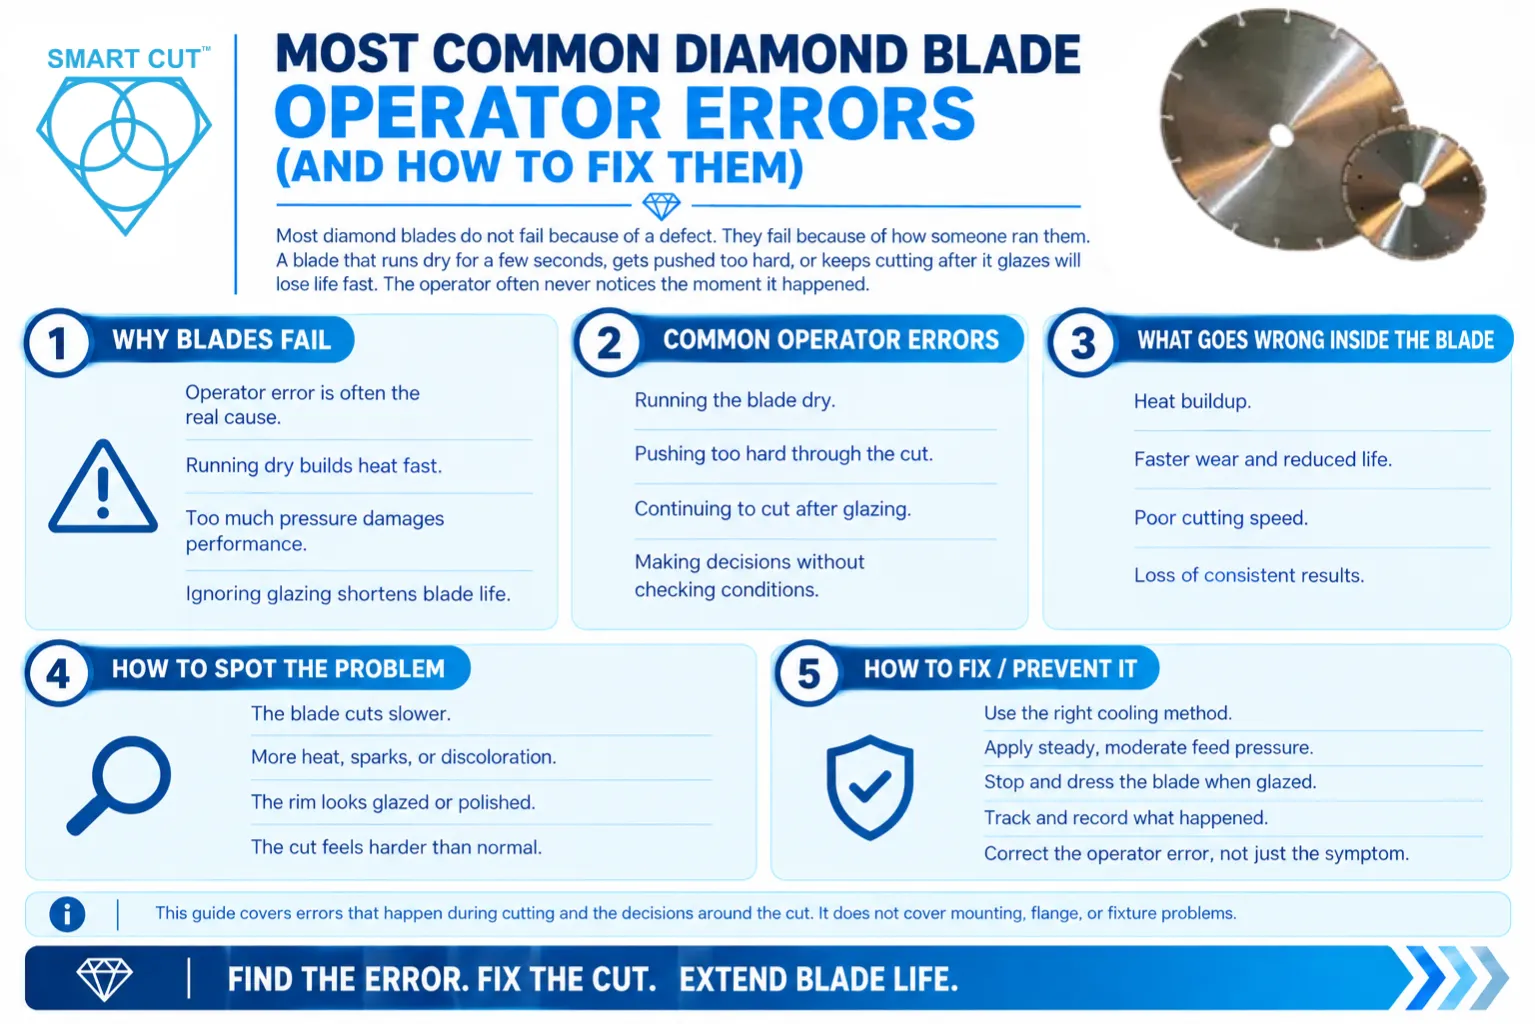
Also say what operators should not do. Short “never” lines help. For example, never run the blade dry, never force the feed to speed up a slow cut, and never reach into the cutting area while the blade turns.

Section 8: In-Process Checks

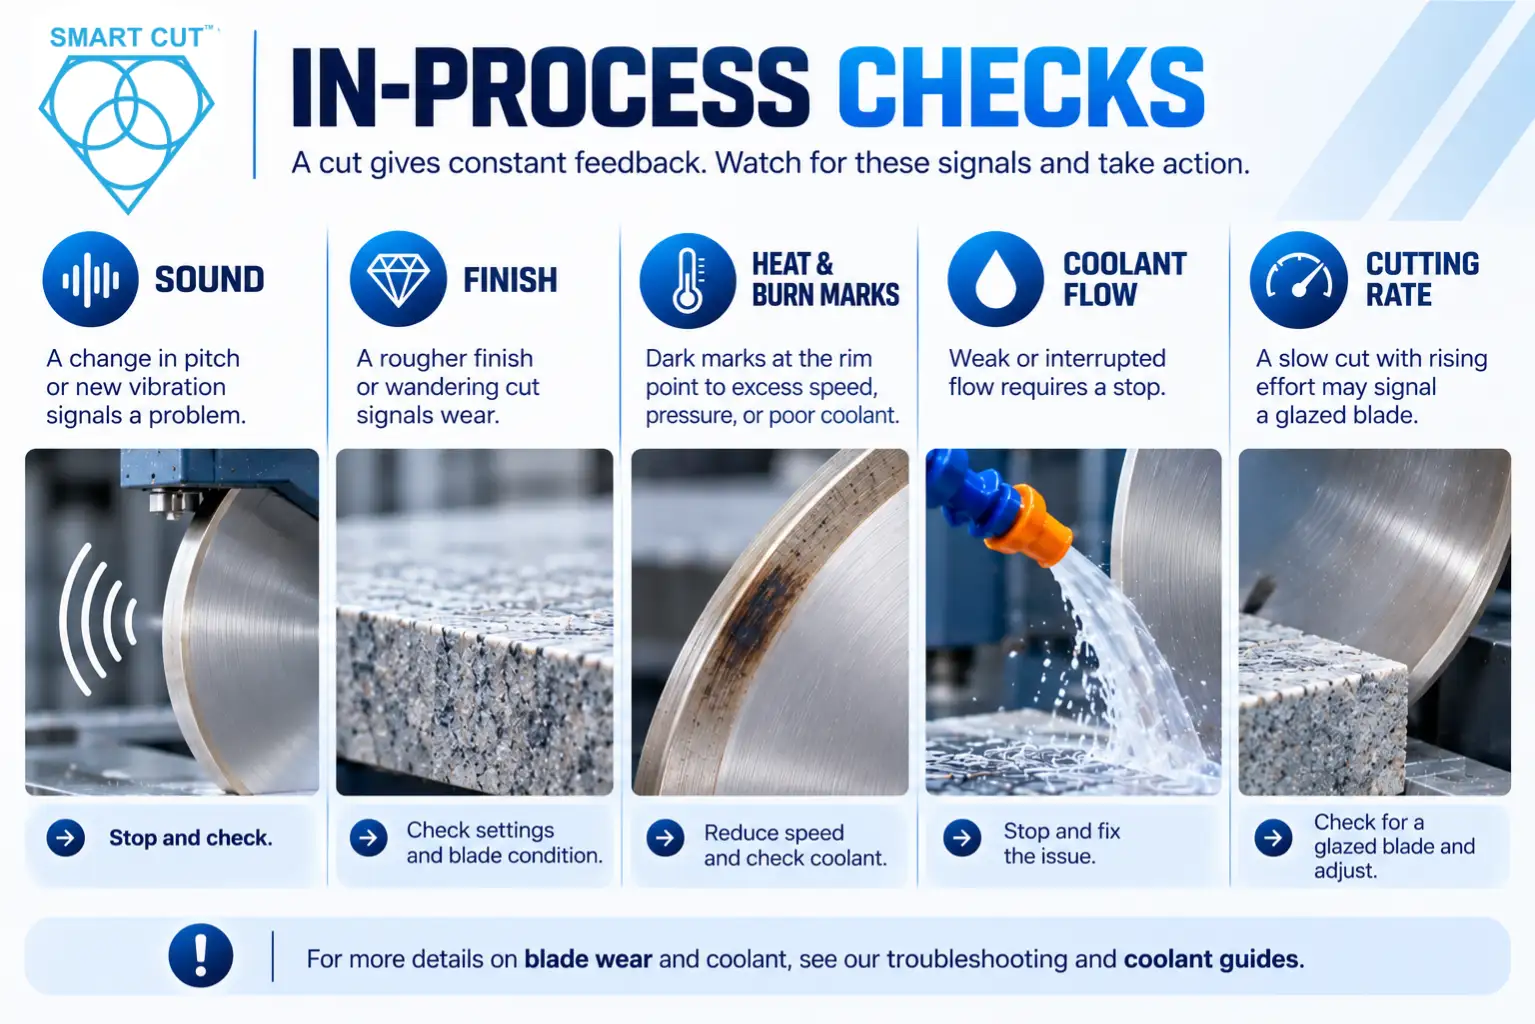
A cut gives constant feedback. Your SOP should tell operators what to watch and what counts as a warning.

Cover these signals.

  • A steady sound is normal. A change in pitch or a new vibration signals a problem.
  • A rougher finish or a wandering cut signals wear, load, or a setup issue.
  • Heat and burn marks. Dark marks at the rim point to excess speed, excess pressure, or poor coolant.
  • Coolant flow. Weak or interrupted flow requires an immediate stop.
  • Cutting rate. A slow cut with rising effort may signal a glazed blade.

For each signal, write the action. For deeper reading on what blade wear looks like, see troubleshooting common diamond blade wear patterns. Coolant also deserves attention, and our guide on how coolant flow affects blade life and cut quality explains why.

Section 9: Stop and Escalation Rules

This section may matter most. Operators need permission and clear rules to stop.

Write the stop conditions as a short list. Typical items include:

  • Coolant flow fails or weakens.
  • Burn marks appear.
  • The cut wanders, or the finish degrades suddenly.
  • Vibration or an unusual noise starts.
  • A guard, interlock, or stop control does not work.
  • Anything looks unsafe.

Then state what happens next. Who does the operator call? What do they record? Who decides whether the blade goes back into service?

State plainly that operators will never be blamed for stopping early. If people fear blame, they hide problems, and small problems grow.

Section 10 and 11: End of Job and Records

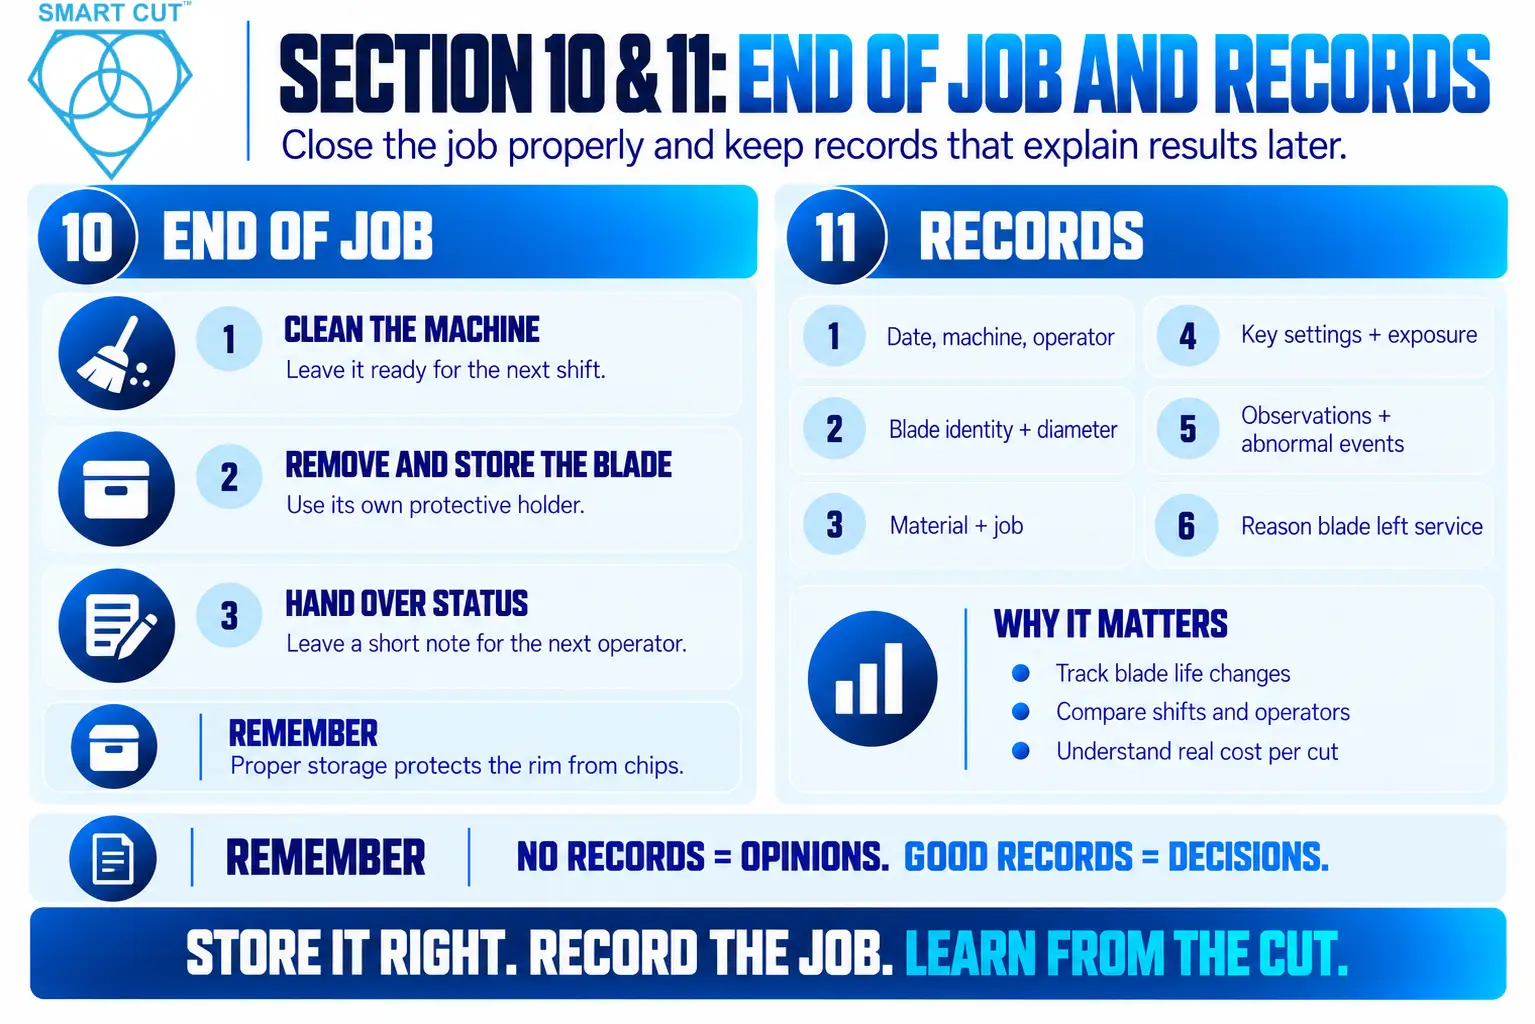
At the end of a job, operators clean the machine, remove and store the blade properly, and hand the machine to the next shift with a short status note. Proper storage protects the rim from chips, so give each blade its own protective holder.

Records turn single cuts into data. Keep the log short so people complete it. Capture the following.

  • The date, machine, and operator.
  • The blade identity and diameter.
  • The material and job.
  • The key settings, including exposure.
  • Observations and any abnormal events.
  • The reason the blade left service, and when it did.

With these records, you can answer hard questions later. Did blade life change after a material switch? Does one shift consistently get different results? What is the real cost per cut? Without records, those questions stay opinions.

Section 12: Revision Control

Section 12: Revision Control

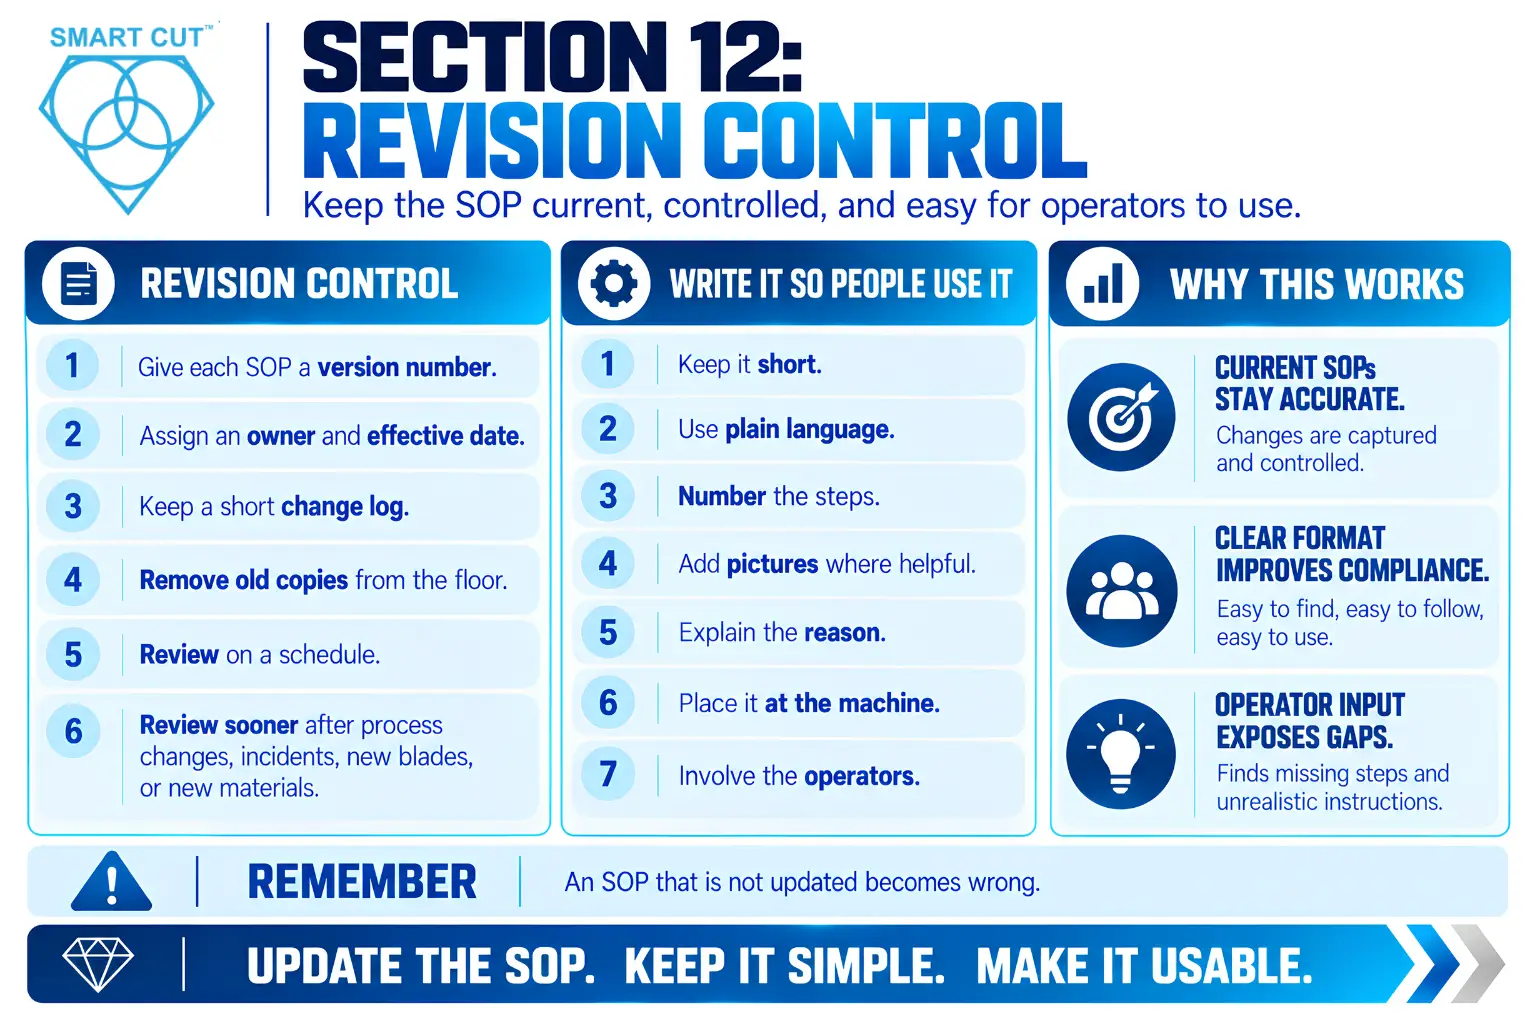
An SOP that nobody updates becomes wrong. Give it a version number, an owner, an effective date, and a short change log. Remove old copies from the floor when a new version takes effect.

Also set a review rhythm. Review the SOP at regular intervals, and review it sooner after any process change, incident, or new blade or material.

Write It So People Use It

Content matters, but format decides whether operators read the SOP. Follow these rules.

Keep it short. Long documents get ignored. Move detail into job sheets and checklists.

Use plain language. Write in short, active sentences. Start steps with a verb.

Number the steps. Order matters in setup and in the cutting sequence.

Add pictures where they help. A photo of a correct nozzle position beats a paragraph.

Explain the reason. A short “why” next to a key step improves compliance. An operator who knows why coolant matters will not skip it under pressure.

Place it at the machine. A document in a distant office does not help the operator at the saw.

Involve the operators. The people who run the saw know where the process breaks. Ask them to review drafts, because they will spot unrealistic steps and gaps.

Roll It Out Step by Step

Roll It Out Step by Step

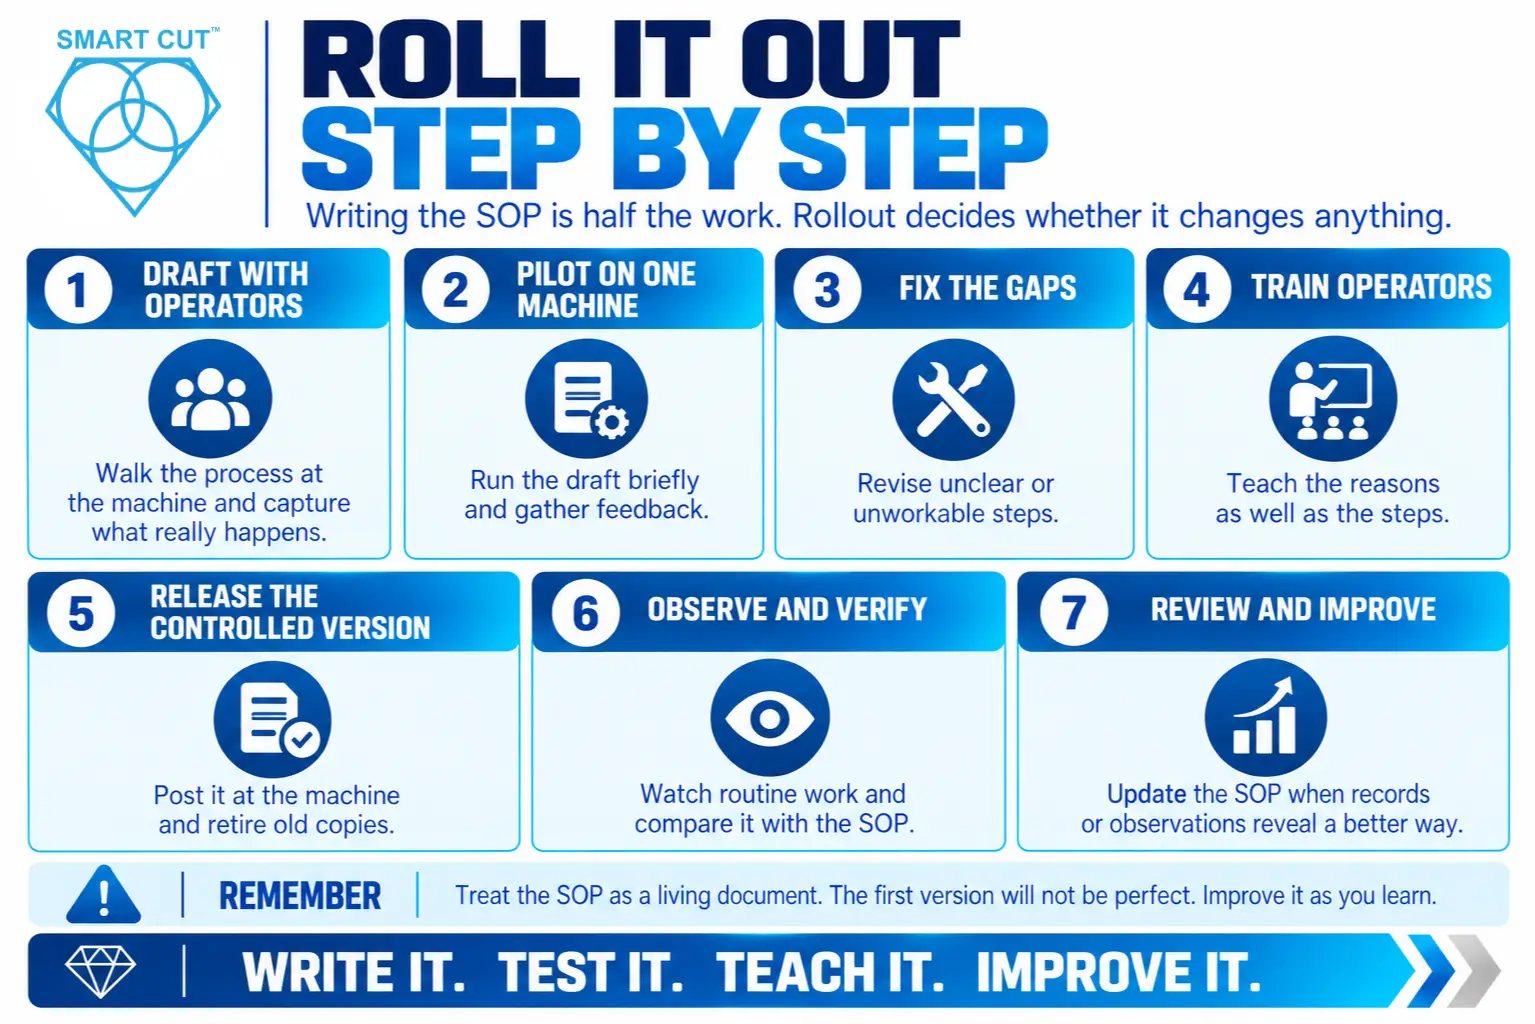
Writing the SOP is half the work. Rollout decides whether it changes anything.

  1. Draft with operators. Walk through the process at the machine and capture what actually happens.
  2. Pilot on one machine. Run the draft for a short period and gather feedback.
  3. Fix the gaps. Revise steps that operators found unclear or unworkable.
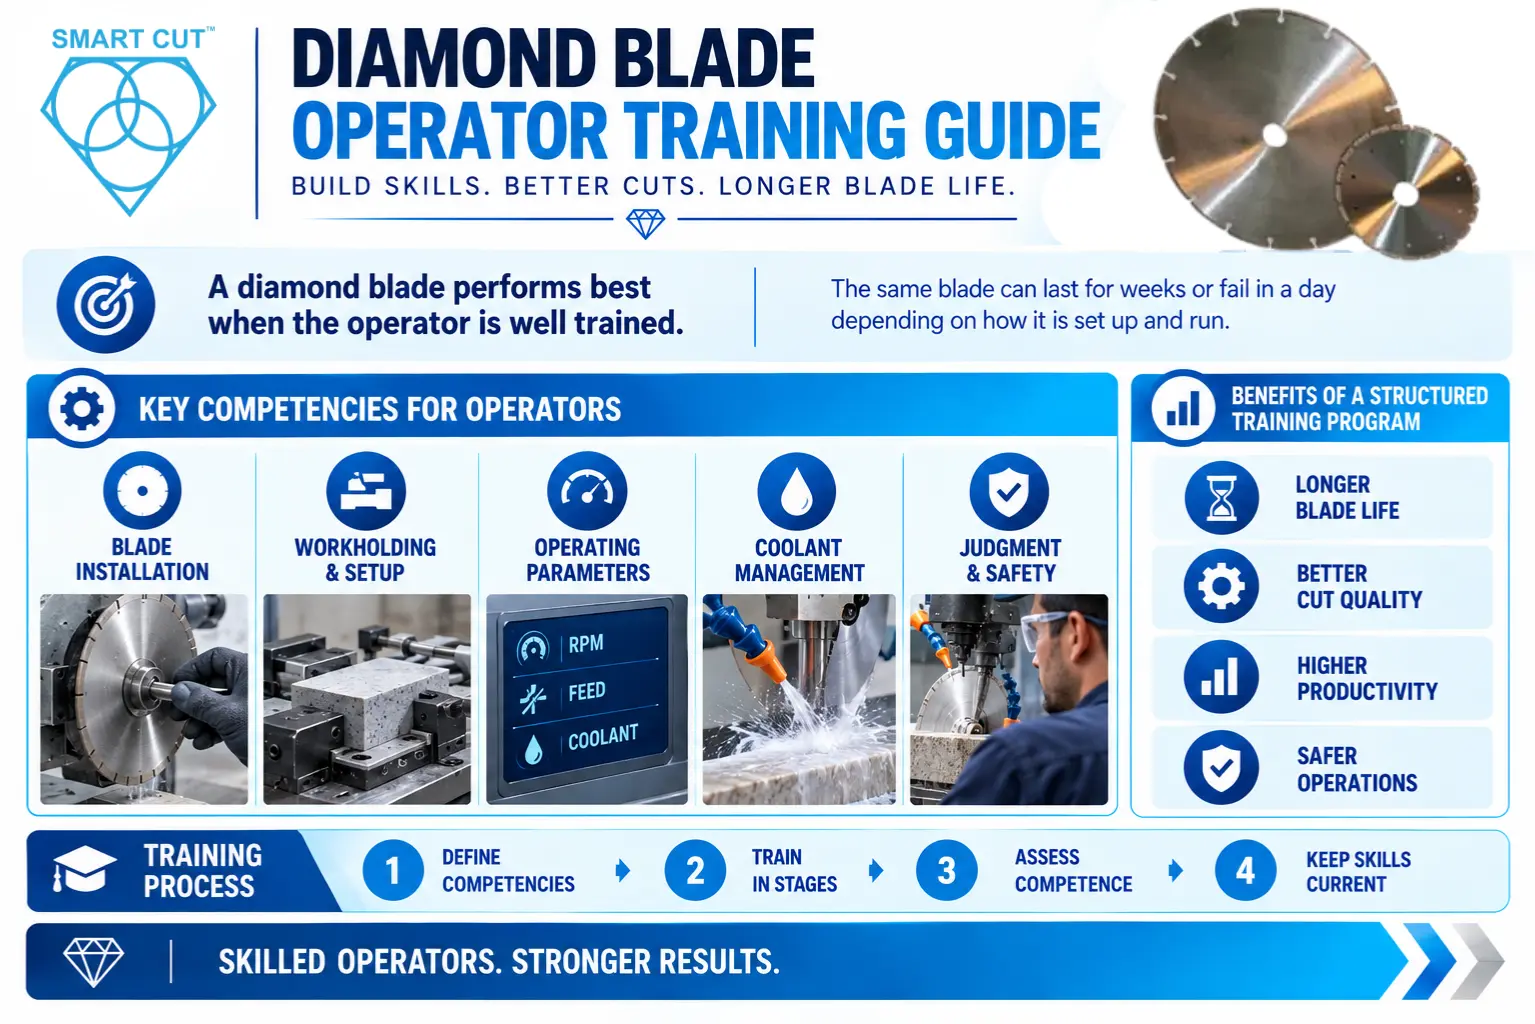
  4. Train operators. Teach the reasons as well as the steps. Our operator training guide shows how to build a staged program with sign-off.
  5. Release the controlled version. Post it at the machine and retire old copies.
  6. Observe and verify. Watch routine work and compare it with the SOP. Use what you see to find unclear steps.
  7. Review and improve. Update the SOP when records or observations reveal a better way.

Treat the SOP as a living document. The first version will not be perfect, and that is fine. What matters is the habit of improving it.

Measure Whether the SOP Works

Measure-Whether-the-SOP-Works

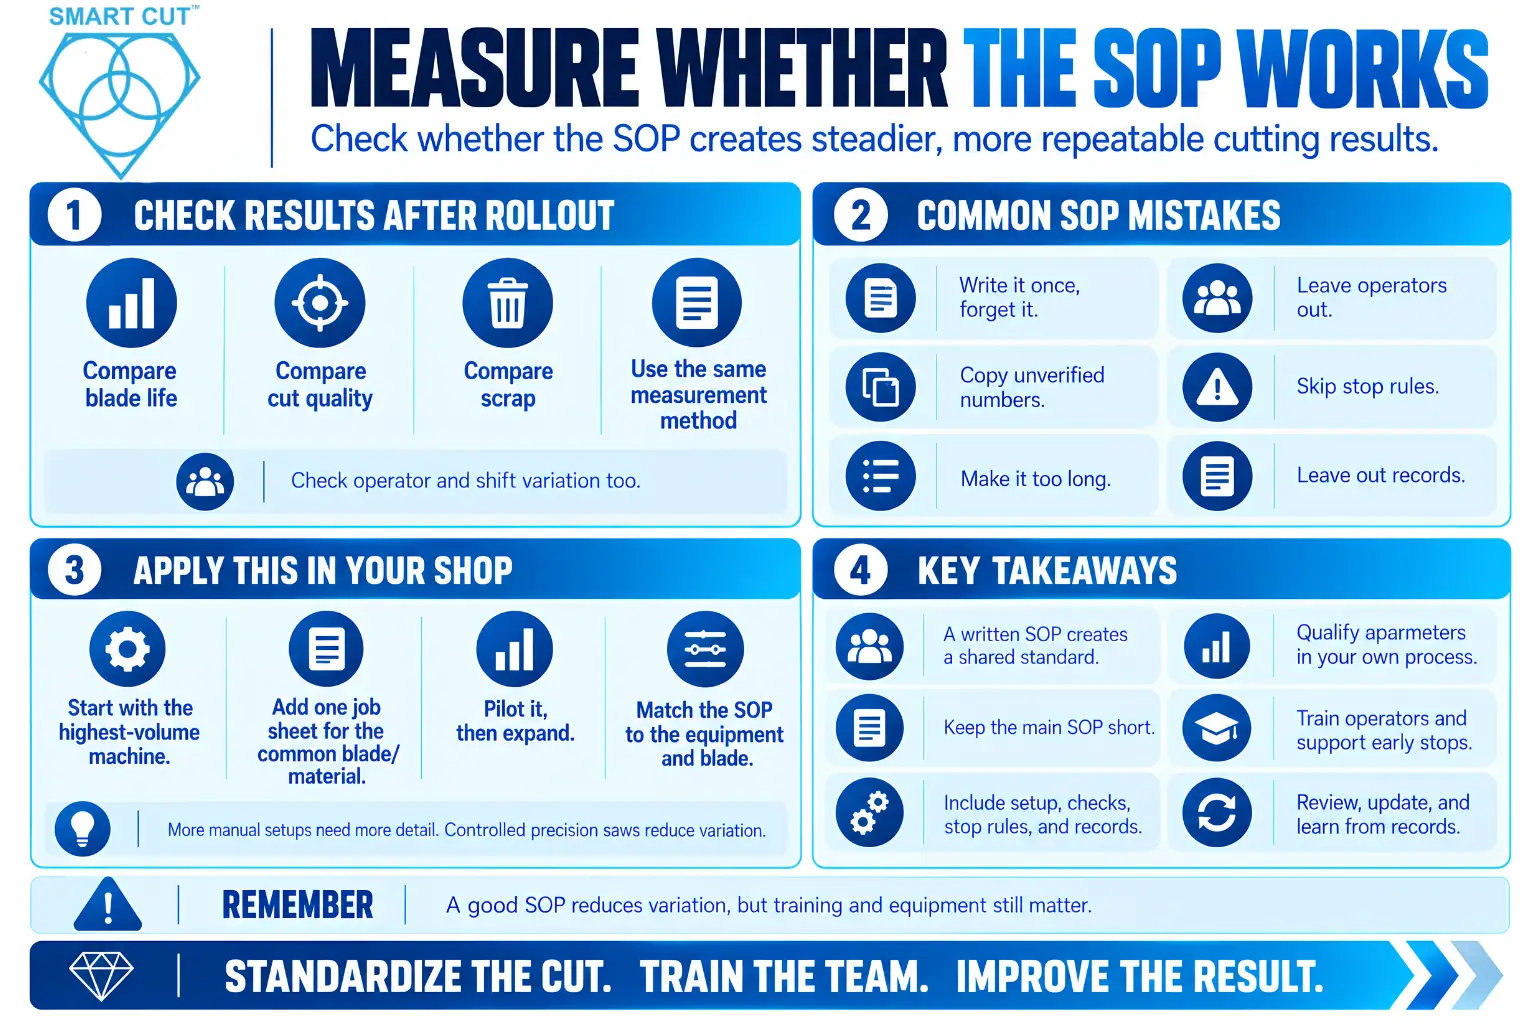
Check results after rollout. Compare blade life, cut quality, and scrap before and after, using the same measurement method. Look at variation between operators and shifts too. A good SOP narrows the gap between operators.

Keep your expectations realistic. Some variation will always remain, and not every change traces back to the SOP. Still, a clear trend toward steadier results tells you the standard works. A flat or worse trend tells you to look again at the steps, the training, or the equipment.

Common SOP Mistakes

Writing it once and forgetting it. Review on a schedule.

Copying numbers from a source you cannot verify. Qualify parameters in your own process.

Making it too long. Split it into a short main SOP and job sheets.

Writing it without the operators. Unrealistic steps get ignored.

Skipping the stop rules. Without them, operators keep cutting through problems.

Leaving out records. Without records, you cannot learn from results.

Not training. A document without training is a poster.

Applying This in Your Shop

Start with your highest-volume machine. Write the main SOP in a simple format, add one job sheet for your most common blade and material, and pilot it. Then expand to other machines and applications.

Equipment influences how much the SOP must carry. A rigid, controlled precision saw removes some operator variables, so the SOP can focus on setup, checks, and judgment. A more manual setup needs more detail on feed control and reading the cut.

Finally, remember that a good SOP works best with a well-matched blade. Explore the diamond and CBN wafering and cut-off blades or the wider diamond blade range, and ask the UKAM team for help matching a blade to your process.

Key Takeaways

  • A written cutting SOP turns individual habits into a shared, repeatable standard.
  • Define scope by machine and application, and keep the main SOP short.
  • Include safety, a blade and parameter reference, setup, cutting, checks, stop rules, and records.
  • Qualify parameters in your own process instead of copying unverified numbers.
  • Give operators clear stop rules and never blame them for stopping early.
  • Keep records short, so people complete them, and use them to learn.
  • Control versions, review on a schedule, and update after changes.
  • Train operators and observe routine work, because an SOP without training changes little.

Frequently Asked Questions

It is a written procedure that tells operators how to set up, run, and finish a cut consistently.

It reduces variation between operators and keeps good practice in the shop.

Keep the main SOP short and move detail into job sheets and checklists.

It should list approved values for each blade and material, verified in your own process.

Surface speed depends on blade diameter as well as RPM.

Yes, because operators need clear conditions and permission to stop.

The operators who run the machine, because they know where the process breaks.

A cutting SOP guides daily production, while a testing SOP controls an evaluation.

Keep blade identity, material, settings, observations, and any abnormal events.

Review it on a schedule and after any process change or incident.

Treat outside values as a starting point only, and verify them in your process.

No, because an SOP supports training and judgment but cannot replace them.

Post the current version at the machine and remove outdated copies.

Compare blade life, cut quality, and operator-to-operator variation before and after.

Conclusion

A cutting SOP does a simple job: it makes good practice the shared practice. It states which blade and settings to use, how to set up, how to run the cut, when to stop, and what to record. In return, it gives you steadier blade life, cleaner cuts, and records you can learn from.

Write it with your operators, keep it short, and qualify the numbers in your own process. Then train people on it, watch how they use it, and improve it over time. A living SOP pays back every shift.

If you want help matching a blade and parameters to your material and process, request a consultation with the UKAM team, or explore the diamond and CBN wafering and cut-off blades.

Trusted by Tens of Thousands of Manufacturers, Laboratories,
Research Institutions Worldwide Since 1990

American Based Manufacturer

Established in 1990

Custom manufacturing

RELATED ARTICLES

Brian is an experienced professional in the field of precision cutting tools, with over 27 years of experience in technical support. Over the years, he has helped engineers, manufacturers, researchers, and contractors find the right solutions for working with advanced and hard-to-cut materials. He’s passionate about bridging technical knowledge with real-world applications to improve efficiency and accuracy.

As an author, Brian Farberov writes extensively on diamond tool design, application engineering, return on investment strategies, and process optimization, combining technical depth with a strong understanding of customer needs and market dynamics.

author-avatar

About Brian Farberov

Brian is an experienced professional in the field of precision cutting tools, with over 27 years of experience in technical support. Over the years, he has helped engineers, manufacturers, researchers, and contractors find the right solutions for working with advanced and hard-to-cut materials. He’s passionate about bridging technical knowledge with real-world applications to improve efficiency and accuracy. As an author, Brian Farberov writes extensively on diamond tool design, application engineering, return on investment strategies, and process optimization, combining technical depth with a strong understanding of customer needs and market dynamics.

Download Checklist

Please fill in your details to download the Precision Diamond Saw Pre-Operation Checklist.