How to Properly Use Precision Diamond & CBN Blades
-
Posted by
contactor6

The diamond blade itself is only a small factor in your cutting operation. Successful diamond sawing is both an art & science. Requiring proper use and understanding of the right: RPM’s, Coolants, Equipment, Dressing Devices, Accessories for your material / application. Selecting the right diamond blade parameters, often involves a trial and error process.
The diamond & cbn blade itself is just one element in the complex process of successful cutting. Precision diamond sawing combines both art and science, requiring a thorough understanding of the right RPMs, coolants, cutting machines, dressing devices, and accessories tailored to your specific material and application. Selecting the appropriate diamond or cbn blade and optimizing its parameters often involves some degree of trial and error. However, with the right knowledge and guidance, many common pitfalls can be avoided.
Share this Article with Friend or Colleague
DIAMOND BLADE USAGE/SAWING RECOMMENDATIONS


In order for you to get the most out of your new Diamond Blade, we strongly urge you to read and follow these instructions and suggestions. Doing so will help you save money and time. These suggestions and recommendations have come from years of experience in research, development and manufacturing of precision diamond products. As well as years of personal experience and observations of users like you. The diamond blade itself is only a small factor in your cutting operation. Successful diamond sawing is both an art & science. Requiring proper use and understanding of selecting the right diamond blade for your material / application. Maintaining and using proper:
a.) RPM's
b.) Coolants
c.) Equipment
d.) Dressing Devices
e.) Accessories
Selecting the right diamond blade parameters, often involves a trial and error process. Many which can be avoided through experience and understanding of how to use these parameter for your specific application. What works for one application, may not work for another. While there is no real substitute for experience, even new diamond blade users can quickly become proficient by learning and applying some basic principles of diamond sawing.
Before Cutting
Visually examine diamond blade for cracks or any other damage. Do not use if damage is suspected. Damaged, incorrectly mounted, our misused blades can be very dangerous to use. Always wear proper safety equipment: Safety footwear, snug fitting clothing, safety goggles, hearing and head protection, and proper respiratory equipment. Make sure to check the diamond blade for run out.
If for some reason you feel there is a manufacturing defect, please return the blade where it was purchased with a note explaining the difficulty. Defective blades will be repaired or replaced. Blades improperly used will be repaired or replaced at users expense.
Before Installation
The following recommendations are given so that best results may be obtained in using diamond wheels:
Inspection
Visually examine blade for cracks or any other damage. Do not use if damage is suspected. Damaged, incorrectly mounted, or misused blades can be very dangerous to use.
Mounting
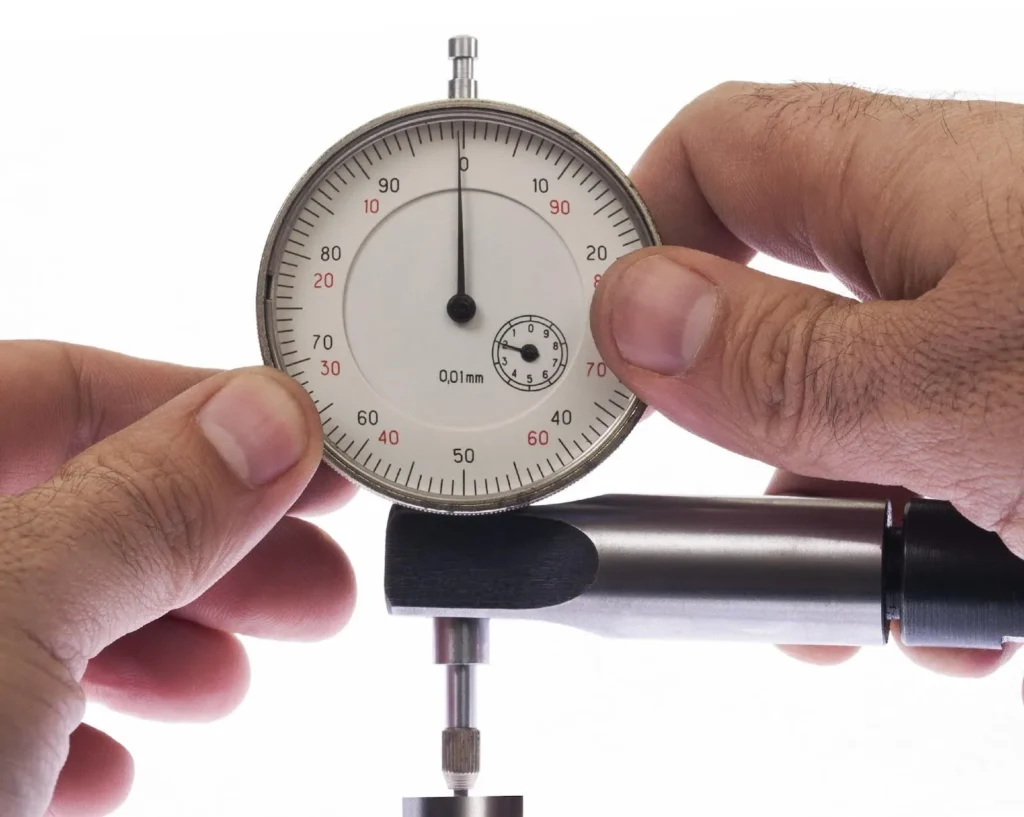
Care should be taken in mounting a diamond wheel. Flanges, back plates and spindle should be clean, free of burs, and run true. By using an indicator and tapping lightly on a wood block held against the wheel, make sure the wheel is within .005. of true rotation. Tighten the flanges securely and recheck with an indicator before using. The use of permanent mounting should be practice where convenient. Please check the shaft of your machine for looseness that may indicate worn bearings. Also, check shaft for wear on the shaft itself. Blade should fit snuggly.
Flanges
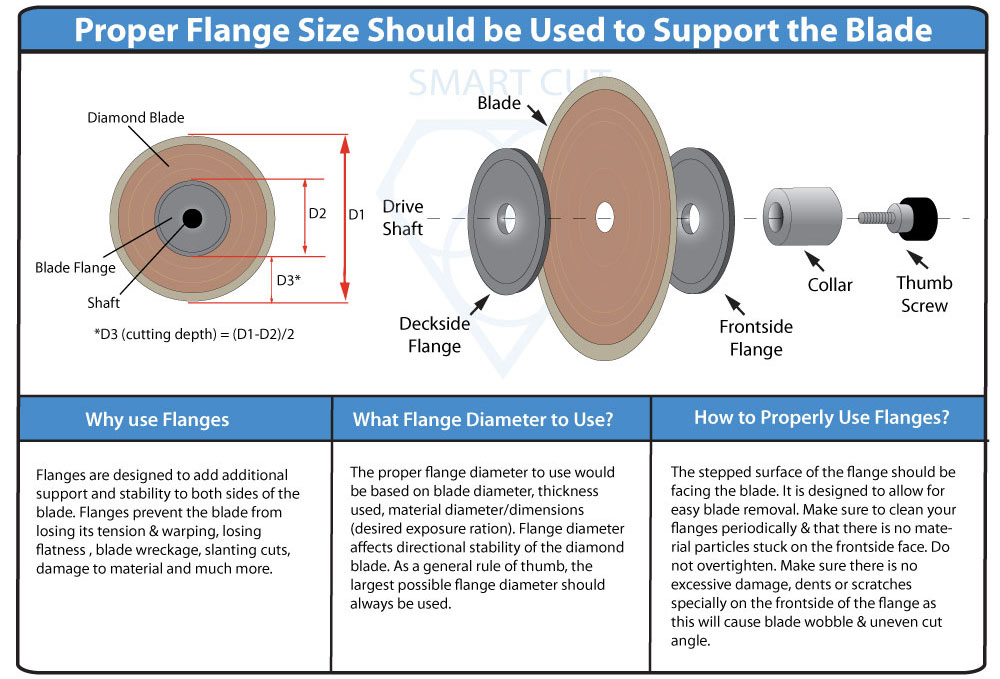
A pair of same size flanges with proper relief should be approximately 1/3 the diameter of the blade. Flanges must be free of rust and dirt. Your blade should turn perfectly true after flange nut is tightened. Carriage alignment must be accurate for deeper cuts to prevent blade bending. Do not use blades that rattle or wobble on the saw. Flange diameter affects directional stability of the diamond wheel. For ultra thin Diamond Wheels, your flange size must be 3/4 outside diameter of the blade. Often extending right up to the diamond section. As a general rule of thumb, the largest possible flange diameter should always to be used.
Safety
Always wear proper safety equipment: Safety footwear, snug fitting clothing, safety goggles, hearing and head protection, and proper respiratory equipment. Always use blade guards provided on machines. Do not remove these safety devices. They are for your protection.
Before Using
Make sure that the arrow on wheel point in the same direction as shaft rotation. Best performance and life will result. Before performing any cutting operations, let the tool run for a few seconds without load. If blade wobbles, vibration or unusual noise occurs, stop the tool immediately. Inspect blade for damage or incorrect mounting.
Securing your material while cutting
It is extremely important that the part you are cutting is clamped down and hold securely in place. So material does not move, if material does move while cutting it may break the diamond section of your blade. A clamp should be used for this purpose. Do not hold the part (material) with your hands. Doing so is dangerous, and your material will chip.
Cutting Speeds
RPM's will vary depending on the OD (Outside Diameter) of the blade, application, material to be cut, and equipment used. To improve blade life and help reduce wreckage, it is important to run blades at the proper RPM's and keep the diamonds exposed through dressing. Most diamond slicing blades should be operated in the range of 3,150 to 5,000 surface feet per minute. For soft, abrasive materials, RPM should increase. For hard, dense materials, RPM should decrease. RPM's used in dicing operations may between 8,000 to 30,000. Recommended RPM's

Blade Diameter
Recommended RPM
Blade Diameter
Recommended RPM
4"
6"
8"
10"
12"
14"
16"
4,000
2,675
2000
1600
1325
1140
1000
18"
20"
22"
24"
30"
36"
1000
900
825
700
550
500

Faster cutting may reduce your working time slightly. However, the major trade off is a significant increase in friction and blade heat up, considerably reducing blade life and increasing the risk of heat fractures and breakage. Meaning if a diamond blade develops dark “burn” marks at the diamond section, the blade is being used is too fast or the amount of pressure is too great. Reduce cutting speed or adjust pressure accordingly. It is generally recommended that you use a blade as fast as it will cut freely.
Sawing with Coolant
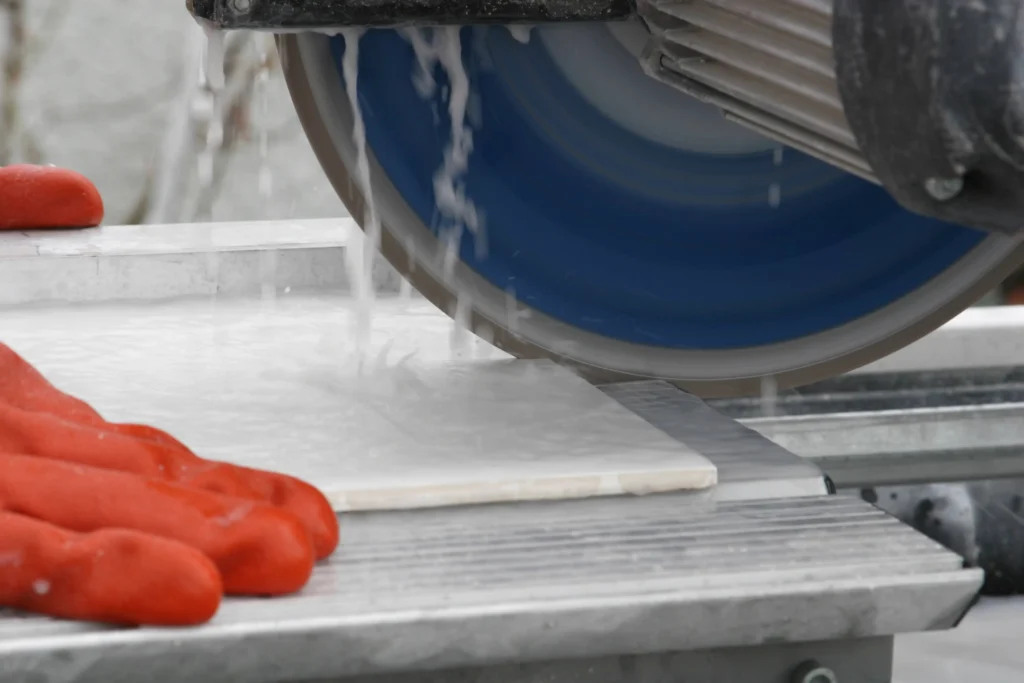
Coolant should always be used to cool and lubricate the blade. Most frequent source for diamond blade damage is cutting without enough coolant. It has been found that generous flow of coolant increases diamond blade efficiency, improves surface finish and reduces heat build-up and material cracks and deformation associated with overheating. Water is most often used coolant, providing excellent performance at minimal cost. Coolant must be applied in the proper place or it will not cool the blade or material being worked on properly. Coolant should always be directed so that the full flow is at the point of contact between blade and material, facing the same direction as rotation of the blade. The amount of coolant used should increase with the hardness of the material being cut. If you see sparks, there is insufficient coolant reaching the cutting zone or its simply ineffective.
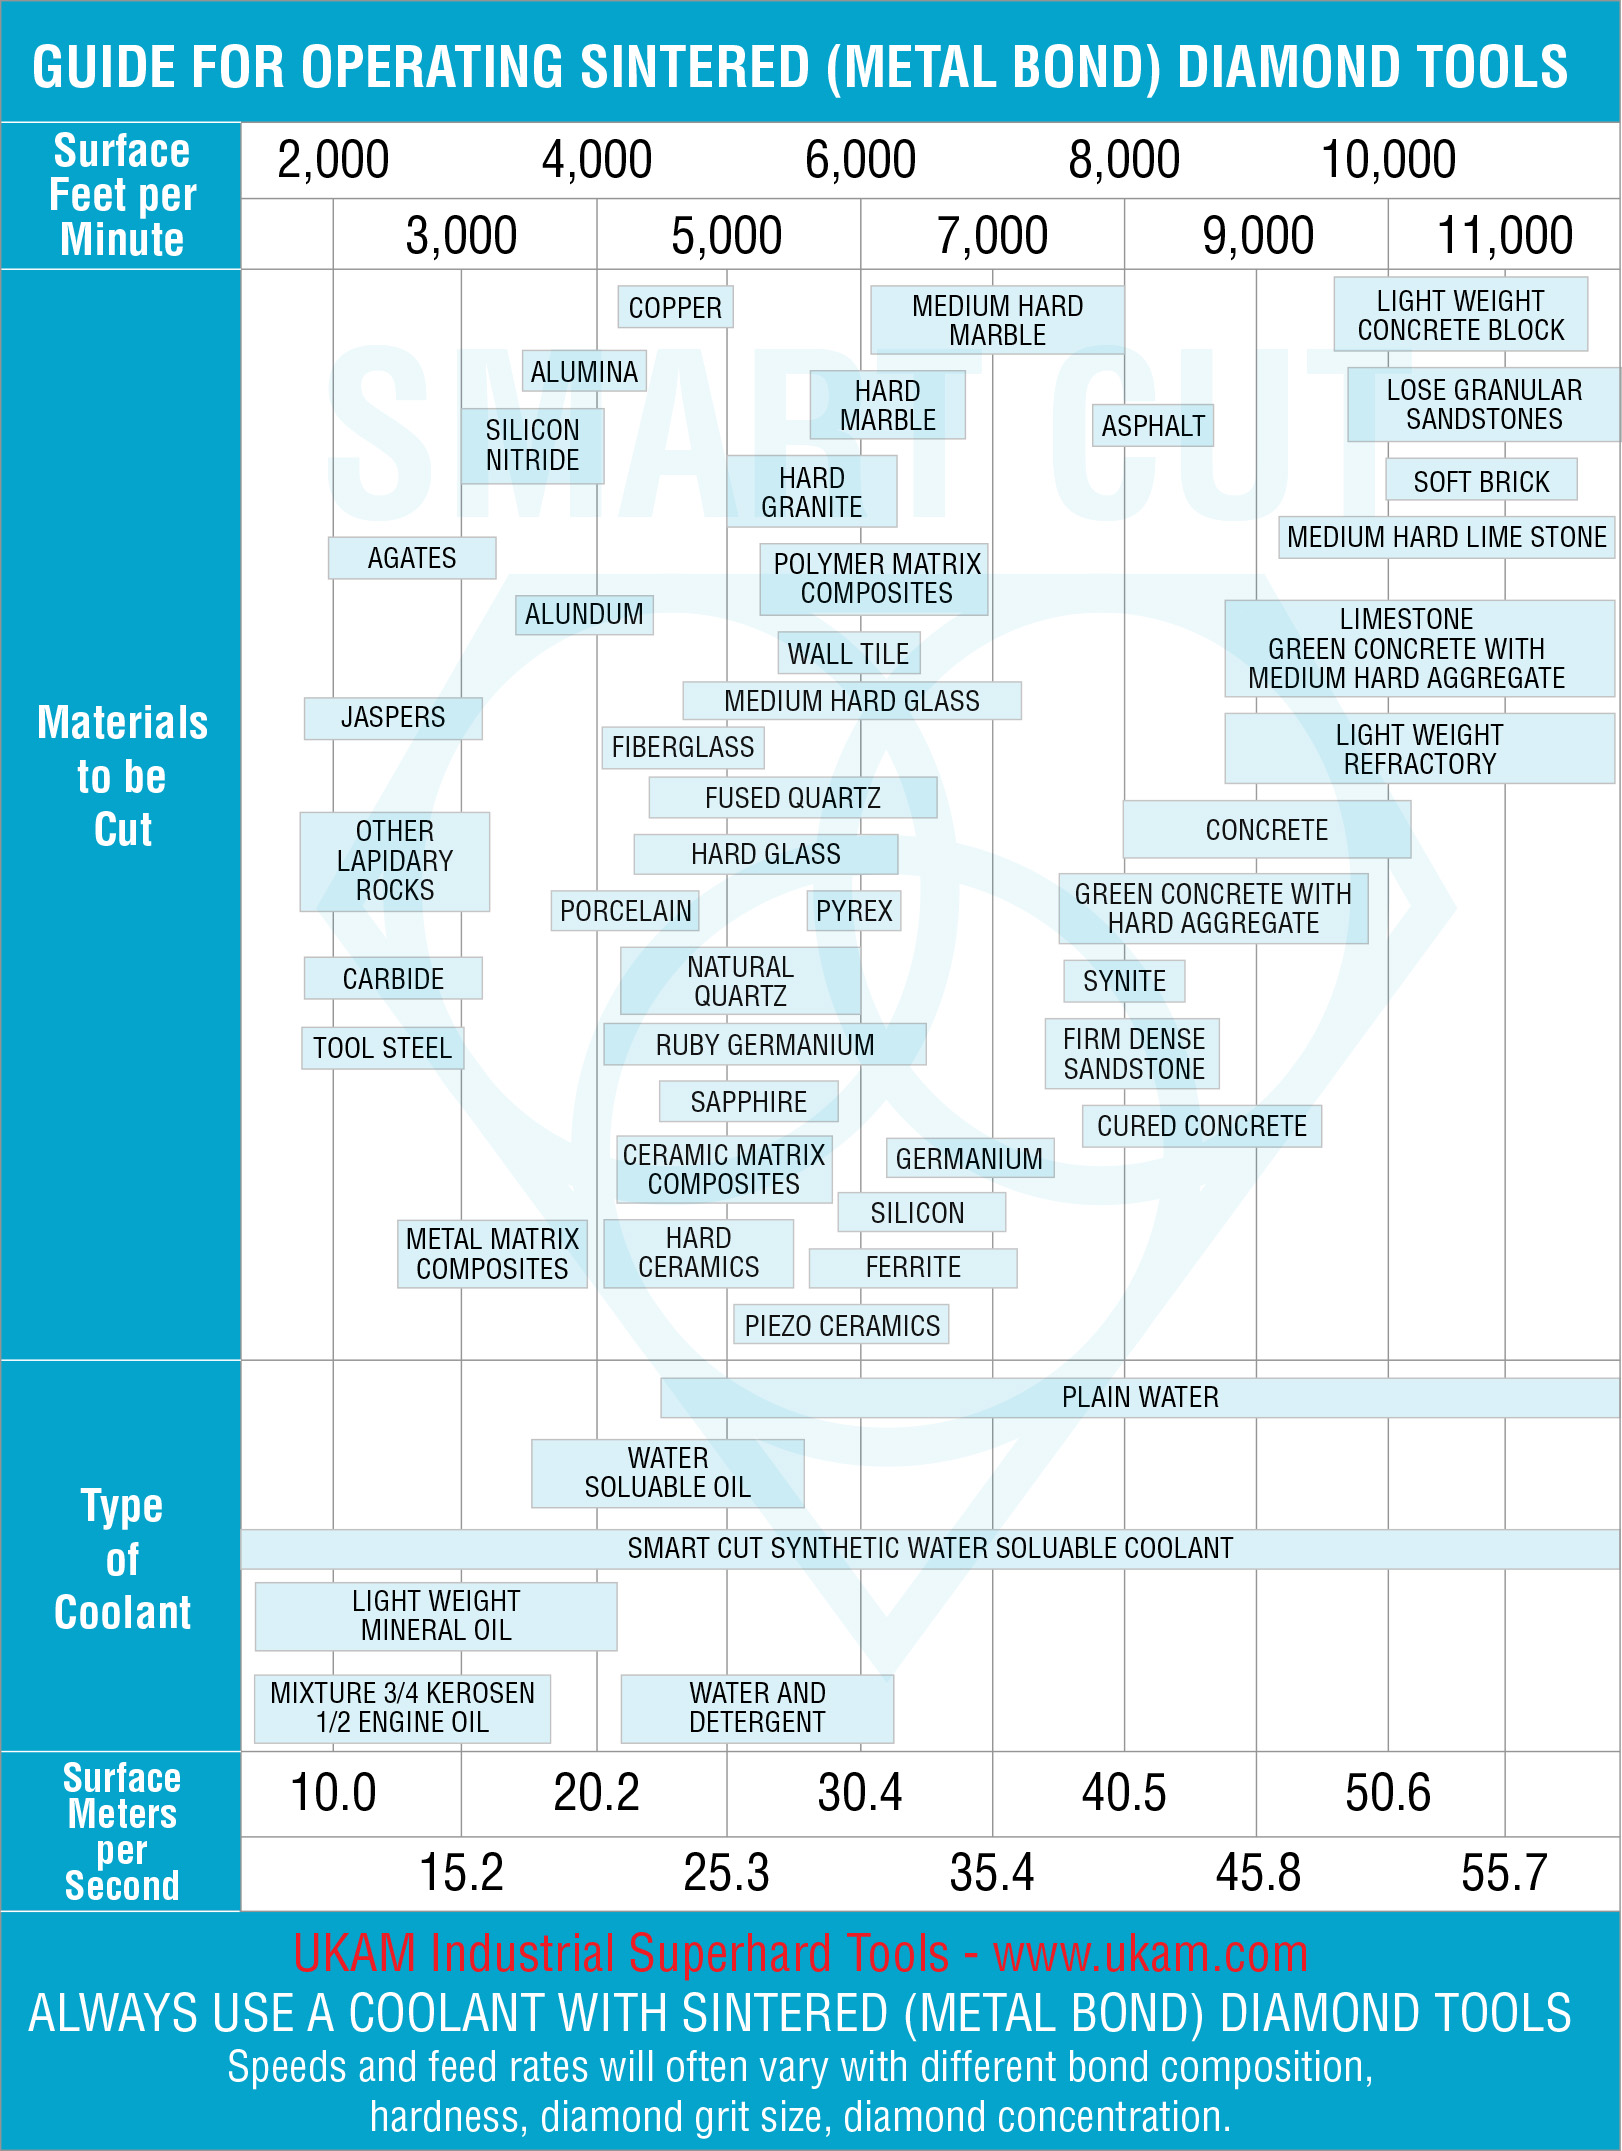
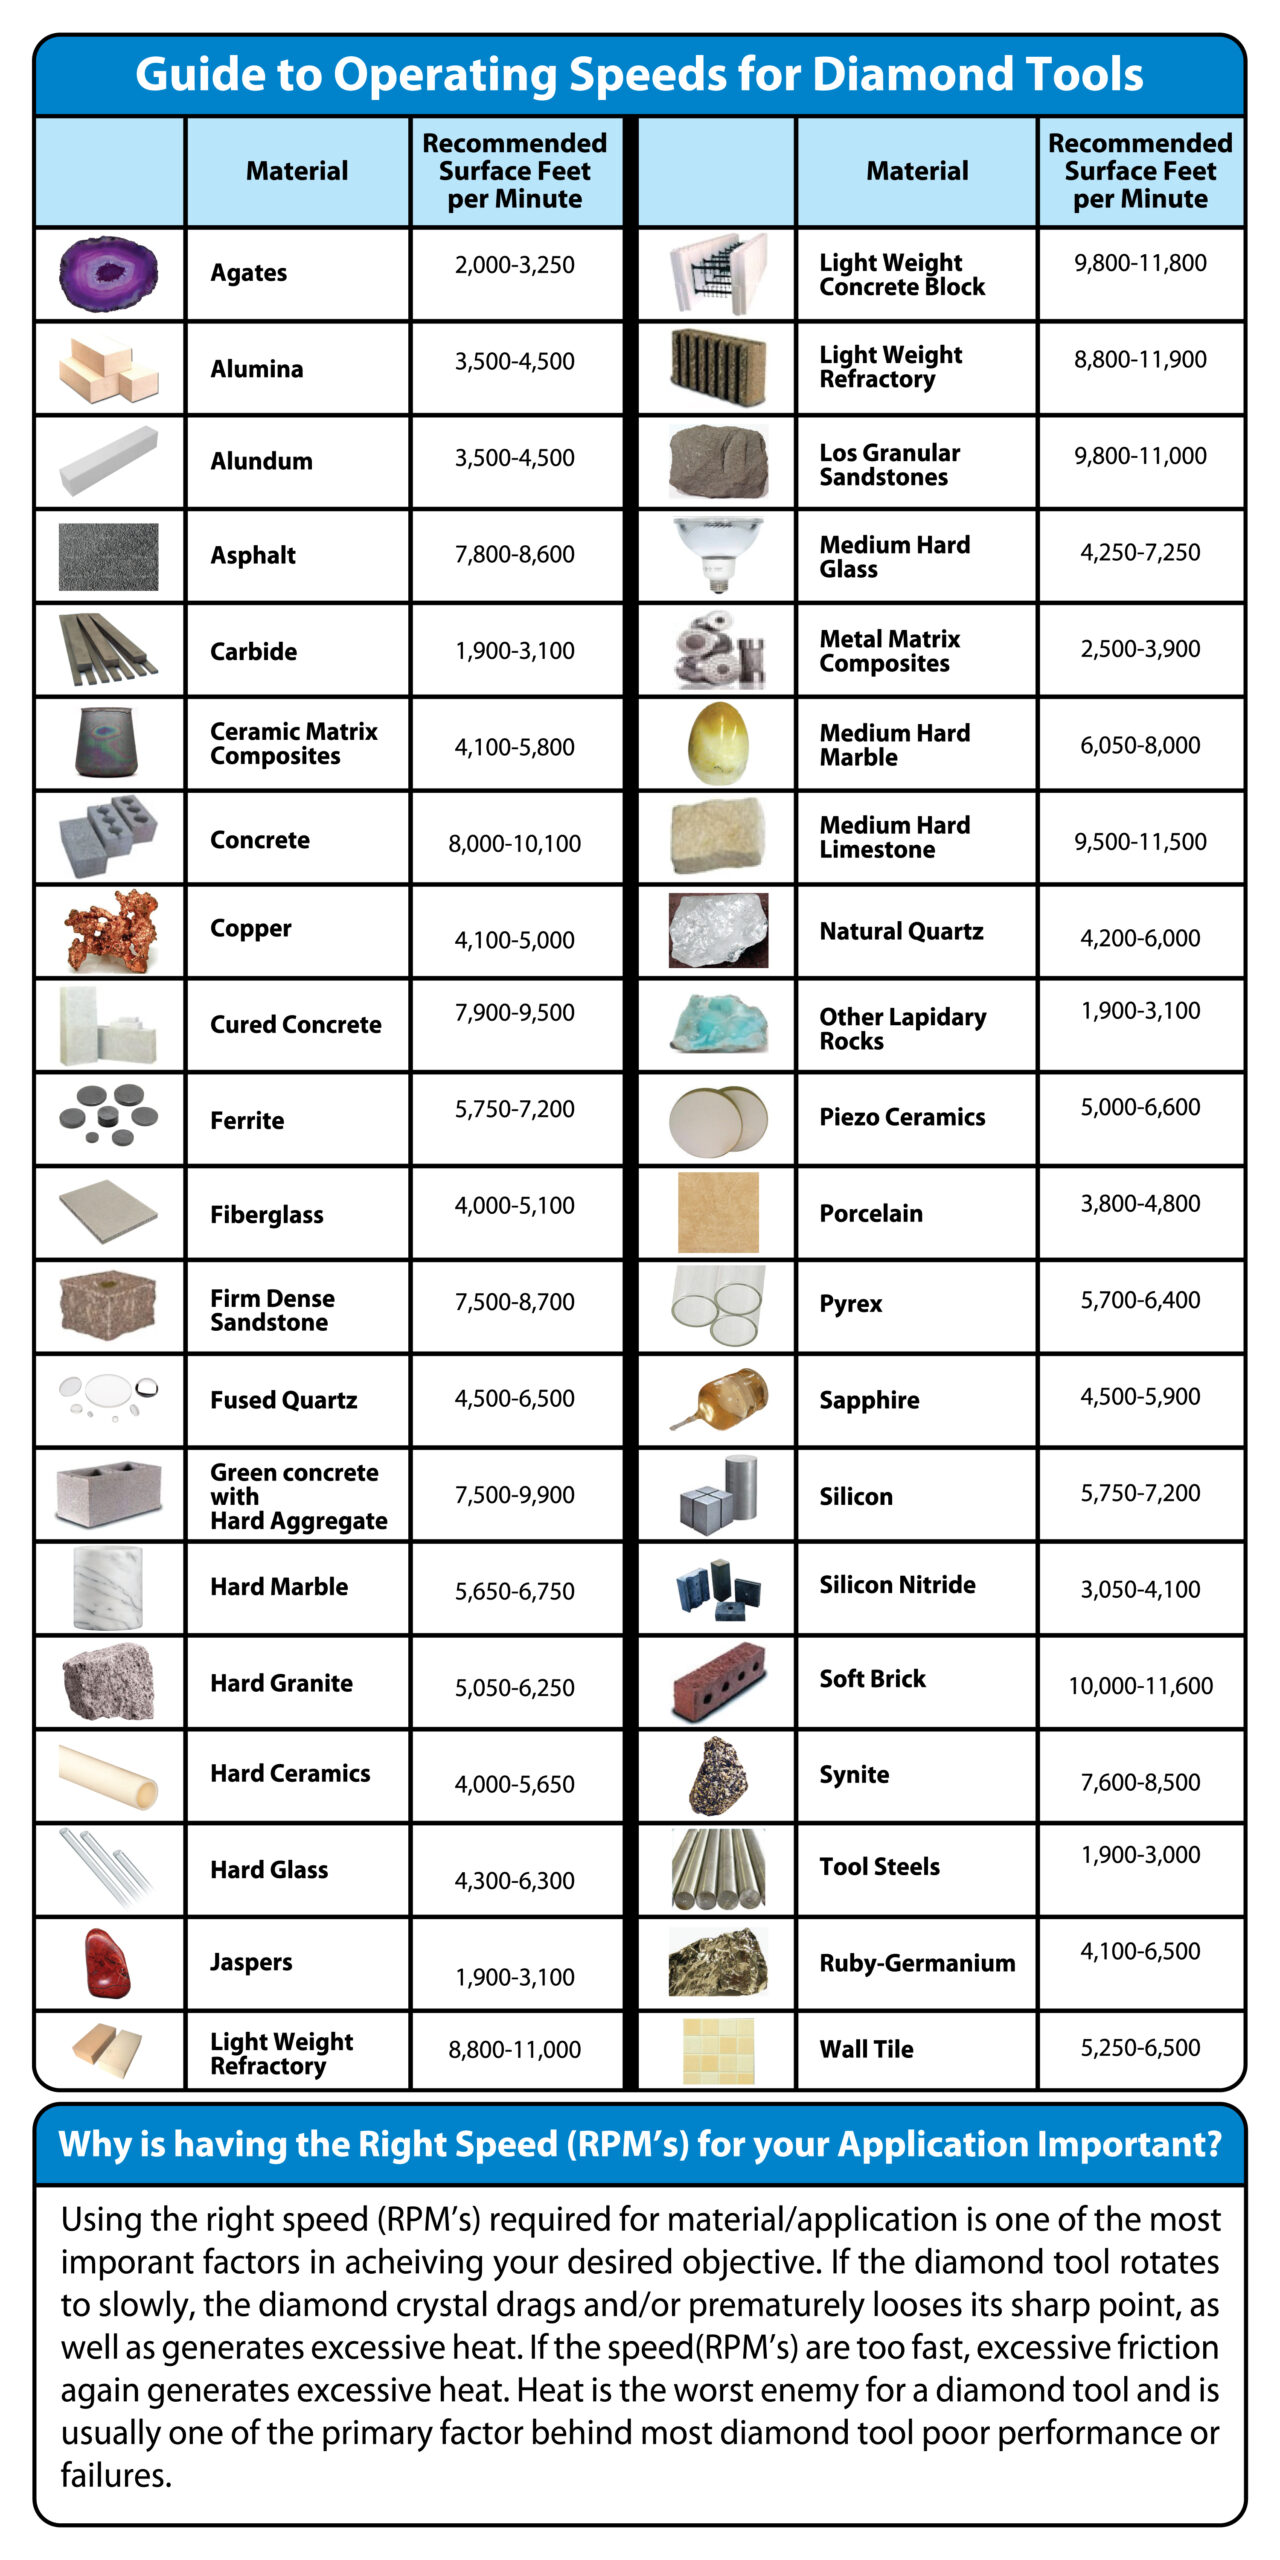

Never run a diamond blade dry. Severe damage will result. Coolants do 3 things:
a.) cool blade and material being cut
b.) clean out abrasive particles formed while cutting
c.) provide lubrication to keep cutting edge clean
When cutting in harder materials such as granite, agate, quartz, porcelain, or very hard materials like sapphire and alumina, it is important to have lots of coolant.
Determine the type of coolant you are planning to use. If you are planning to use water as a coolant, check with the blade manufacturer on what type of water recommended for your blade. City water with 90 psi or running water is usually used for cutting. For some applications, you may want to use an additive with your coolant. If you decide to go this route, you will need a circulating system and the right ratio between your additive and coolant.
UKAM Industrial Superhard Tools diamond blades for most applications are designed to give you a straight cut in plain water. Although better performance and longer life in some cases may be obtained by using a water soluble coolant.
For more information on proper use and care of your diamond blades,
Diamond Blade Dressing & Truing

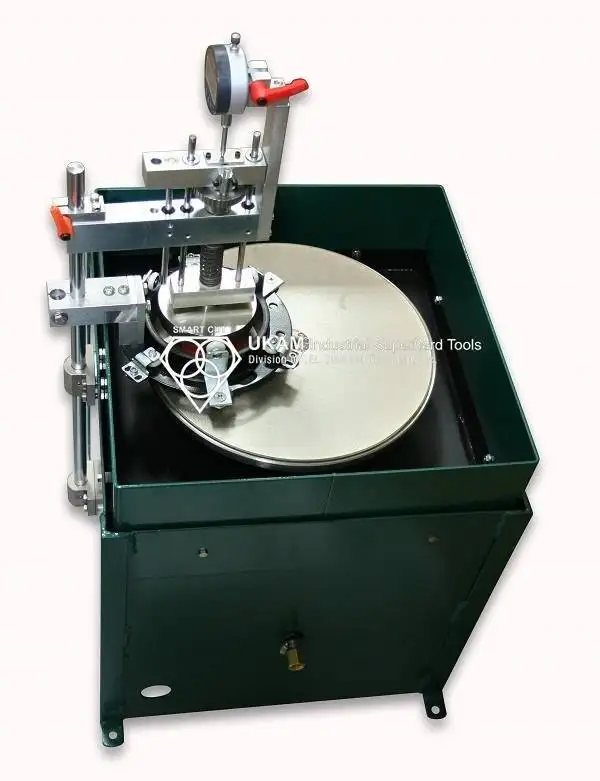
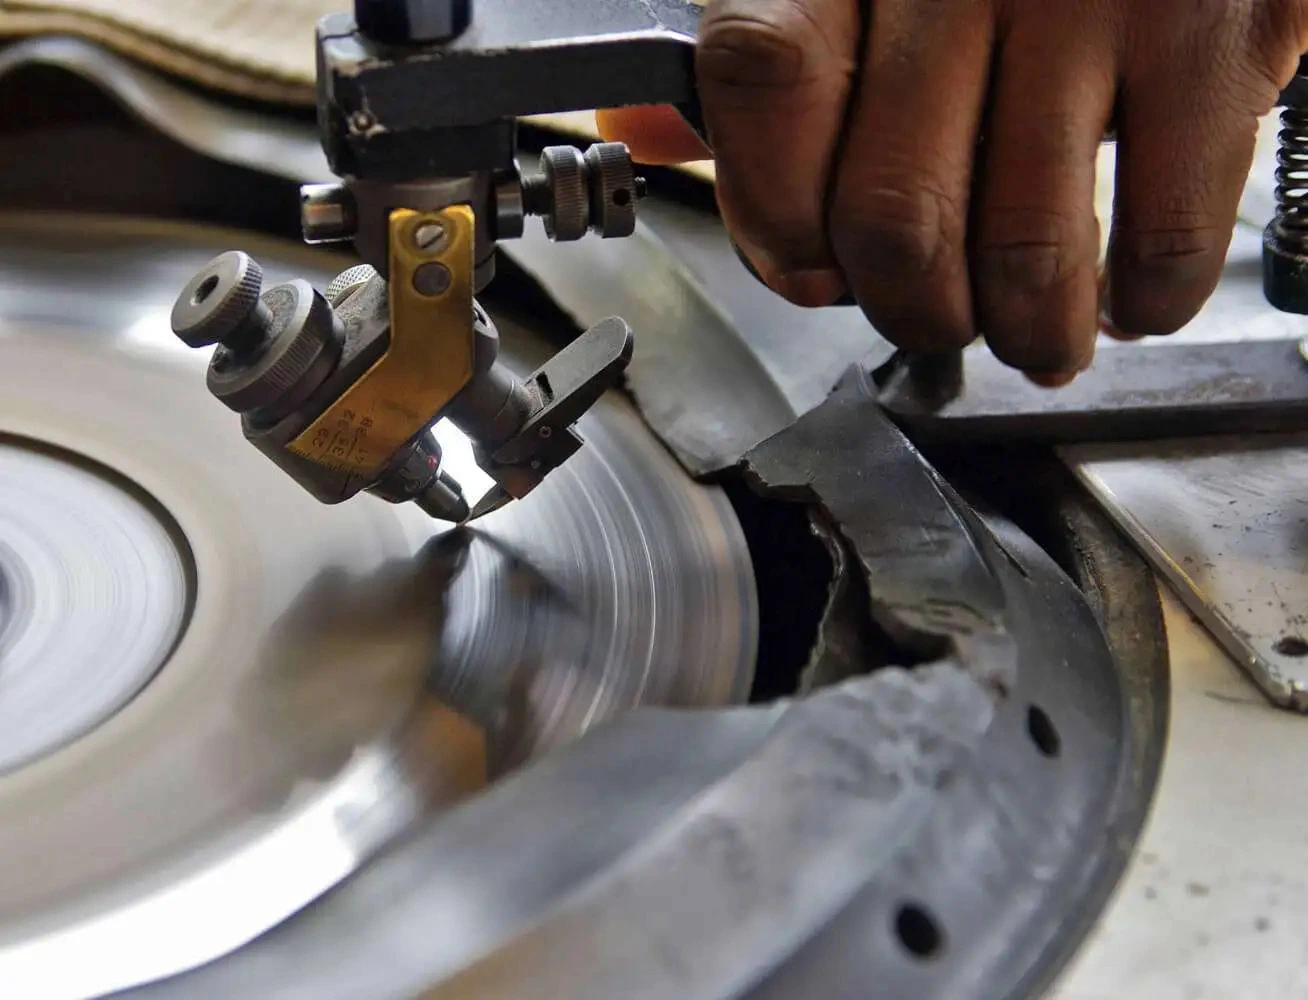
Feed material slowly into blade so the blade does not lead off. Excessive pressure can cause your wheel to bend or dish. Feed rate should never be so great that blade slows down. A diamond blade may occasionally require dressing with a dressing stick made specifically for this purpose. Use coolant for this procedure. The SMART CUT™ Diamond Bond is designed to minimize this procedure. By using enough coolant and following suggested procedures you can rest assured this will require a minimum amount of time as compared to most blades.
Most Diamond Blades can be dressed (retrued) several times. Usually the wear on the diamond blade depth takes place on the Blade core and diamond section. Dressing causes diamonds to be pulled outfrom the blade diamond section (diamond part). For this reason, great care should be taken to reduce this effect. We suggest rexposing the diamond section with a Al203 (alumina oxide) stick after retrueing. This is a very simple operation: just cut into the dressing stick many times.
Applying Pressure to a Blade
When using diamond blades, it is very important to apply light to medium pressure. Gradually feeding blade it into material, until it begins to cut at its own speed. Increasing pressure on the blade will do little towards reducing the time it takes you to complete a job. But will cause your blade to overload and overheat. This causes not only blade overheat (burn up), but it also heats up the material being cut, causing unwanted material cracks and deformation. If you can see dark “burn” marks around the diamond section, the cutting speed you are using is too fast or you are applying too much pressure.
Balancing Cutting Speed, Pressure and Coolant
Cutting speeds are affected by the hardness and abrasiveness of the material, age and condition of equipment, pressure and coolant. Experience with a specific material and applications allows the operator to develop the right cutting process for their particular application, and taking into account all of the factors discussed above. New users, who are just beginning to use diamond blades, are better using thicker kerf blades, applying lower speeds, lower pressure, and a large amount of coolant. Until they are able to build their experience using a specific diamond blade, set up, and application. Doing so will minimize the risk of diamond blade wreckage and material damage.
Cutting Depth
Most frequent source of diamond blade damage is attempting to cut too large piece of material. Maximum material size should not be more than 3/8" blade diameter.
Thin Kerf / Ultra Thin Diamond Blades
Thin Kerf / Ultra thin blades Are used for to obtain more precision tolerances, faster cutting speed, and minimize loss of valuable material. Thinner blades provide less resistance against and impact against material, and can thus be operated at significantly more higher speeds. Including ultra hard & expensive materials minimum loss of material counts the most. Thinner blades will provide a smoother surface finish, faster cutting, greater cutting accuracy, minimize material loss and deformation.
Diamond Blade Maintenance
Proper Diamond Blade maintenance is very important for optimum cutting performance. Maintaining the diamond cutting edge shape, and rigidity is important to prevent the blade from loosing its sharpness and roundness.
When to replace a Diamond Blade
Diamond Blades that are:
a.) Dished
b.) Bent
c.) Not running true
should be replaced. If your diamond blade has a tendency to pull to one side, making uneven cuts. Reverse the blade, and try cutting again. If you still have the same problem, it could be your vise alignment. If after reversing the blade still cuts to opposite side. It may be bent or dished. Should this be the case, the blade must be repaired or replaced before further use. Never continue cutting with a damaged Diamond Blade. </span.
Do's
1. Always inspect flanges for burrs, warpage, cleanliness and flatness.
2. Check blades carefully before each use for proper alignment and possible defects.
3. Maintain a firm grip on blade during cutting operation
4. Keep bystanders and/or animals out of working area.
5. Make sure all Diamond Blade users comply with safety regulations. For use, see safety codes USA-ANSIB71 and OSHA regulations. Canada - CSA.
Don't
1. Do not alter (change) blade inside diameter (ID). Doing so will create unbalanced blade rotation and result in blade wobbling, pounding, or cracking which could be hazardous.
2. Do not stand in line with blade and stream of hot particles.
3. Do not force a Diamond Blade. Most diamond blades are designed for straight line cutting only. Cutting curves can cause stress cracks or fragmentation of the blade. Resulting in possible injury to people in vicinity.
4. Do not use side pressure or grind with side of the blade.

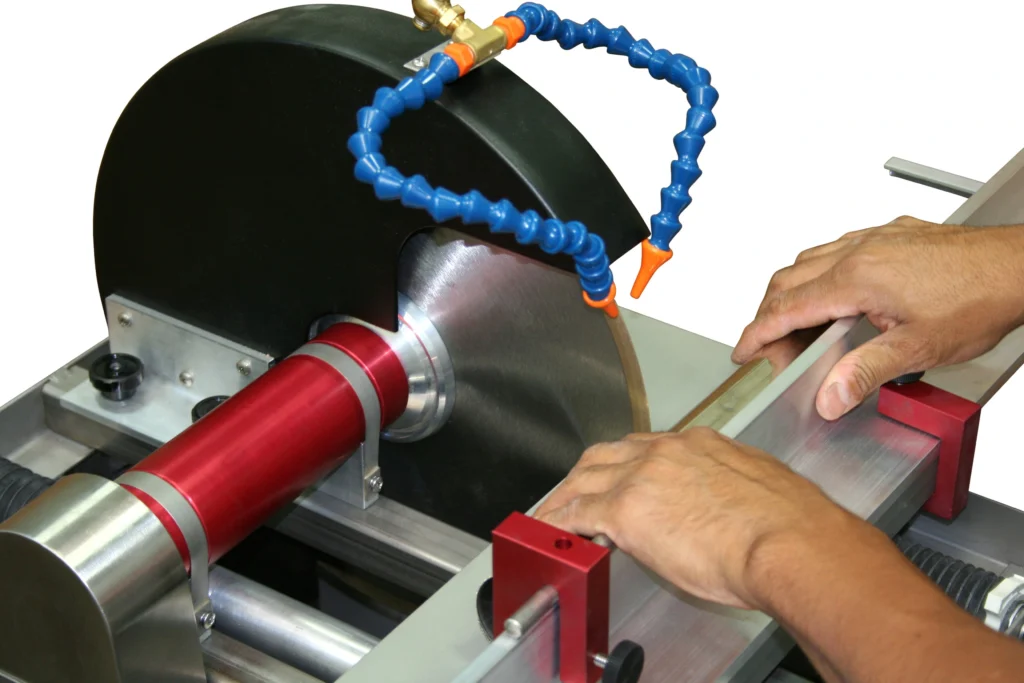
We strongly encourage you to read and follow these instructions and suggestions to maximize the performance and longevity of your new diamond blade. These recommendations are based on years of research, development, and manufacturing of precision diamond & cbn products, as well as valuable insights gained from users like you. Properly maintaining and using the correct RPMs, coolants, equipment, and accessories are critical to achieving optimal results. What works well for one application may not be suitable for another, underscoring the importance of understanding how to apply these parameters effectively.
While there is no true substitute for hands-on experience, even those new to using diamond blades can quickly become proficient by learning and applying the fundamental principles of diamond sawing. With this knowledge, you’ll be well-equipped to make informed decisions that save time, reduce costs, and enhance the quality of your work.
Safety Precautions
When operating cutting machines, it is imperative to prioritize safety by wearing the appropriate personal protective equipment (PPE). Always wear safety footwear designed to protect your feet from falling objects or accidental contact with sharp or heavy materials. Snug-fitting clothing is essential to prevent loose fabric from becoming entangled in moving parts of the machinery. Safety goggles are crucial to shield your eyes from flying debris, dust, and sparks that can be generated during the cutting process. Additionally, use hearing protection to guard against the prolonged exposure to loud noise levels, which can cause hearing damage over time. Head protection, such as a hard hat, is also important, especially in environments where there is a risk of falling objects.

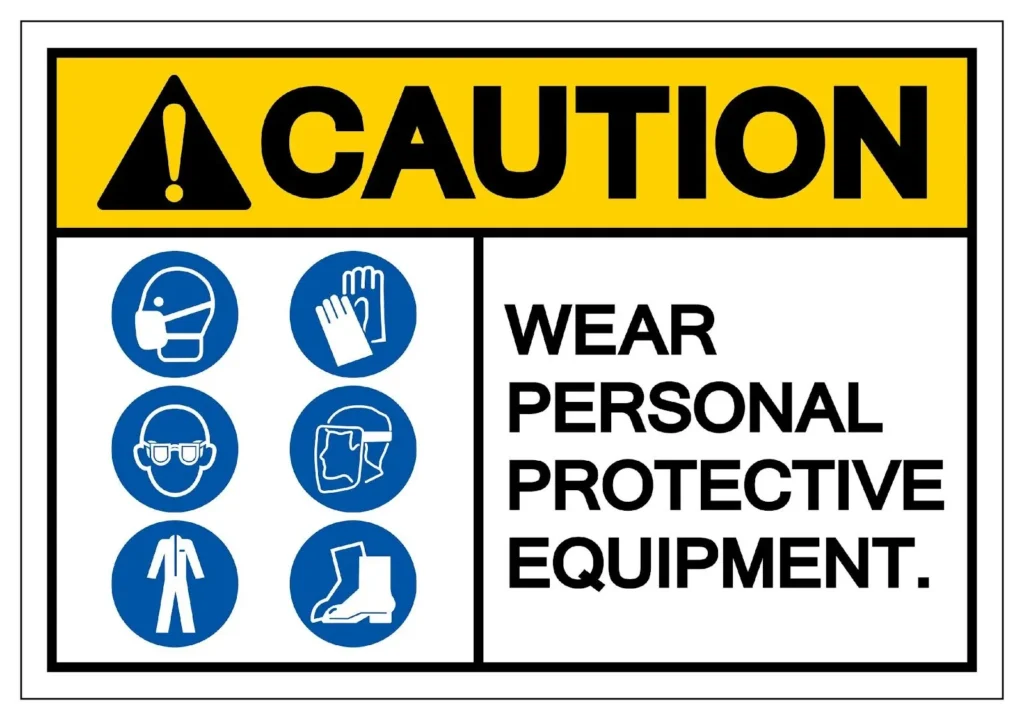
Proper respiratory protection should not be overlooked, particularly when working with materials that produce fine dust or hazardous particles. A well-fitted respirator or mask can help prevent inhalation of harmful substances, which is especially important when cutting materials like stone, concrete, or metals that can release silica dust or other harmful particles.
Always use the blade guards provided on your machines. These guards are specifically designed to protect you from accidental contact with the blade and to contain debris that could otherwise be ejected at high speeds. Removing or bypassing these safety devices significantly increases the risk of injury. The blade guard also serves as a barrier that helps maintain a safe working environment by keeping hands and other body parts away from the moving blade.
In addition to using the provided guards, regularly inspect them to ensure they are in good condition and functioning properly. Damaged or malfunctioning guards should be repaired or replaced immediately to maintain their protective capabilities. It is also important to ensure that the guards are properly adjusted for each cutting operation, as improper adjustment can reduce their effectiveness.
Furthermore, always follow the manufacturer’s safety guidelines for the specific cutting machine you are using. This includes adhering to the recommended operational procedures, performing regular maintenance checks, and ensuring that all safety features are in place and operational before starting any work.
In the event of an emergency, know the location and proper use of all emergency stops and shut-off controls on the machine. Familiarize yourself with the emergency procedures for your work area, including how to quickly and safely stop the machine if necessary.
Selecting the Right Diamond or CBN Blade your Application
Selecting the right diamond or CBN blade for your application is one of the most critical steps in ensuring a successful cutting operation and achieving your specific objectives. While any diamond or CBN blade can cut material, just as any car can drive, the key to optimal performance lies in selecting the blade that is precisely engineered for your needs. There are countless variations of cutting blades, each designed to operate at specific cutting speeds, produce certain surface finishes, control chipping levels, and achieve desired cut quality. With hundreds, if not thousands, of possible combinations of diamond or CBN cutting blade specifications, it’s essential to have a clear understanding of what you aim to accomplish.
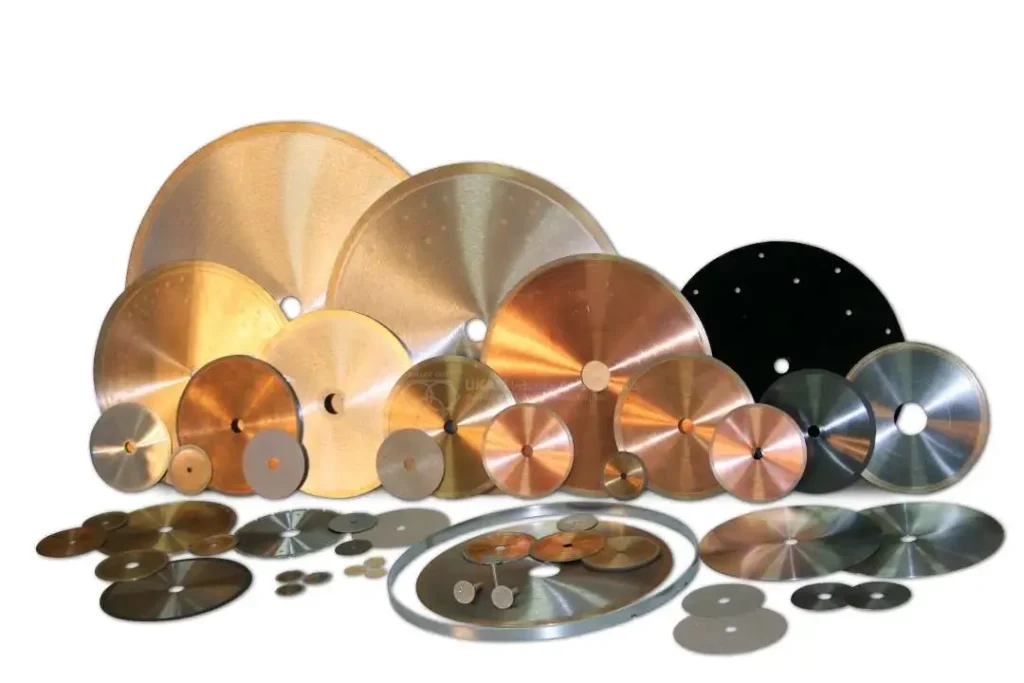
Every cutting operation involves trade-offs—between cutting speed, cut quality, cost, and other factors. The market offers a wide range of blades that can perform the task you have in mind, but some will perform better than others depending on the specific demands of your application. If you’re engaged in high-volume production, it might be advantageous to have diamond & cbn blades custom-manufactured for your individual application and objectives. This customization can optimize all the relevant variables, leading to better performance, greater efficiency, and ultimately, cost savings.
It’s important to test, evaluate, and compare diamond & cbn blades not only subjectively but also using a set of measurable and quantifiable metrics. Objective testing allows you to assess the performance of different blades under controlled conditions, ensuring that you select the blade that best meets your needs. Consider factors such as cutting speed, surface finish, blade longevity, and overall cost-effectiveness in your evaluations.
The benefits of using the right diamond or CBN blade for your application are numerous. The right diamond or cbn blade will enhance cutting efficiency, improve the quality of the cuts, reduce material waste, and minimize the need for rework. Find out more: Optimizing your Diamond & CBN Cutting Operation to Ultimate Level of Efficiency. Additionally, it can extend the life of the blade and reduce downtime, contributing to a more streamlined and productive operation. By carefully selecting and testing your blades, you can optimize your cutting processes, achieve your desired outcomes, and maintain a competitive edge in your operations.
Using Right Cutting Machine for your Application
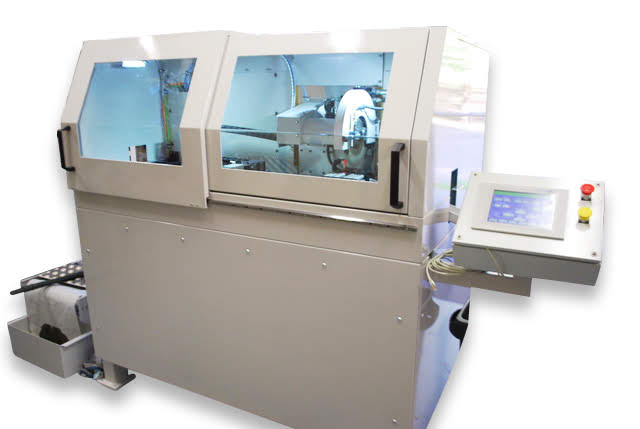
The diamond or cbn blades does the cutting but the cutting machine is what drives and controls the blade, The results will only be as good as both the blade and cutting machine being used. This is why selecting the right cutting machine for your application is crucial to achieving optimal results. While the diamond or CBN blade is responsible for the actual cutting, the cutting machine drives and controls the blade, ensuring that the process is efficient, precise, and suited to the material and task at hand. The wide range of available cutting equipment, from simple handheld rotary tools to sophisticated CNC-controlled cutting machines, reflects the diverse needs of various applications.
For basic cutting tasks, especially those involving softer materials or simple, straightforward cuts, a handheld rotary machine might be sufficient. These tools are versatile, portable, and relatively easy to use, making them ideal for smaller projects or situations where flexibility is needed. However, their manual operation can limit precision and consistency, particularly when dealing with harder materials or more intricate cuts.

In contrast, automated or CNC-controlled cutting equipment offers a higher level of precision and control, making it the preferred choice for complex or high-volume applications. These machines can be programmed to execute precise cuts with minimal human intervention, ensuring consistent results across multiple pieces. This is particularly beneficial in industries such as manufacturing, where accuracy and repeatability are critical. CNC machines also excel in handling harder materials, where precise control over speed, feed rate, and blade positioning is necessary to avoid damaging the blade or the material.
Different applications also demand different types of cutting machines. For instance, in the semiconductor industry, where tiny, precise cuts are required, specialized equipment designed for wafer dicing is essential. These machines offer the fine control needed to work with delicate materials at a micro level. On the other hand, construction and stone cutting applications typically require robust, heavy-duty machines capable of handling large, hard materials. These machines are designed to operate with high power and durability, ensuring they can withstand the rigors of cutting dense substances like concrete, stone, or asphalt.
The environment in which the machine will be used also plays a role in determining the right equipment. For fieldwork or situations where mobility is essential, portable cutting machines are necessary. These machines are designed to be easily transported and operated in various locations, offering flexibility without sacrificing too much in terms of power or precision. Conversely, in a controlled, industrial setting, larger, stationary machines may be more appropriate, offering greater stability, power, and precision.
Different Cutting Machine Features:
|
Feature |
Description |
|---|---|
|
RPM Range |
Range of revolutions per minute the machine supports |
|
Horsepower (HP) |
Power output of the machine’s motor |
|
Cutting Accuracy |
Precision of cuts, typically measured in microns |
|
Repeatability |
Ability to produce the same results consistently |
|
Holding Fixtures |
Tools or mechanisms to secure material in place |
|
Cutting Depth |
Maximum depth the machine can cut in one pass |
|
Coolant System |
Mechanism for applying coolant to the blade/material |
|
Feed Rate Control |
Adjustable speed at which material is fed into the blade |
|
Cutting Axes (X, Y, Z) |
Number and direction of axes along which the machine can cut |
|
Max and Min Blade Diameter |
Range of blade sizes the machine can accommodate |
|
Automation Level |
Degree of automation (CNC, semi-automatic, manual) |
|
Angle of Cut |
Ability to adjust or fix the cutting angle |
|
Blade Mounting Stability |
How securely the blade is held during operation |
|
Power Source |
Type of power used (electric, pneumatic, hydraulic) |
|
Material Compatibility |
Types of materials the machine can effectively cut |
|
Variable Speed Control |
Ability to adjust blade speed based on material |
|
Blade Compatibility |
Types of blades the machine can use (diamond, CBN, etc.) |
|
Dust Collection System |
Mechanism to capture debris during cutting |
|
Portability |
Ease of moving or transporting the machine |
|
User Interface and Control Panel Design |
Complexity and usability of controls |
|
Emergency Stop Mechanism |
Quick-access stop feature for safety |
|
Overload Protection |
System to prevent overloading the machine |
|
Noise Level |
Amount of noise the machine produces during operation |
|
Blade Change Mechanism |
Ease and method of changing the blade |
|
Vibration Control and Damping |
Features to minimize vibration for precision cuts |
|
Lubrication System |
System to keep moving parts lubricated during operation |
|
Construction Materials |
Materials used in the machine's construction (e.g., steel frame) |
|
Floor Space Requirements |
Physical space needed to operate the machine |
|
Maintenance Accessibility |
Ease of performing routine maintenance |
|
Environmental Controls |
Adaptations for specific environments (e.g., cleanroom) |
|
Weight and Size |
Overall dimensions and weight of the machine |
|
Software Integration |
Compatibility with software for CNC machines |
|
Safety Features |
Additional protective measures like guards and shields |
Ultimately, the choice of cutting machine should be guided by the specific requirements of your application, including the material being cut, the desired precision, the volume of work, and the operating environment. By selecting the right machine, you can ensure that your diamond or CBN blade performs at its best, delivering high-quality cuts efficiently and reliably. Investing in the appropriate equipment not only enhances the cutting process but also extends the life of your blades, reducing costs and improving overall productivity.
Before Starting To Cut
Ensure that the arrow on the cutting wheel aligns with the direction of the shaft rotation. Proper alignment is crucial for achieving the best performance and maximizing the life of the blade. When the blade rotates in the intended direction, it cuts more efficiently, with less strain on both the blade and the machine. This alignment also helps prevent premature wear and potential damage to the blade, which can occur if it’s mounted incorrectly.
Before starting any cutting operation, it’s important to let the blade run for a few seconds without load. This brief spin-up allows you to check for any issues that might not be visible during a visual inspection. If you notice the blade wobbling, hear unusual noises, or feel excessive vibrations, stop the tool immediately. These signs could indicate that the blade is damaged, improperly mounted, or that there is an issue with the machine itself.
Inspect the blade carefully if any of these issues occur. Look for cracks, chips, or other signs of damage that could compromise the blade’s integrity. Additionally, check that the blade is mounted correctly on the shaft, ensuring that it is seated properly and securely tightened. Incorrect mounting can lead to misalignment, which not only reduces cutting performance but can also pose serious safety risks.
Furthermore, it's essential to verify that the blade is compatible with the machine and the material you intend to cut. Using a blade that is not suited for the material can result in poor performance, excessive wear, and potential damage to both the blade and the workpiece. Always use blades designed for the specific material you are working with, whether it’s metal, stone, or another substance.

Before beginning the cutting process, also make sure that the machine’s speed settings are appropriate for the blade type and material. Running the blade at the wrong speed can cause overheating, increased wear, and reduced cutting efficiency. Refer to the manufacturer’s guidelines for recommended RPM settings for the specific blade and material combination.
In addition to checking the blade, take a moment to inspect the cutting machine itself. Ensure that all components, such as the blade guard, motor, and handles, are in good working condition. Proper maintenance of the cutting tool is just as important as the blade alignment and condition, contributing to overall safety and cutting performance.
By taking these precautions—ensuring proper blade alignment, running the cutting machine without load, and thoroughly inspecting both the blade and the tool—you can avoid common problems and ensure that your cutting operations are safe, efficient, and effective.
Mounting the Blade
When mounting a diamond blade, it’s essential to take careful steps to ensure the blade is securely and accurately positioned, as this directly impacts the cutting performance and safety. Begin by inspecting all components involved in the mounting process, including the flanges, back plates, and spindle. These parts must be clean and free of any debris, burrs, or imperfections that could affect the blade’s stability. Even a small amount of residue or a minor burr can cause the blade to wobble or run out of true, leading to poor cutting performance and potential damage to the blade or machine.
Once the components are clean and ready, mount the blade onto the spindle. Use an indicator to check that the blade is running true within .005 inches of rotation. This precision is critical for ensuring smooth, accurate cuts and preventing uneven wear on the blade. To achieve this, gently tap the blade with a wood block while monitoring the indicator. This technique helps to adjust the blade’s position on the spindle, ensuring it is perfectly aligned.
After achieving the correct alignment, tighten the flanges securely to hold the blade in place. It’s important not to over-tighten, as excessive pressure can warp the blade or damage the flanges. Once tightened, recheck the blade with the indicator to confirm it remains within the .005-inch tolerance. This final check ensures that the blade is correctly mounted and ready for operation.
Where possible, consider using a permanent mounting system for the blade. Permanent mounts offer additional stability and reduce the need for frequent adjustments, which can save time and enhance precision in repetitive cutting tasks. However, this approach is most practical when the blade will be used consistently for the same type of cutting operation.
Additionally, it’s crucial to inspect the machine’s shaft before mounting the blade. Check the shaft for any signs of looseness or wear, as these can indicate worn bearings or damage to the shaft itself. A loose or worn shaft can cause the blade to fit improperly, leading to vibration, inaccurate cuts, and potential safety hazards. The blade should fit snugly on the shaft, with no play or movement once it is mounted.
Also, ensure that the blade is compatible with the machine’s specifications, including the shaft diameter and the machine’s speed range. Using a blade that doesn’t fit correctly or is not rated for the machine’s RPMs can result in poor performance or even blade failure. If the blade does not fit snugly, do not attempt to force it into place, as this can damage both the blade and the machine.
Lastly, consider the environment in which the blade is mounted. Temperature fluctuations, humidity, and exposure to dust or debris can affect the mounting process. Ensure that the mounting area is clean and well-lit to allow for careful inspection and precise adjustments.

Starting to Cut
Before beginning any cutting operation, it’s crucial to start the machine and allow it to run for a few seconds without engaging the material. This brief, unloaded operation gives you the chance to listen carefully for any unusual sounds, such as vibrations, wobbling, or grinding noises, which could indicate issues with the blade mounting or other machine components. These irregularities are warning signs that something may be wrong, and the machine should be stopped immediately for inspection. Check the blade and its mounting setup to ensure everything is securely in place and properly aligned before proceeding.
Once the machine is running smoothly and no irregularities are detected, you can gradually bring the blade into contact with the material. It’s important to avoid applying excessive pressure during this initial engagement. The blade should do the work, cutting through the material with minimal force from the operator. Starting with a light touch allows the blade to establish a cutting groove, which is essential for preventing chipping and ensuring a clean, controlled start to the cut. As the blade moves through the material, continue to listen for any changes in sound. Grinding, squealing, or vibrations during cutting could be signs that the blade is worn, misaligned, or encountering resistance that it shouldn’t. These auditory cues are critical for diagnosing potential issues before they cause significant problems.
If you suspect that the blade may be worn or not performing as it should, it’s a good idea to perform a test cut on a piece of scrap material. This test cut will allow you to evaluate the quality of the cut, looking for smoothness, accuracy, and the overall effort required to make the cut. A well-maintained blade should cut through the material cleanly and without excessive resistance. If the blade struggles, produces uneven cuts, or requires more effort than usual, it’s likely time to inspect and possibly replace the blade. Regularly monitoring these aspects of your cutting process helps maintain high-quality work and prevents unnecessary wear and tear on your equipment.

Speed (RPM’s)
RPMs refer to "revolutions per minute," which is the number of times the blade completes a full rotation around its axis in one minute. RPM is a critical factor in cutting operations because it directly affects the blade's cutting speed, efficiency, and the quality of the cut. To extend blade life and minimize damage, it is essential to operate blades at the correct RPMs and ensure the diamonds remain exposed through regular dressing. Most diamond and CBN blades should be run within the range of 3,150 to 5,000 surface feet per minute. For soft, abrasive materials, a higher RPM is recommended, while for hard, dense materials, a lower RPM is advisable. In dicing operations, RPMs can range between 8,000 and 30,000.
Running blades at the optimal RPM ensures that the cutting process is efficient and reduces the chances of overheating, which can lead to blade deformation and a decrease in performance. Additionally, maintaining the proper RPM helps to produce a cleaner cut, reducing the need for post-processing and saving time and resources.
Regular dressing of the blade is crucial to keep the diamonds exposed. Over time, the cutting edges can become glazed over with material debris, which reduces the blade's cutting efficiency. Dressing removes this buildup, exposing fresh diamond edges and maintaining the blade's cutting ability. This process should be part of routine maintenance to ensure consistent performance and longevity of the blade.
Blade diameter directly impacts the optimal RPM. Larger diameter blades require lower RPMs to maintain the same surface speed as smaller blades. This helps prevent excessive heat generation and ensures effective cutting. It's crucial to follow manufacturer recommendations for RPM settings based on blade size to achieve the best results.


The hardness of the material being cut significantly affects the ideal RPM. Harder materials, such as advanced ceramics or hardened steels, generally require lower RPMs to avoid excessive wear on the blade and reduce the risk of chipping or cracking. Softer materials can typically be cut at higher RPMs, allowing for faster cutting speeds and increased efficiency.
Different cutting machines have varying capabilities in terms of RPM ranges. Ensuring that the machine's RPM settings are compatible with the recommended RPMs for the blade and material is essential. Overdriving the blade beyond the machine’s capabilities can lead to poor performance and potential equipment damage.
The kerf thickness, or the width of the cut made by the blade, can influence the optimal RPM. Thicker kerfs create more resistance during cutting, which might necessitate lower RPMs to maintain control and precision. Conversely, thinner kerfs can often be cut at higher RPMs, enabling faster processing times.
The correlation between RPMs and feed rate is critical. High RPMs paired with an inappropriate feed rate can lead to overheating and blade damage. Conversely, low RPMs with a too slow feed rate can cause inefficient cutting and excessive wear. Balancing these two factors based on the material and blade characteristics ensures smooth and effective cutting.
The surface finish of the material being cut is also affected by RPM settings. Higher RPMs can produce smoother finishes on softer materials but may cause rough finishes on harder materials due to increased vibration and heat. Adjusting RPMs to achieve the desired surface quality is important for specific applications.
Modern cutting machines often feature RPM monitoring and control systems. These systems can automatically adjust RPMs based on the load and feedback from the cutting process, ensuring optimal performance. Utilizing such technology can enhance precision and reduce manual adjustments.
Effective cooling and lubrication are vital at higher RPMs to dissipate heat and remove debris. Ensuring that the coolant flow matches the RPMs can prevent overheating and extend blade life. Lower RPMs might require less intensive cooling, but maintaining adequate lubrication remains important.
Different RPM settings can lead to various blade wear patterns. High RPMs might cause faster wear and more frequent need for dressing, especially with harder materials. Monitoring these patterns and adjusting RPMs accordingly can optimize blade usage and reduce costs.
Speed and feed rates are crucial for optimal cutting performance, prolonging blade life, and preventing material damage.
Recommended RPM ranges for different materials:
|
Material Type |
Example Materials |
Recommended RPM Range |
|---|---|---|
|
Advanced Ceramics |
Si3N4, Al2O3, ZrO2 |
2,000 - 6,000 |
|
Metals and Alloys |
Stainless Steel, Titanium, Aluminum, Superalloys |
3,000 - 10,000 |
|
Glass and Optics |
Borosilicate Glass, Quartz, Optical Glass |
2,500 - 6,500 |
|
Composites |
Carbon Fiber, Fiberglass, Kevlar |
3,000 - 8,000 |
|
Semiconductors |
Silicon Wafers, Gallium Arsenide, Germanium |
2,000 - 6,000 |
|
Lapidary and Stone |
Granite, Marble, Gemstones |
1,800 - 4,500 |
|
Construction Materials |
Concrete, Asphalt, Masonry |
2,000 - 5,000 |
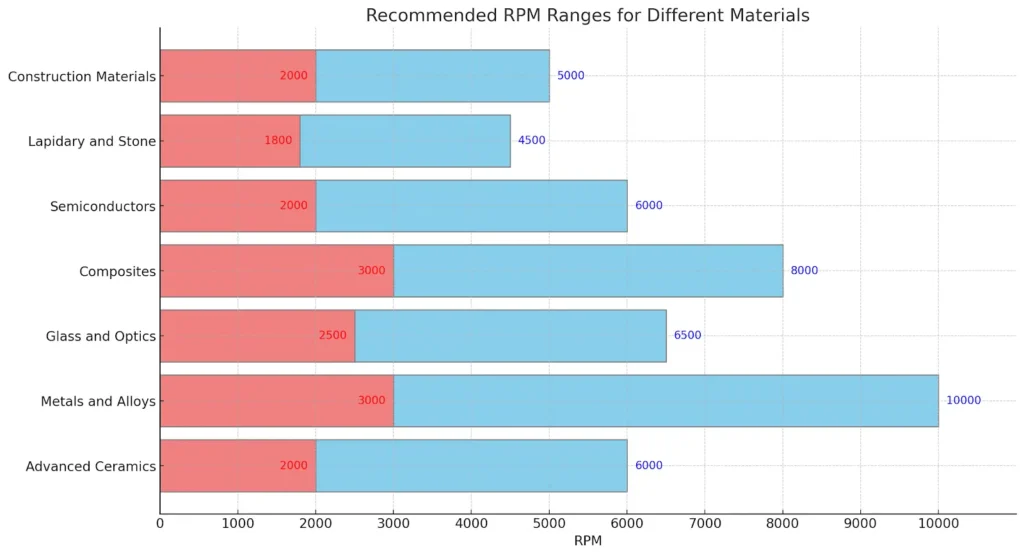
For different materials, the recommended RPMs vary. Advanced ceramics like Silicon Nitride (Si3N4), Alumina (Al2O3), and Zirconia (ZrO2) typically require RPMs between 2,000 and 6,000. Due to their high hardness and brittleness, lower RPMs help prevent cracking and chipping. Metals and alloys, including stainless steel, titanium, aluminum, and superalloys, generally need higher RPMs, ranging from 3,000 to 10,000. Effective cooling systems are essential to manage the heat generated during cutting.
Glass and optics materials, such as borosilicate glass, quartz, and optical glass, should be cut at RPMs between 2,500 and 6,500. These materials' fragility and precision requirements necessitate moderate RPMs to avoid microfractures. For composites like carbon fiber, fiberglass, and Kevlar, the recommended RPM range is 3,000 to 8,000. Given the variability in material composition, a balanced approach to RPMs is necessary to prevent delamination. Semiconductor materials, including silicon wafers, gallium arsenide, and germanium, require precision cutting with RPMs between 2,000 and 6,000 to ensure clean cuts without damaging the wafers.
Lapidary and stone materials such as granite, marble, and gemstones are best cut at RPMs ranging from 1,800 to 4,500. These dense and hard materials need lower RPMs to manage cutting stress and prevent blade wear. Construction materials, including concrete, asphalt, and masonry, typically need RPMs between 2,000 and 5,000. The rough and abrasive nature of these materials demands robust blades and moderate RPMs to avoid rapid wear.
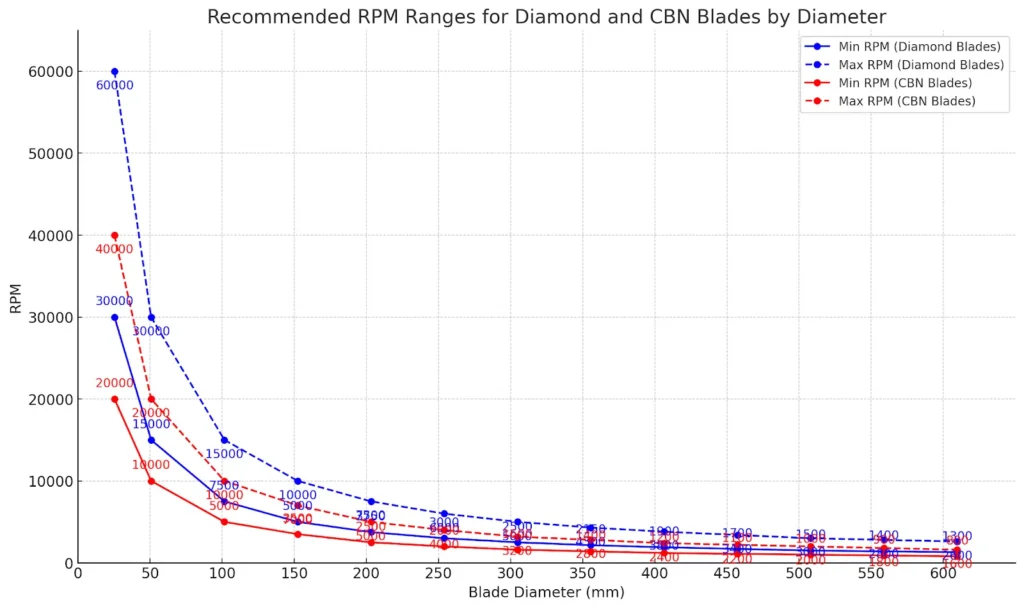
Several factors influence RPM selection. Larger blade diameters require lower RPMs to maintain safe and effective cutting speeds. While smaller diameter blades should be run at higher rpm’s
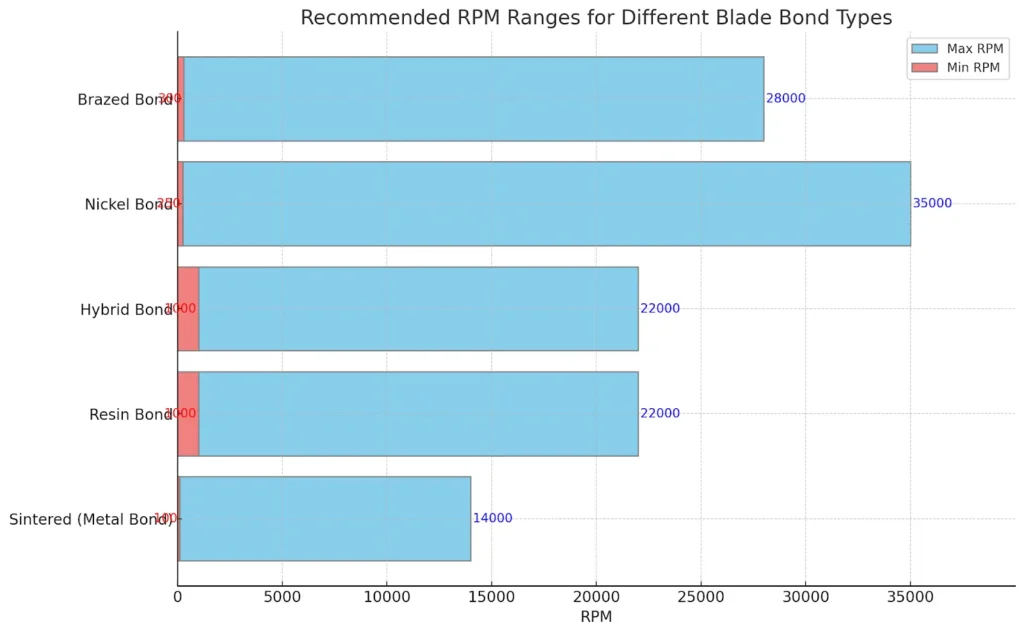
blade bond type plays a crucial role in determining the appropriate RPM settings. Understanding the properties of each bond type and how they interact with different materials is essential for optimizing blade performance, enhancing cut quality, and extending the lifespan of the blade. By carefully adjusting RPMs to match the bond type, users can achieve more efficient and cost-effective cutting operations.
|
Bond Type |
Min RPM |
Max RPM |
|---|---|---|
|
Sintered (Metal Bond) |
100 |
14,000 |
|
Resin Bond |
1,000 |
22,000 |
|
Hybrid Bond |
1,000 |
22,000 |
|
Nickel Bond |
250 |
35,000 |
|
Brazed Bond |
300 |
28,000 |
Adjusting RPM settings based on bond type is important for several reasons:
-
Heat Management: Different bond types react differently to heat. Softer bonds, like resin, may degrade faster at high temperatures, while harder bonds, like metal, can withstand more heat but require lower RPMs to manage stress.
-
Cutting Efficiency: The right RPM ensures that the blade cuts efficiently. Too low an RPM can cause the blade to wear unevenly or clog, while too high an RPM can lead to overheating and premature wear.
-
Material Compatibility: The bond type must be compatible with the material being cut. Softer bonds are better for softer materials, allowing for higher RPMs to speed up the process. Harder bonds are needed for harder materials to ensure a precise and controlled cut at lower RPMs.
-
Blade Life: Proper RPM settings based on bond type extend the blade's life. By preventing overheating and excessive wear, the blade can maintain its cutting performance over a longer period, reducing the need for frequent replacements and lowering overall costs.
Material thickness is another consideration, as thicker materials may necessitate lower RPMs for even cutting. The desired cut quality can dictate more conservative RPM settings, particularly for precision and finish requirements.
In addition to matching RPMs with the material, it is crucial to consider the cutting machine type, blade diameter, kerf thickness, bond type, diamond grit size, concentration, and the client’s desired objectives of cut quality, surface finish, cutting speed, and blade life. Each of these factors can significantly impact the performance and efficiency of the cutting process.
Diamond or cbn grit size is important; coarser grits (larger particles) are suitable for rapid, rough cutting of hard materials, resulting in a faster cutting speed. Finer grits (smaller particles) are ideal for precision cutting and achieving smoother finishes, but they cut more slowly.
Diamond concentration, the volume of diamond in the blade, also affects cutting speed. Higher concentrations provide more cutting points, enhancing efficiency and allowing for faster cutting of hard materials. Lower concentrations are better for softer materials and support quicker cutting, but may not be as efficient on harder materials.
Desired cut quality and surface finish also influence cutting speed. For high precision cuts and smooth finishes, slower cutting speeds with fine grit sizes and high diamond concentrations are necessary. For general-purpose cuts where the surface finish is less critical, coarser grits and lower concentrations can be used at higher cutting speeds. To optimize speed and feed rates, regular machine calibration is essential to maintain consistent RPMs. Monitoring blade condition through regular inspections and dressing is crucial for maintaining cutting efficiency. Using appropriate coolants helps manage heat and prolong blade life. Adjustments to RPM settings should be made based on specific material characteristics and cutting conditions.


Factors that Influence Diamond & CBN Blade RPM’s
|
FACTOR |
LOW RPMS |
HIGH RPMS |
|---|---|---|
|
Blade Outside Diameter (OD) |
Larger blades require lower RPMs to avoid excessive heat. |
Smaller blades can operate at higher RPMs for faster cutting. |
|
Material Hardness |
Harder materials need lower RPMs to prevent blade damage and ensure precision. |
Softer materials can handle higher RPMs to clear debris and maintain smooth cutting. |
|
Material Density |
Denser materials need slower speeds to prevent excessive wear and ensure consistent cutting. |
Less dense materials can be cut at higher speeds for quicker processing. |
|
Abrasiveness |
Not specifically impacted, but higher RPMs can wear down the blade faster. |
Softer, abrasive materials benefit from higher RPMs to clear debris and reduce clogging. |
|
Effects on Blade |
Faster blade wear due to larger portion of material removal by each diamond particle. |
Increased blade longevity as each diamond particle removes smaller portions of material. |
|
Cutting Action |
Softer wafering/sectioning action, better control over cut quality. |
Harder cutting action, faster material removal but potentially less control. |
|
Applications |
Harder, denser materials needing precision and minimal chipping. |
Softer, abrasive materials where rapid removal is beneficial. |
|
General Guidelines |
Decrease RPMs for hard, dense materials. |
Increase RPMs for soft, abrasive materials. |
|
Equipment Specifications |
Ensure equipment can handle lower RPMs for larger blades and harder materials. |
Ensure equipment can achieve higher RPMs for smaller blades and softer materials. |
|
Monitoring and Adjustment |
Regularly monitor and adjust RPMs to maintain cut quality and control wear. |
Use variable speed controls to fine-tune RPM settings dynamically. |
Feed Rate & Pressure
Feed rate refers to the speed at which the material is fed into the blade during the cutting process, measured in units like inches per minute (IPM) or millimeters per second (mm/s). Proper adjustment of the feed rate, along with the RPM (revolutions per minute) of the blade, is essential to prevent overheating, excessive blade wear, and poor cut quality, ensuring optimal cutting performance.
Selecting the right feed rate is crucial for achieving optimal cutting performance and ensuring the quality of the cut. The feed rate must be carefully matched with the RPM to avoid issues like overheating, blade damage, and poor cut quality.
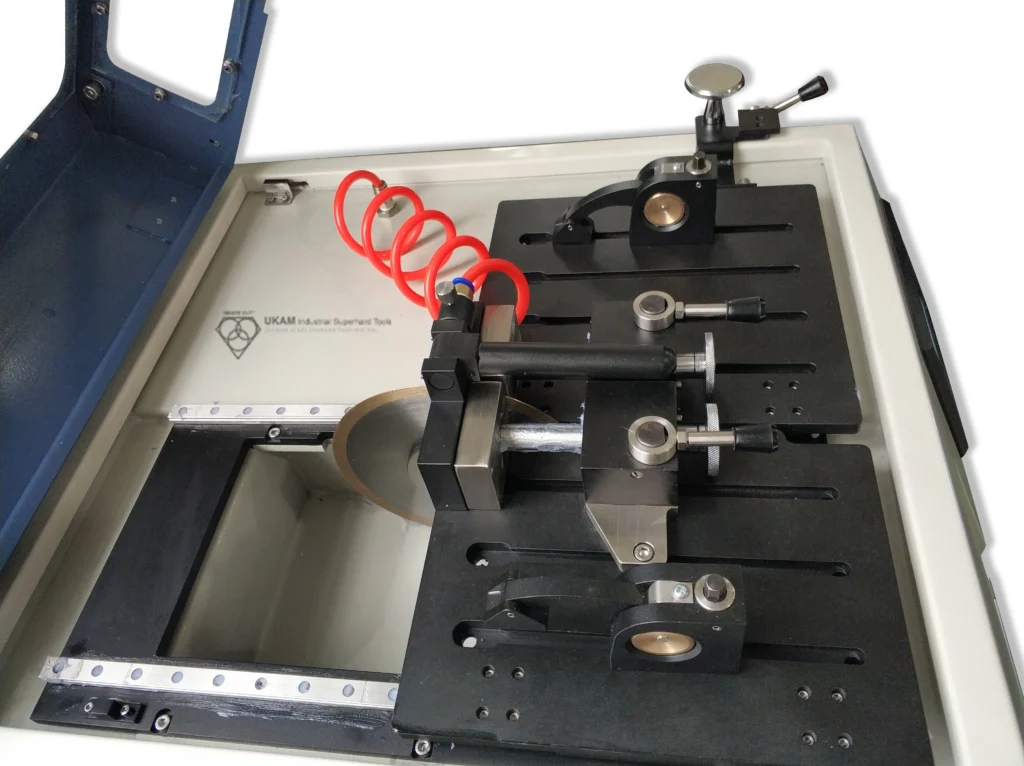
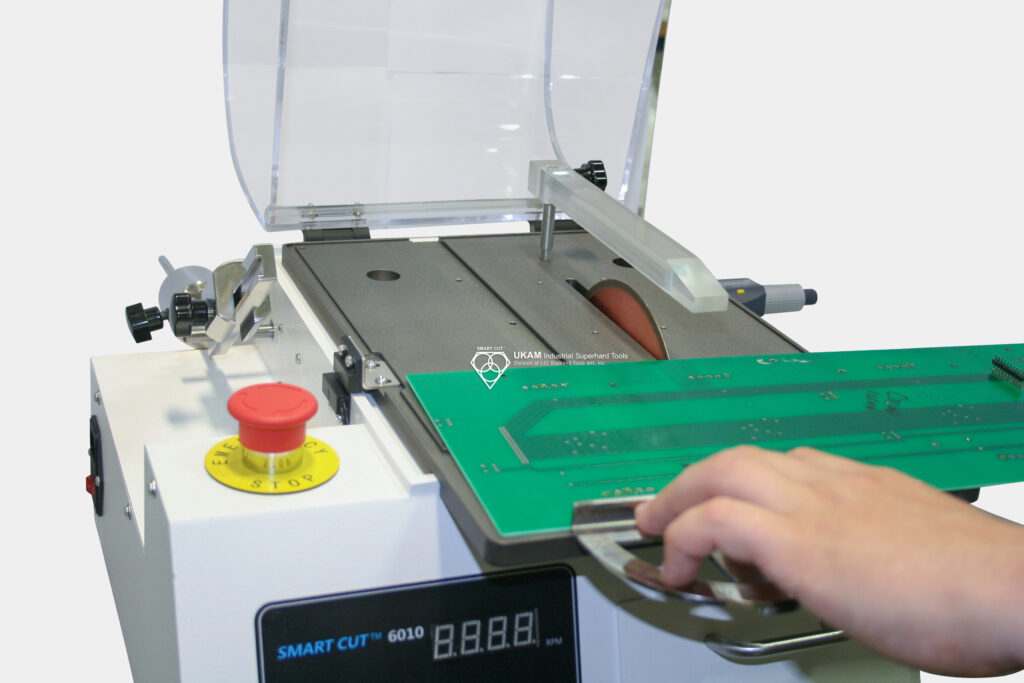
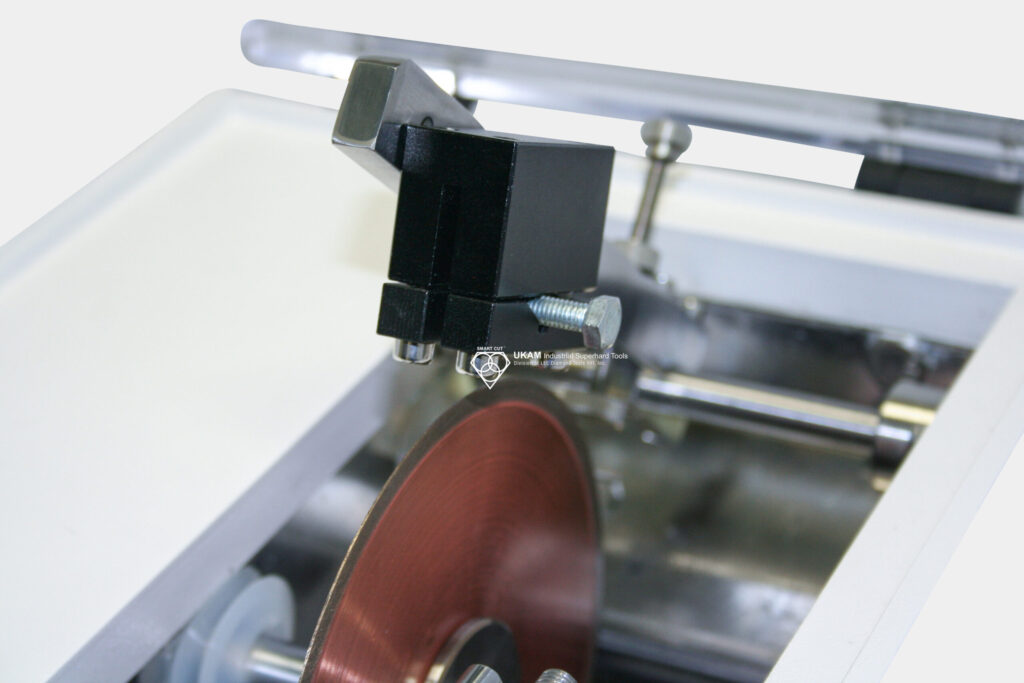
When using diamond & cbn blades, apply light to medium pressure. Gradually feed the blade into the material until it begins to cut at its own speed. Increasing pressure on the blade will not reduce the time to complete the job but will cause the blade to overload and overheat, leading to blade damage and unwanted material cracks. Dark burn marks around the diamond section indicate that the cutting speed is too fast or that too much pressure is being applied. As the cut nears completion, reduce pressure on the blade to minimize chipping. Never force a diamond blade; excessive pressure can cause bending or dishing, and the feed rate should never be so great that the blade slows down.
Monitor the blade during operation and listen for any unusual sounds. If you notice vibrations, strange noises, or decreased cutting performance, stop immediately and inspect the blade for damage. When cutting materials with embedded crystals like geodes, proceed slowly and carefully to avoid damaging the blade or the crystals. Use a continuous and steady feed rate to maintain a smooth and uniform surface, avoiding rapid or jerky movements that can lead to uneven cuts.
Material hardness and type play a significant role in determining the feed rate. Harder materials generally require slower feed rates to prevent excessive blade wear and achieve a smooth cut. Softer materials can be fed more quickly, allowing for faster cutting operations. The blade's composition, grit size, and bond type also influence the optimal feed rate, with finer grits and harder bonds typically requiring slower feed rates to maintain cut quality and blade integrity.
The capabilities of the cutting machine must also be considered. Modern machines often have adjustable feed rates, allowing for precise control based on the material and blade being used. Desired cut quality is another important factor; applications requiring a high-quality surface finish often necessitate a slower feed rate to ensure a smoother cut with minimal chipping. Conversely, for rough cuts where surface finish is not critical, a faster feed rate can be used to increase productivity.
The thickness and geometry of the material affect the feed rate as well. Thicker materials require slower feed rates to ensure the blade can cut through without overheating or excessive wear. Complex geometries or intricate cuts may need slower feed rates to maintain precision and avoid blade damage. The condition of the blade impacts the optimal feed rate; a well-maintained blade can handle higher feed rates, while a worn or damaged blade may require slower feed rates to function effectively.
Adequate cooling and lubrication are essential when determining the feed rate. Proper coolant flow helps manage heat and remove debris, allowing for higher feed rates without risking blade or material damage. Optimal feed rates can be determined through a combination of manufacturer guidelines, empirical testing, and adjustments based on specific cutting conditions.
Start with the feed rate recommendations provided by the blade and cutting machine manufacturers, as these guidelines are based on extensive testing and provide a solid baseline for various materials and applications. Conduct test cuts on sample materials to observe how the blade and material respond at different feed rates, adjusting incrementally to find the optimal balance between speed and cut quality. Pay attention to feedback from the blade and material during cutting. Signs of overheating, excessive wear, or poor cut quality indicate the need for feed rate adjustments. Be prepared to adjust the feed rate based on specific cutting conditions, such as changes in material properties, blade condition, or environmental factors. Flexibility in feed rate adjustment ensures consistent performance and quality.
Modern cutting machines often feature automated feed rate control systems that adjust the feed rate in real-time based on load and cutting conditions. Utilizing these technologies can enhance precision and efficiency. Optimal feed rates should be determined in the context of the entire cutting process, including RPM, cooling, and blade maintenance. A holistic approach ensures that all factors work together to achieve the best results.
Factors that Influence Diamond & CBN Blade Feed Rate & Pressure
|
ASPECT |
LIGHT TO MEDIUM LOAD/FEED RATE |
HEAVY LOAD/FEED RATE |
|---|---|---|
|
Desired Cut Quality |
Higher precision and better surface finish, minimal material deformation |
Potentially lower precision, risk of material deformation |
|
Material Hardness |
Suitable for harder materials to avoid excessive wear and damage to the blade |
Risky for harder materials, may cause blade damage |
|
Material Density |
Ideal for denser materials to ensure a controlled and consistent cut |
Can cause inconsistent cuts and potential blade deformation |
|
Material Geometry and Thickness |
Better for thicker materials, prevents blade bending and warping |
Can cause issues with thicker materials, including blade warping and bending |
|
Typical Load Range |
10 to 1,000 grams, adjusted based on material and desired cut quality |
Higher than recommended can lead to blade wear and material damage |
|
Initial Pressure |
Light to medium pressure, gradually increasing until the blade cuts at its own speed |
Immediate high pressure can stress the blade and material, leading to potential damage |
|
Signs of Excessive Pressure |
Few or no burn marks, blade maintains consistent speed |
Dark “burn” marks, blade slows down, indicating too fast cutting or excessive pressure |
|
Blade Performance |
Consistent blade speed, gradual feed rate |
Slowing blade speed, risk of blade bending or warping |
|
Completion of Cut |
Reduce pressure as the cut nears completion to avoid chipping and preserve material integrity |
High pressure throughout can cause chipping and compromise material integrity |
|
Avoiding Blade Deformation |
Gradual feed rate and appropriate load prevent blade bending and warping |
High load/feed rate can lead to blade bending, warping, and reduced blade life |
|
Avoiding Material Damage |
Minimizes risk of burning, smearing, cracks, and deformation |
High risk of burning, smearing, cracks, and deformation |
|
Practical Guidelines |
Start with light to medium pressure, monitor and adjust dynamically, reduce pressure near completion |
Avoid high initial pressure, monitor for signs of excessive pressure, adjust to maintain blade performance |

Blade Cooling & Lubrication
Using coolant is essential for cooling and lubricating the blade during cutting. The most frequent cause of diamond blade damage is cutting without sufficient coolant. A generous flow of coolant increases diamond & cbn blade efficiency, improves surface finish, and reduces heat build-up, preventing material cracks and deformation associated with overheating. Water is the most commonly used coolant, providing excellent performance at minimal cost. It must be applied correctly to ensure effective cooling of the blade and material. Direct the coolant flow to the point of contact between the blade and material, aligning with the blade's rotation. The amount of coolant should increase with the hardness of the material being cut. If you see sparks, there is insufficient coolant reaching the cutting zone, or it is simply ineffective. Never run a diamond blade dry, as severe damage will result. Coolants perform three essential functions: cooling the blade and material, cleaning out abrasive particles, and providing lubrication to keep the cutting edge clean.
When cutting harder materials such as granite, agate, quartz, porcelain, or very hard materials like sapphire and alumina, it is crucial to use plenty of coolant. Determine the type of coolant you plan to use. If using water, check with the blade manufacturer for the recommended type. City water with 90 psi or running water is usually sufficient. For some applications, an additive may be beneficial. In such cases, use a circulating system and ensure the correct ratio between the additive and coolant.
Using coolant is critical to cool and lubricate the blade effectively. Proper coolant supply minimizes chipping and maintains consistent cut quality. Coolant serves multiple functions: cooling the blade and material, providing lubrication to minimize friction, and removing powder residue and swarf. A generous flow of coolant improves blade efficiency, surface finish, and reduces heat build-up and material deformation. Ensure coolant is directed at the point of contact between the blade and material, facing the blade's rotation. Increase coolant flow with harder materials. If you see sparks, there is insufficient coolant.
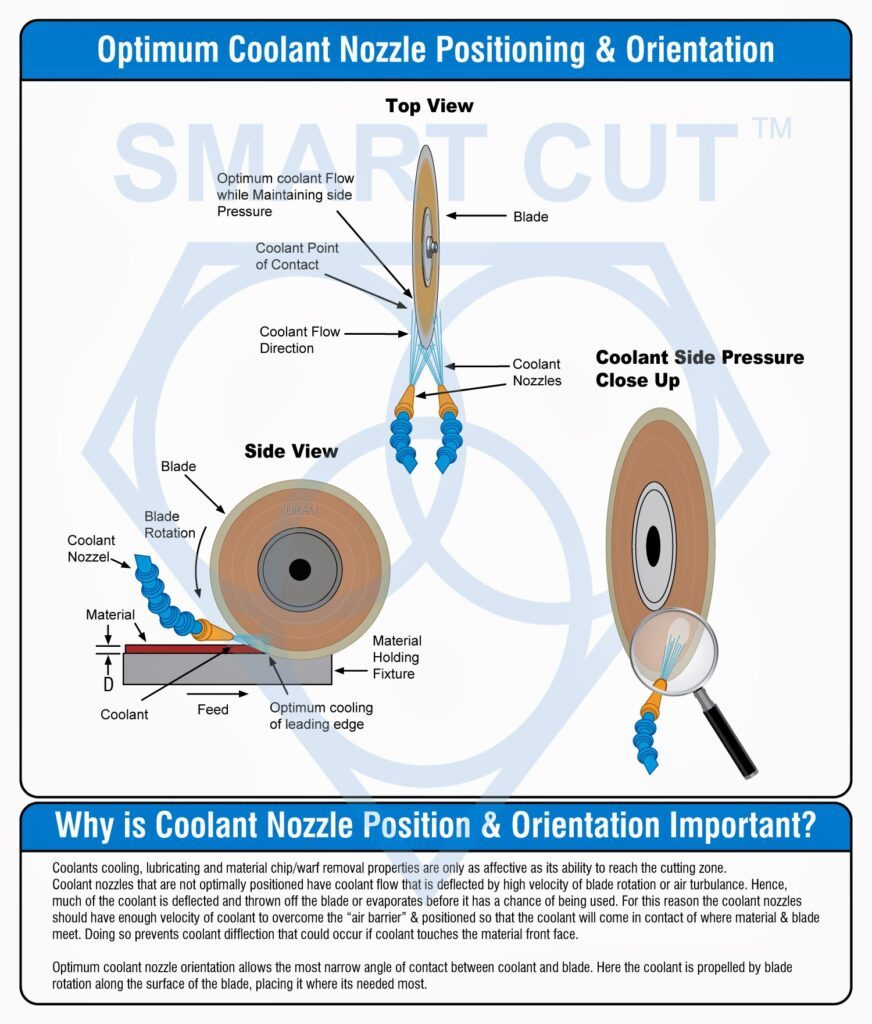
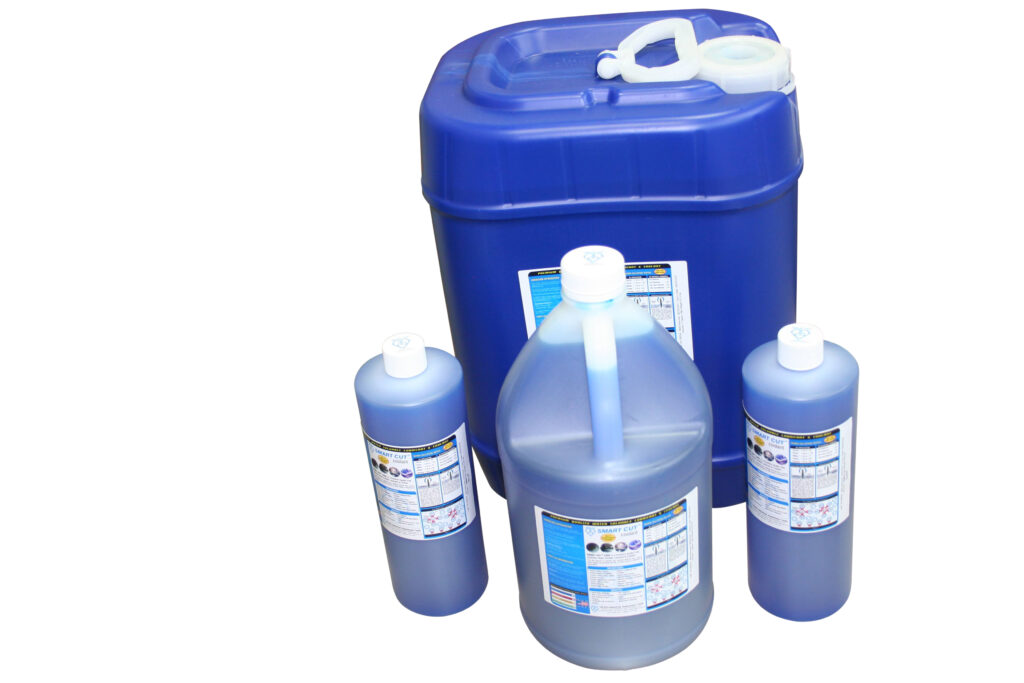
Common coolants include water-soluble options and mineral oil. Mineral oil is typically used for hard metals, while water-soluble coolants are preferred for other materials. Plain water evaporates at 212°F, but temperatures in the cutting zone can reach 500°F, causing water to evaporate before effectively cooling. This results in shorter blade life and material damage. Water-soluble coolants reduce thermal stress, edge damage, and internal cracking, acting as both coolant and lubricant. They prevent the sample from sticking to the blade, improving cut quality and minimizing deformation.

Plain water is not recommended for sectioning operations. If using water, check with the blade manufacturer for recommendations. City water at 90 psi or running water is commonly used. For some applications, additives can enhance performance, requiring a circulating system and proper ratio.
Coolant Supply to Cutting Zone
However when cutting ultra hard & brittle materials the coolant flow direction and position will play a major role in determining blade life and performance.
Dual nozzle configuration is best suited to supply adequate amount of coolant at point of contact between blade and material. This type of coolant delivery configuration provides many advantages over other coolant supply methods to cutting zone. Coolant should be pointed at blade point of contact and leading edge of blade. The dual nozzle system provides two separate streams of coolant into cutting zone at angle of cutting edge of the blade. Each stream will cool one side of the blade. The nozzles should be as close as possible to the point where the blade
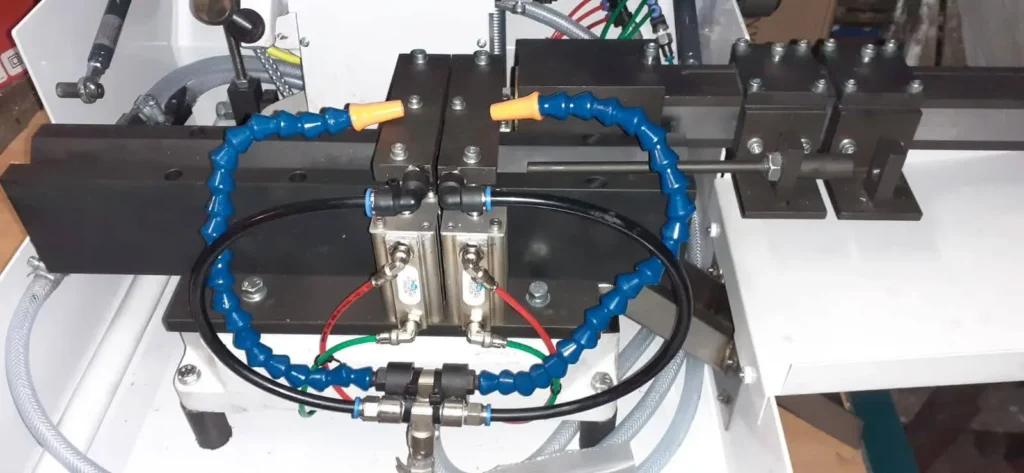

enters the material. Coolant flow should blast with high velocity into the kerf to improve removing debris. Wide kerfs an premature blade water is a result of improper coolant amount or flow applied at cutting zone. By correctly position the coolant stream in front of the blade, the coolant will flow on top of the material. In addition, coolant will be drawn into the kef
When cutting softer material/ direction of cutting is not of ultimate importance. However, when cutting hard and brittle materials that are hard to cut, this quiet different. The blade should enter into the material “cutting down”. As the blade penetrates the surface of the material, chips removed by diamond particles become smaller the deeper the blade penetrates. This cutting direction is most optimal to provide best cut quality and minimize material deformation.
Coolant Maintenance & Optimization
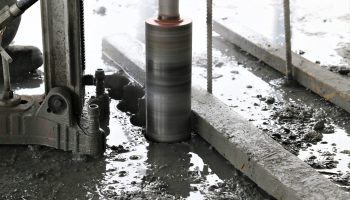
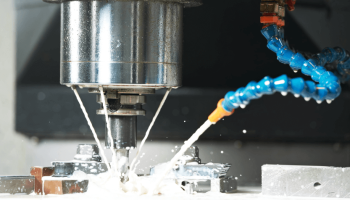
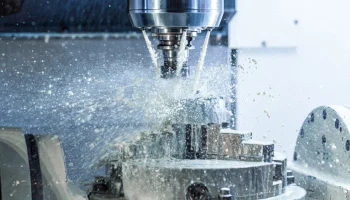
Coolant is one of the most overlooked variables in the cutting process. Effective and proper use of coolant and recalculating coolant system will pay off in terms of improved surface finish quality, increased blade life and more consistent cutting results. Coolant does more than just cool the blade and material, it other more important roles include: lubrication, flush away swarf particles.
For most affective use of coolant the quality of water being used, coolant concentration, and maintenance of the coolant tank makes a difference. Different geographic areas have different water harnesses. Water containing less than six grains of dissolved minerals per gallon is considered soft water, water containing more then seventeen grains per gallon is considered hard. The best coolant water to use in a coolant system is chemically pure water, which is free of all dissolved solids.
Chemically pure water and reverse osmosis. Reverse osmosis is the method most recommended by coolant manufacturers, however not always available. Deionized water offers much improvement over available city water.

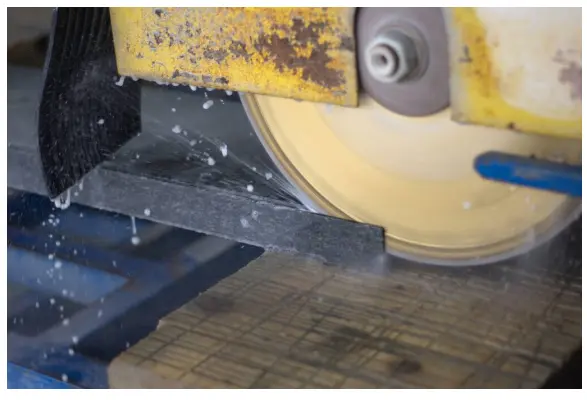
Water in the tank can evaporate and remaining water can become harder. Hard water affects coolant capabilities in many ways decreased capability to the rust inhibitor, increased foaming, formation of a sticky residue, and increased bacteria counts. Coolant concentration should be controlled and maintained to ensure that the coolant is being used at optimum efficiency. Too little coolant in the tank will lead to corrosion and rancidity, while too high of a concentration can also cause foaming.
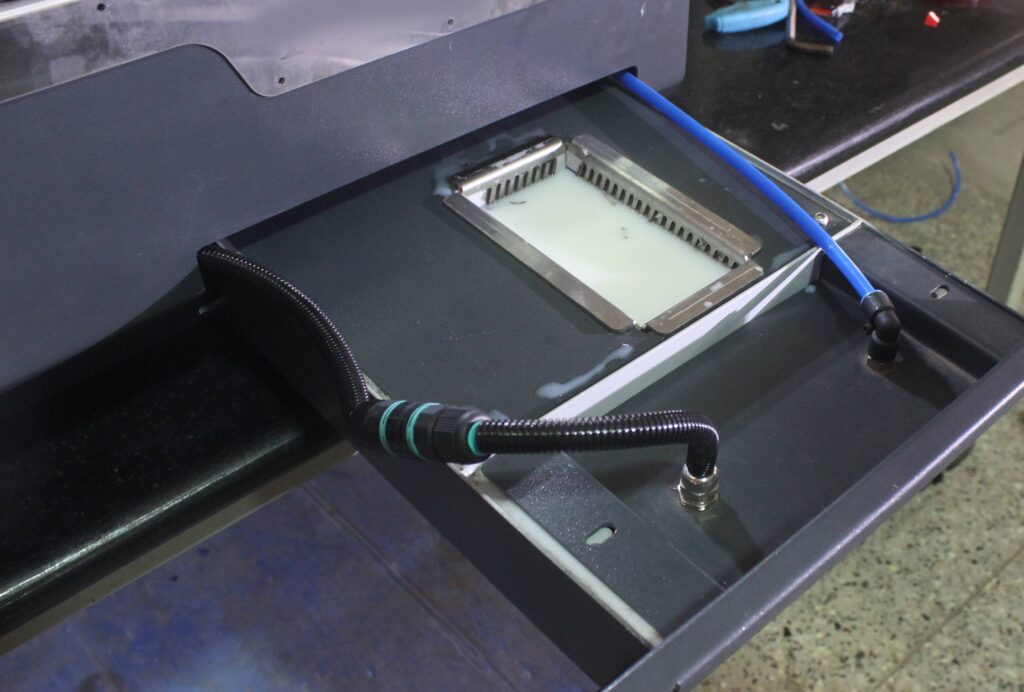
Maintenance of the re-circulating tank is also critical to coolant performance. Cleaning he tank is a dirty job, but if done often enough and thoroughly, it can increase the performance of your sectioning saw. Keeping he coolant tank clean will ensure that you are getting the most form your coolant, keeping corrosion and bacterial growth a bay while providing the necessary coolant, lubrication and protection of your blades and material.
Recirculating Coolant Systems
Recirculating systems in the past have been used in many manufacturing and laboratory environments. Today the increasing variety of work and materials this overlooked aspect and requirement for many applications.
Recalculating coolant systems, require filtering to remove the swarf particles created during cutting process. These coolants systems typically use either cartridge, centrifugal, or cascade. Which process to use will depend on your application. Excessive amount of swarf particles mixed in coolant will slow heat transfer of coolant and may cause surface damage to material being cut. Coolant system must be constantly controlled and monitored in order to insure process consistency.
Coolant temperature will also have an affect on blade life and cut quality. Typically coolant temperatures of 50 degrees F (10 degrees Celsius) will provide best results. White coolant temperatures above 80 degrees F (27 C) should be avoided. Refrigeration of the coolant system can be used with most coolant systems and will provide best results.
Diamond & CBN Blade Flanges
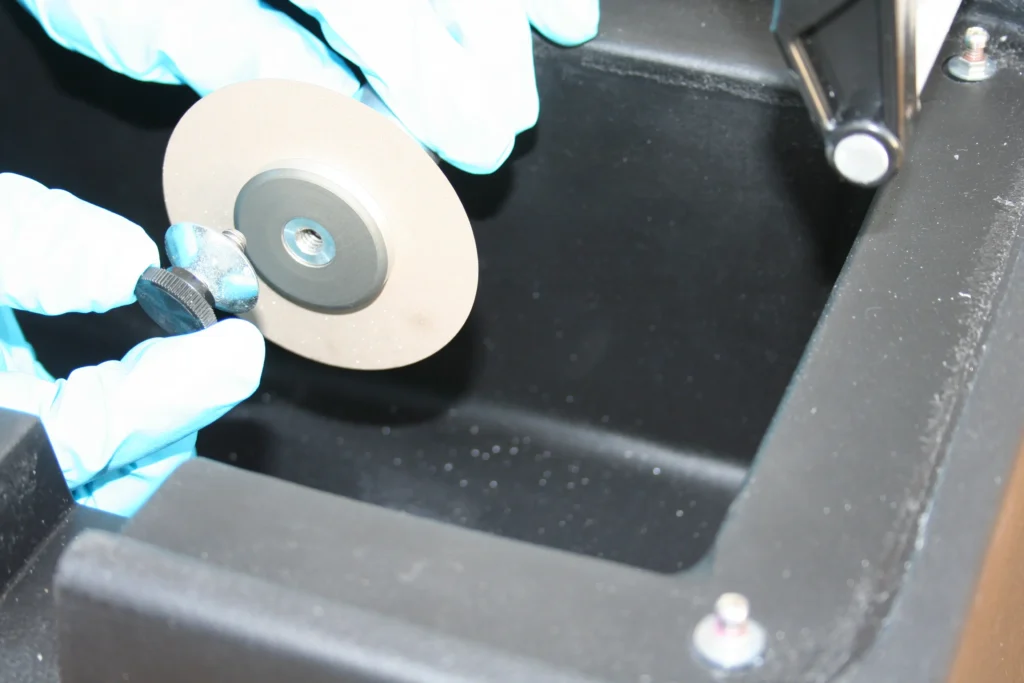
Proper blade mounting in a flange set in acceptable condition is key to any successful wafering/sectioning operation. Flanges are desined to add addition support and stability to both sides of the blade. Flanges prevent the wafering blade from warping, blade wreckage, slanting cuts, damage to material/sample and much more. Flange Diameter to use would be based on blade diameter and thickness used, material diameter/dimensions (desired exposure ration). Flange diameter affects directional stability of the diamond wafering blade. As a general rule of thumb, the largest possible flange diameter should always to be used.. Flanges shold provide sufficient clearence for sample so the cut may be completed without any interruption. For thinner and smaller diameter wafering blades, recommended flange size is ¾ of the Outside Diameter of the wafering blade.
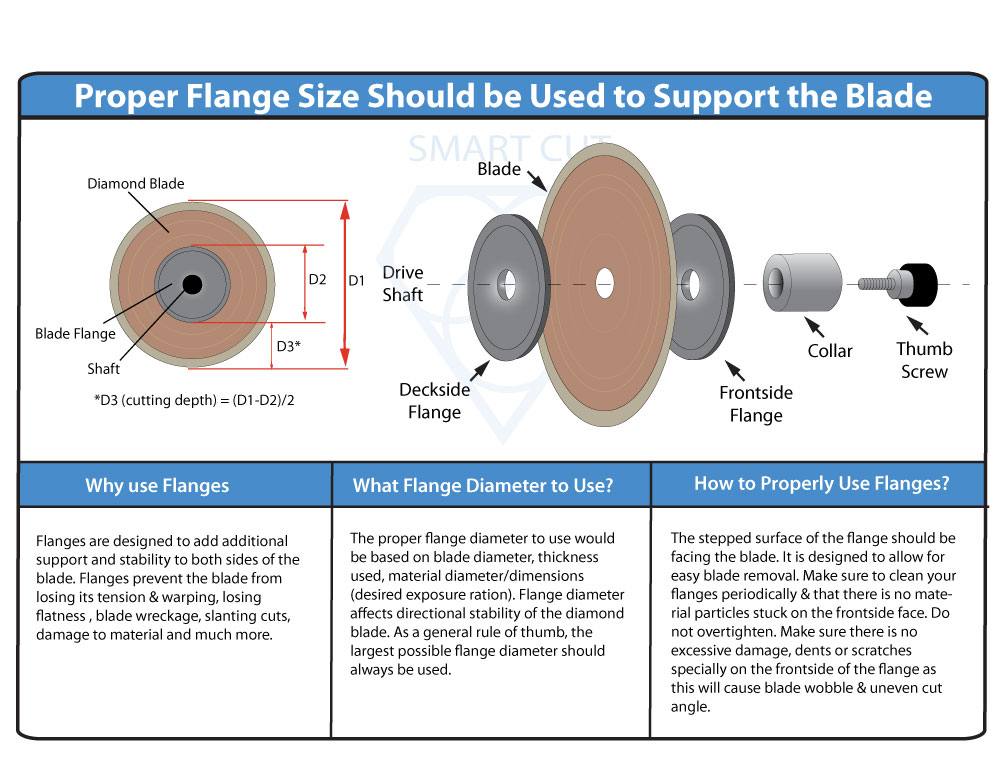
Often extending right up to the diamond section. For larger and thicker blades the recommended flange diameter is approximately 1/3 the diameter of the blade. Flanges must be free of rust and dirt. Your blade should turn perfectly true after flange nut is tightened. Carriage alignment must be accurate for deeper cuts to prevent blade bending.
Any small scratch or nick in flange edge can cause improper blade mounting. This can lead to slanted cuts, blades wobbling and wider cuts, more chipping, or even possible blade breakage.
Material Holding Methods
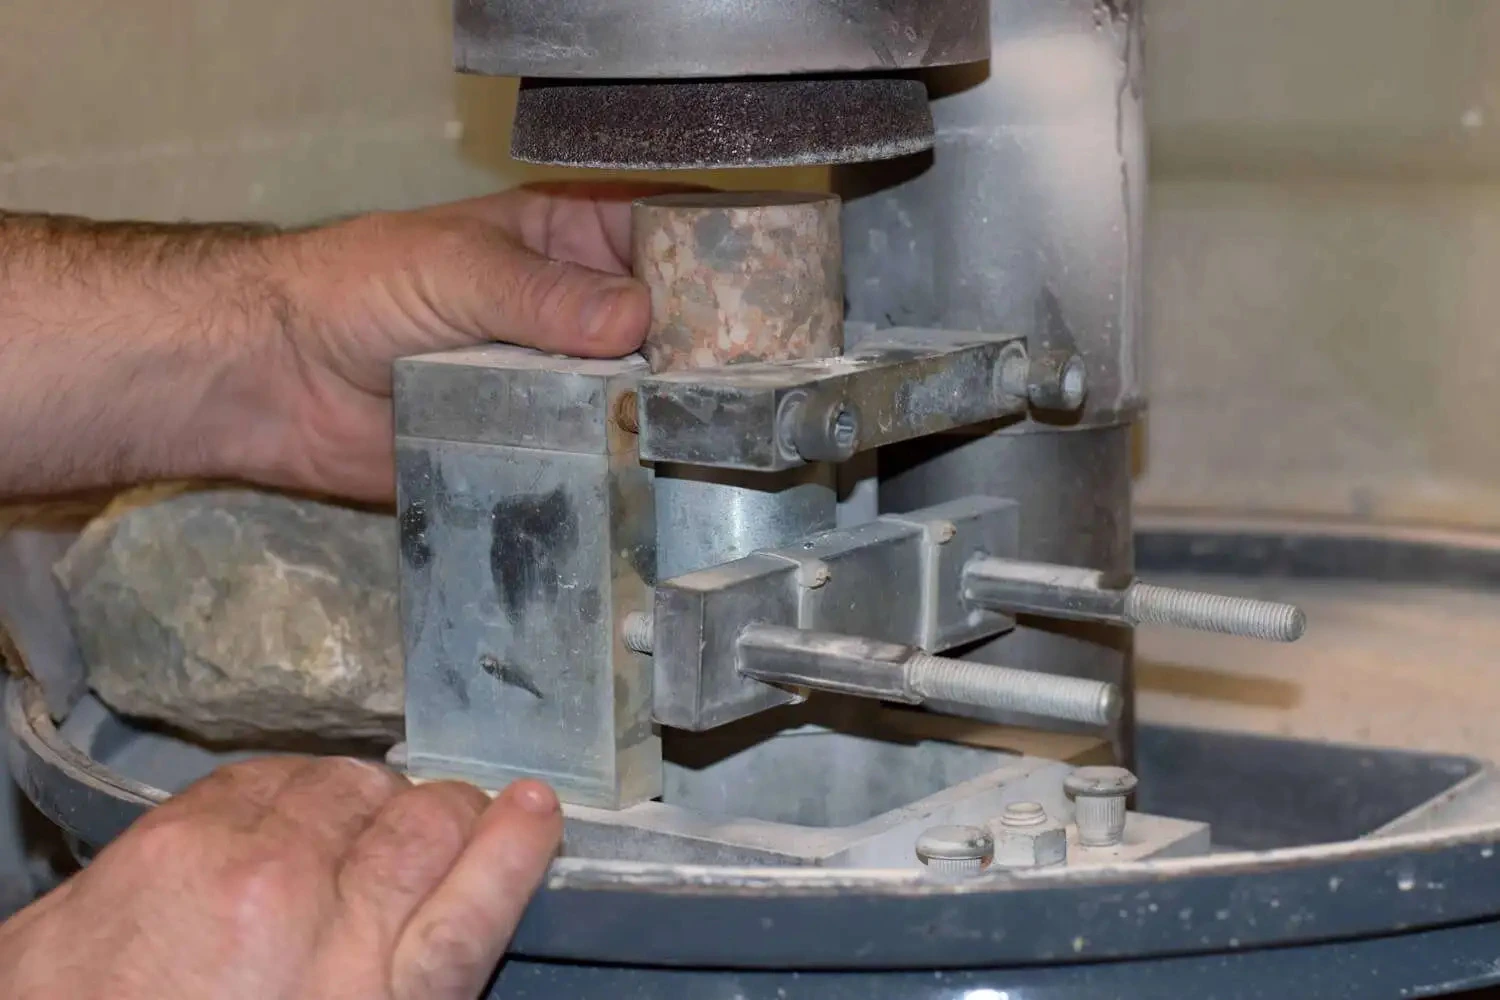
Properly securing your material is one of the most crucial steps in the cutting process. The primary function of the chuck or holding fixture is to keep the material firmly in place, preventing any movement during the cut. Movement during cutting can lead to significant issues, including damage to both the material and the blade. The diamond section of the blade, responsible for the cutting action, is particularly susceptible to breakage if the material shifts unexpectedly. This not only shortens the blade’s life but also compromises the cut quality, leading to increased chipping and uneven edges.
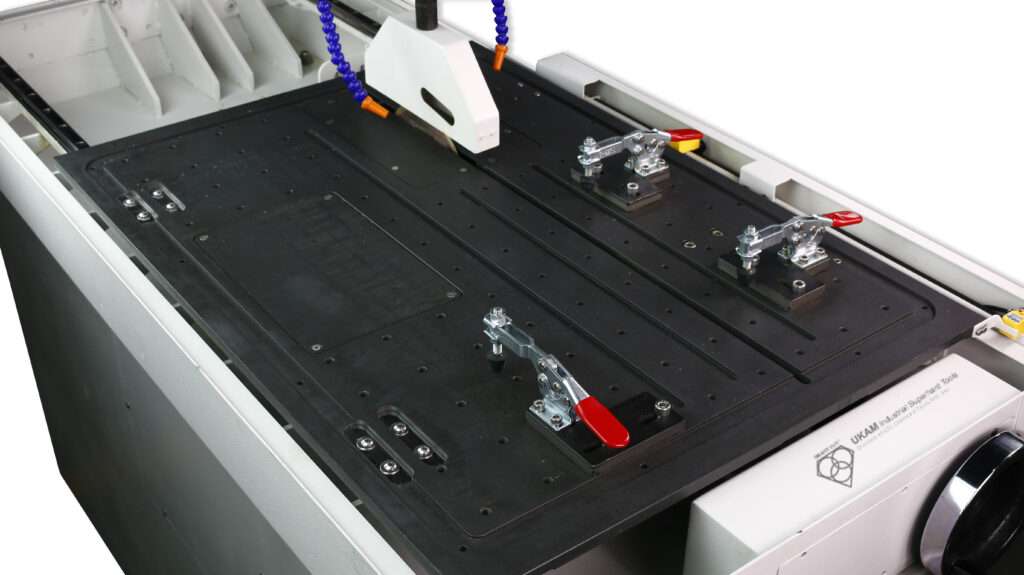
Various material holding methods such as vices, chucks and holding fixtures are available for a wide range of cutting machines to accommodate all types of material shapes and geometries. The choice of material holding fixture for your application will depend on the initial material dimensions, desired cut depth, and material properties such as hardness, brittleness, and shape or geometry.
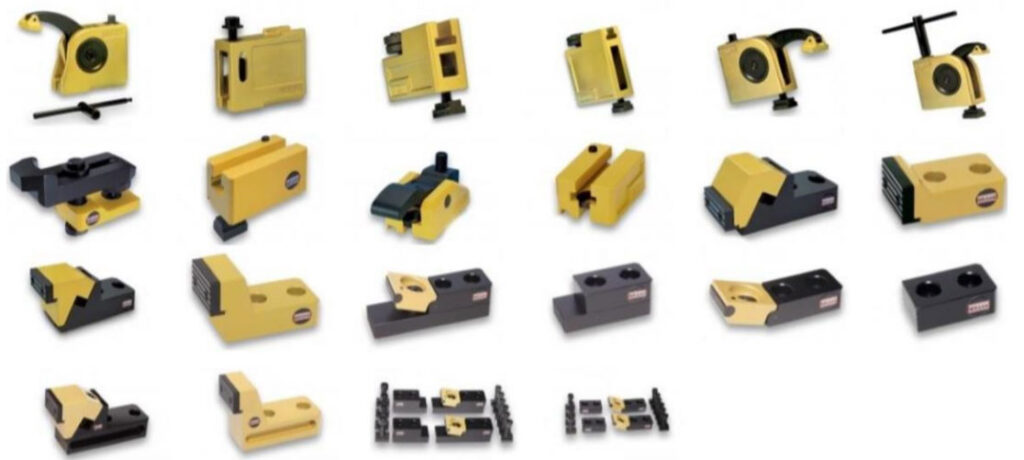
Securing your material while cutting is critical to achieving a clean, precise cut and ensuring safety during the process. When the material is not properly clamped down and held securely in place, it can shift or move as the blade makes contact. This movement can lead to several issues, including damage to the blade and the material. The diamond section of the blade, which is responsible for the cutting action, is particularly vulnerable to breakage if the material shifts unexpectedly. This not only shortens the life of the blade but can also result in poor cut quality, with increased chipping and uneven edges.
To prevent these problems, always use a material holding fixture or other securing device to hold the material firmly in place. Clamps are designed to apply even pressure across the material, keeping it stationary and aligned with the cutting path. This ensures that the material remains steady, allowing the blade to perform its job effectively and without interruption. Additionally, using a clamp minimizes the risk of personal injury. Attempting to hold the material with your hands while cutting is extremely dangerous. The force of the blade can easily cause the material to slip or move, leading to accidents or severe injuries. Moreover, holding the material by hand can result in inconsistent pressure, causing the material to chip or the blade to veer off course.
Proper material holding not only enhances safety but also contributes to the overall quality of the cut. When the material is securely held, the blade can cut smoothly and accurately, reducing the likelihood of chipping and producing a cleaner, more professional finish. In summary, always ensure that your material is securely clamped before beginning any cutting operation. This practice not only protects your tools and materials but also ensures your safety and the quality of your work.
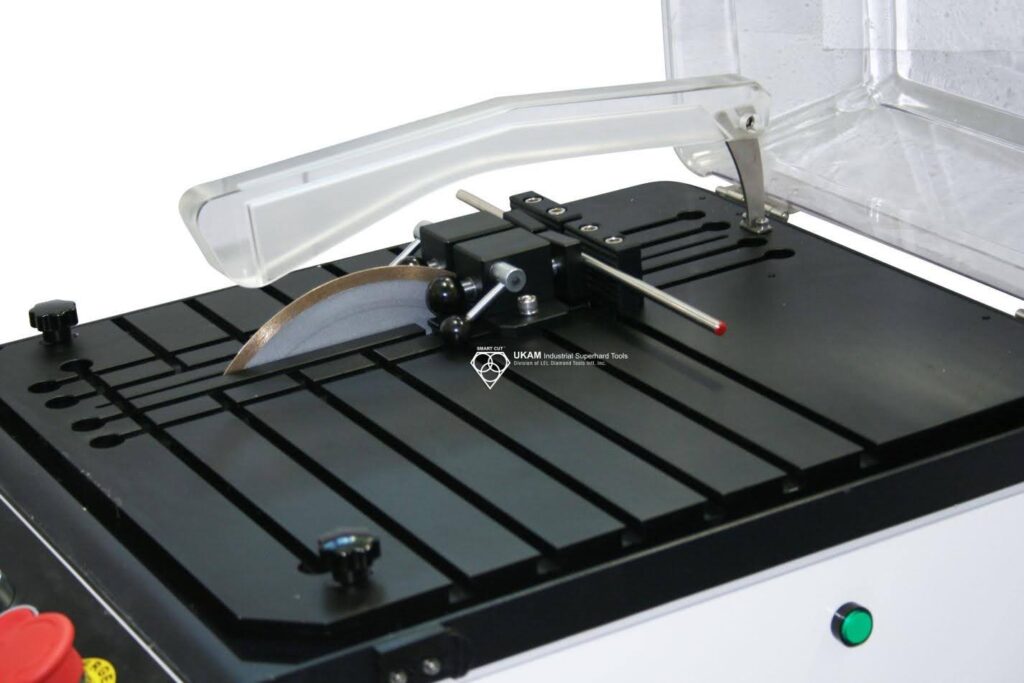
Using the correct chuck is crucial because improper clamping can lead to several issues. For instance, occasional chipping at the bottom of the cut can be a challenge. This problem arises when the back side of the material does not have firm support at the cutting area, creating a higher chipping rate when the blade exits the cut. Ensuring firm support throughout the material's length can help mitigate this issue.
The material must not move while being cut. Movement of material can damage the material or the blade. However, the material must also not be over-tightened. Over-tightening can damage the material holding fixture or the material itself. For example, brittle materials such as those in the glass and refractory families can fracture if over-tightened. On the other hand, harder and denser materials such as silicon carbide can cause dents in the material holding fixture if excessive force is applied. Dents or nicks in the chuck will affect subsequent material cut in the same fixture, causing damage and potential cracks.
The choice of chuck or holding fixture must account for the specific characteristics of the material. For irregularly shaped materials, custom fixtures might be necessary to ensure even clamping pressure and stability during cutting. For cylindrical samples, v-blocks or collet chucks can provide the necessary support and alignment. In addition to selecting the right material holding method, using proper padding and cushioning materials can help protect both the material and the chuck from damage. Padding materials such as rubber or foam can distribute clamping forces more evenly and reduce the risk of damage to brittle materials. This approach also helps to minimize the introduction of nicks and dents in the chuck, preserving its integrity and performance over time.
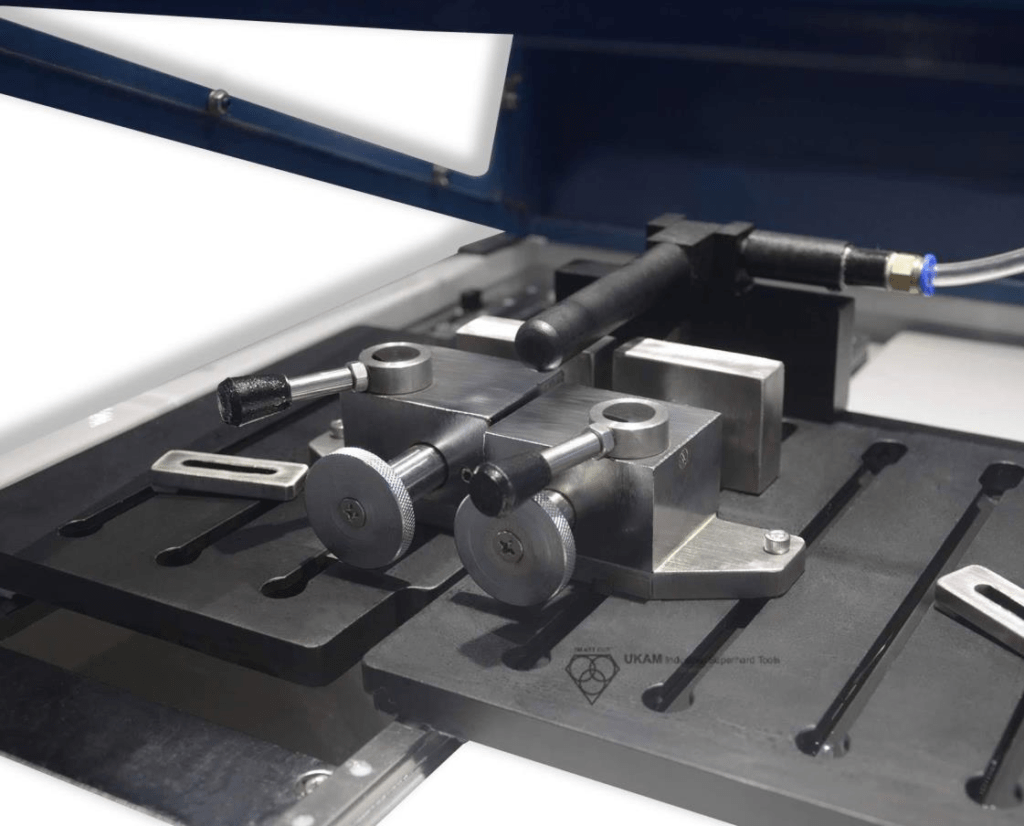
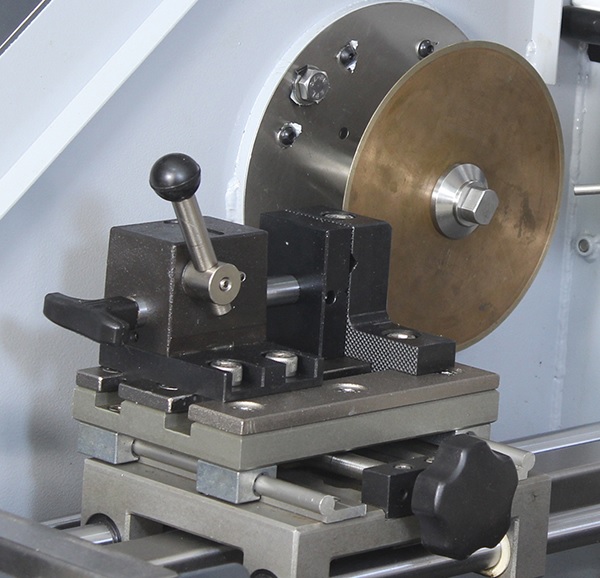
Effective clamping also involves considering the dynamics of the cutting process. During cutting, vibrations and forces exerted on the sample can cause movement if the clamping is not secure. Utilizing fixtures that can dampen vibrations or distribute forces more evenly can improve the stability of the material and enhance the quality of the cut.
Types of chucks / holding fixtures
The choice of chuck or holding fixture must account for the specific characteristics of the sample to ensure optimal clamping and cutting performance. Different materials and geometries require tailored approaches to secure them effectively during the cutting process. Additionally, different types of saws—low and high-speed saws, medium-speed sectioning/wafering saws, and metallographic abrasive cutters for larger diameters—require specific chucks designed for their operational characteristics.
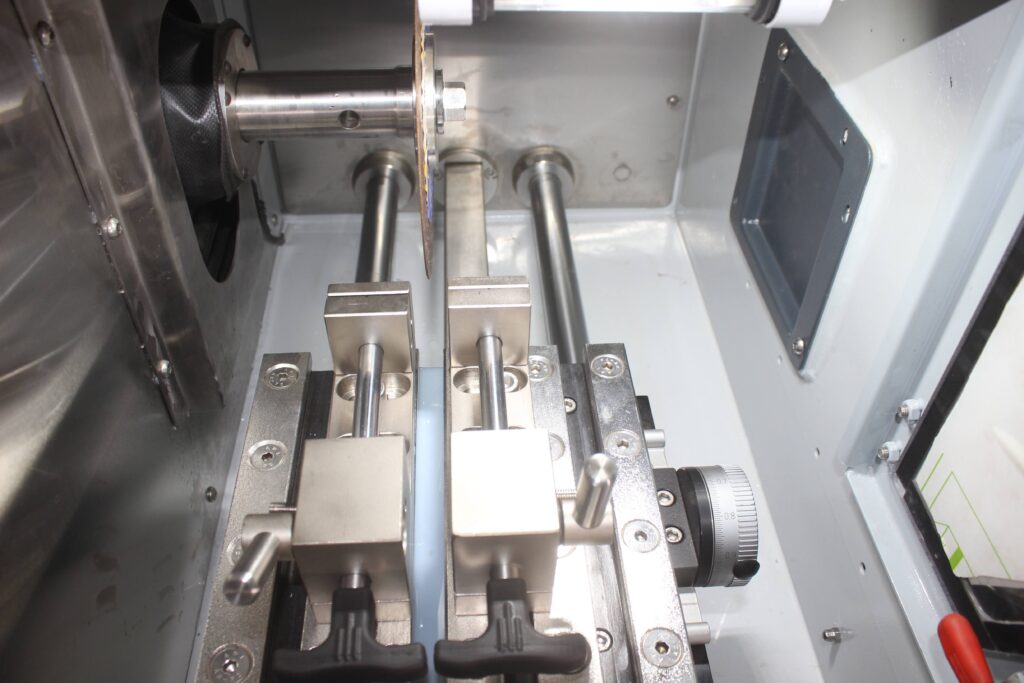
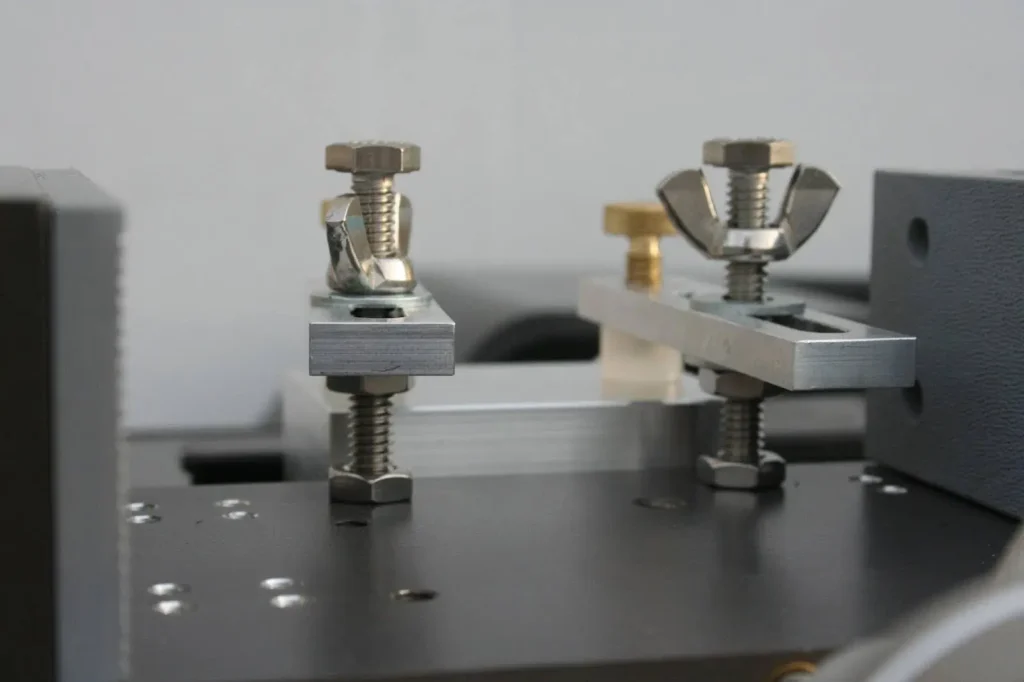
For irregularly shaped materials, standard chucks may not provide the necessary stability and even clamping pressure. Custom fixtures might be necessary in these cases to ensure the material is held securely without causing deformation or damage. Custom fixtures can be designed to match the unique contours and dimensions of the material, providing a more tailored fit that enhances stability during cutting. These fixtures often include adjustable components that can adapt to different sample sizes and shapes, offering flexibility and precision.
Dressing Diamond & CBN Cutting Blades
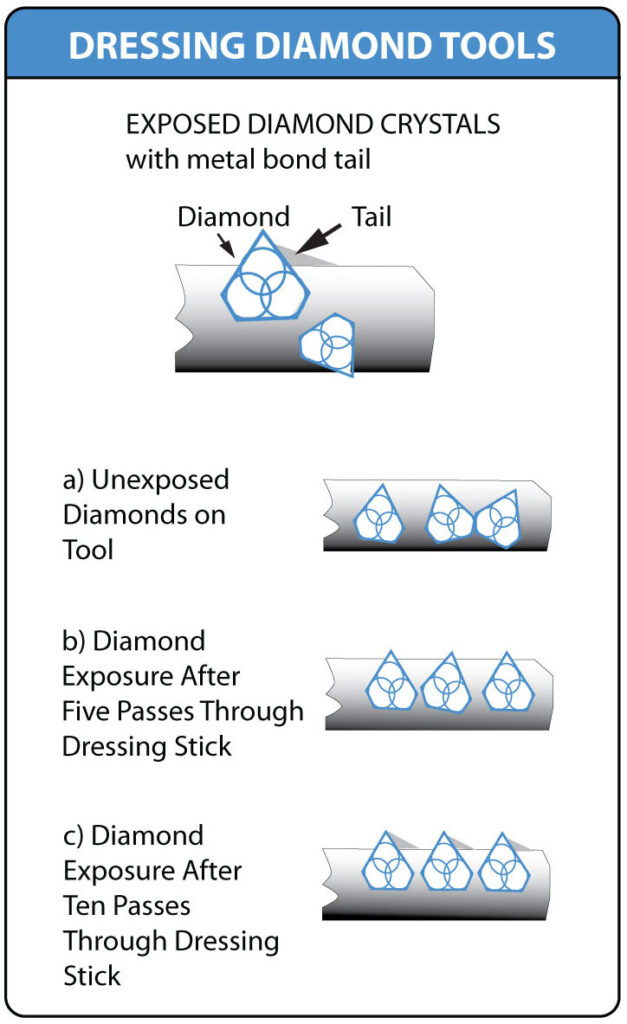
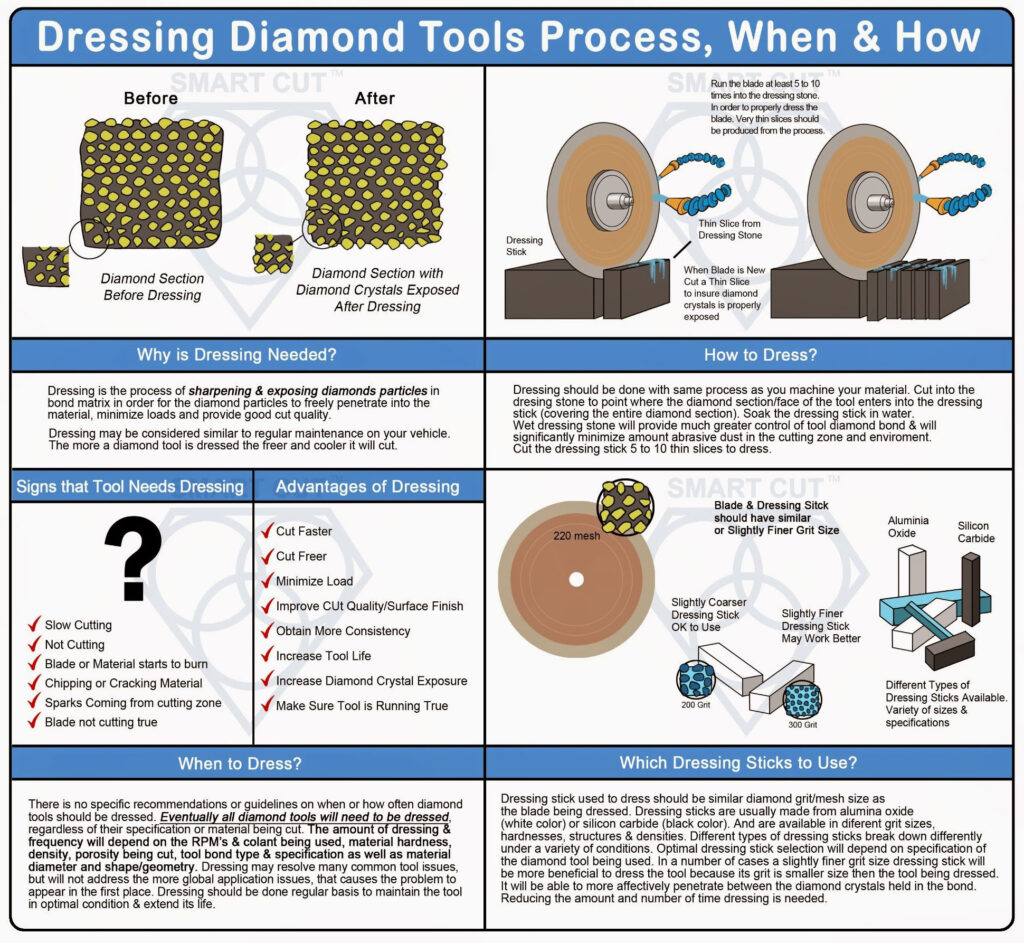
Diamond & cbn blades that are poorly dressed will tend to push the material, creating high loads, high cutting temperature/heat, and poor cut quality. This can also cause blade breakage. Resin bond diamond & cbn blades have a soft binder and in most cases will require minimum dressing, if any at all. Resin bond blades are typically dressed in the material being cut. This is why they are frequently called “self dressing blades”. Nickel bond and metal bond blades have a much harder binder and much more aggressive dressing is needed in order to achieve the above mentioned goals. Nickel bond wafering/sectioning blades require dressing. It is important for the diamonds to be well protruded and exposed in order to easily penetrate into the material.
Lorem ipsum dolor sit amet, consectetur adipiscing elit. Ut elit tellus, luctus nec ullamcorper mattis, pulvinar dapibus leo.

Recommended Dressing Process
Dressing procedures are established by the end user and based on experience and the application concerned. There is not one common method that applies to all applications.
Dressing stick used to dress the blade should be same or similar diamond grit/mesh size as the wafering blade being dressed. Many sectioning saws are equipped with automatic dressing chuck that allows the user at the push of a button to forward the dressing stock slowly into the rotating blade as it is sectioning a sample. This insures the blade is continuously dressed as it cuts through the sample. This process is highly recommended especially for cutting soft and gummy samples/materials such as plastic mounted resins that typically tend to smear or gum up the blade. For best results we recommend that the dressing stock used matches the dimensions of the sample as closely as possible.
When cutting ultra hard and dense materials such as silicon nitride, it is a good idea to implement a secondary dressing process. Dressing the blade before starting to cut the sample. Doing so will re-sharpen the diamond particles, so they are working at their maximum level of efficiency from the very beginning. This can be accomplished by making five cuts through the dressing stick, so that that the dressing stick covers the diamond section. Make sure coolant is turned on and working during this process.
There are no specific recommendations or guidelines on when or how often Diamond or CBN Blade should be dressed. The saw operator should use their best judgment in determining when and how to dress the blade being used. A good rule of thumb to remember: when you notice cutting rate/speed is significantly slower than when the blade was first used is a good sign the blade you are using needs to be dressed. Eventually all diamond or cbn blades will need to be dressed, regardless of the material being cut. The amount of dressing a blade will require will depend on the material hardness, density, porosity being cut, as well as material diameter and shape/geometry. Dressing will re-sharpen and re-expose the diamond crystals/particles in the blade bond matrix, as well as unload the blade from material debris covering the diamond section surface. When cutting very soft and gummy materials such as plastics and some epoxy filled composites, the blade will have to be dressed more frequently than when cutting ceramics and other ultra had and brittle materials.
At same time when cutting large diameter materials where the blade is taken almost to its maximum cutting capacity. For example cutting 1” (25.4mm) of material with 5” blade the blade should be dressed continuously during its operation. Dong so will help prevent “build up” edge on the blade and keep the blade from binding up.
Continuously dressing sintered (metal bond) and resin bond blades will not in any way reduce the life of the blade. Dressing is will most likely increase the life of the blade, avoid possible blade damage/wreckage, and optimize your sectioning operation.
Material Cutting Depth
When determining the best approach for cutting based on depth, material dimensions, and thickness, the choice between a single-pass cut or multiple-pass cuts is crucial for achieving optimal results.
A single-pass cut involves cutting through the entire thickness of the material in one continuous pass. This method is typically used for shallow cuts or thinner materials where the blade can easily penetrate without generating excessive heat or causing strain. Single-pass cutting is ideal for materials that are relatively thin, such as thin sheets, substrates or waters of glass, ceramics, or metal, and for softer materials that do not pose a significant challenge to the blade. It's also useful for quick jobs where speed is essential, provided the material does not resist too much.
However, when using a single-pass method, it's important to ensure that the coolant flow is adequate to manage heat, and the blade RPM and feed rate are set correctly to avoid chipping or cracking, especially with brittle materials. There is also a risk of blade deflection in single-pass cuts, particularly with thicker materials or if the blade lacks sufficient rigidity.
In contrast, a multiple-pass cut involves making several shallower cuts, gradually increasing the depth with each pass until the full depth is achieved. This method is generally preferred for deeper cuts or when working with thicker, harder, or more brittle materials. Multiple passes allow the blade to cool between each cut, reducing the strain and minimizing the risk of overheating, blade wear, and material damage.
This approach is particularly effective for cutting thick materials, which might otherwise cause excessive heat buildup and lead to blade failure in a single pass. It also works well with harder or denser materials like granite or quartz, where a single pass could result in a rough cut or blade damage. Brittle materials, such as glass or certain ceramics, benefit from multiple passes as this reduces the cutting force at any given time, helping to prevent cracking.
While multiple-pass cutting provides greater control and can lead to a smoother finish with less surface damage, it does require more time compared to a single-pass cut. However, the improved precision and reduced risk of damage often justify the extra time required.
The decision between single-pass and multiple-pass cutting depends on factors such as material thickness, hardness, the desired cut quality, and the condition of the blade. For thicker, harder materials or when high-quality, precise cuts are needed, multiple-pass cutting is generally the safer and more effective option. For thinner, softer materials where speed is the priority, a single-pass cut may be sufficient. Additionally, the condition of the blade and the capabilities of the cutting equipment can influence the choice. A well-maintained, high-quality blade may handle a single-pass cut more effectively, while an older blade may require multiple passes to avoid failure.

Balancing Cutting Speed, Feed Rates, Coolant Pressure
Periodic adjustments during cutting is important to maintaining optimal performance and achieving high-quality results. As you work, it's important to remain attentive to the feedback from the cutting process and be prepared to adjust the RPM as needed. For instance, if you notice the blade beginning to bog down or an excessive buildup of heat, it may be necessary to lower the RPM or increase the flow of coolant to help dissipate the heat and prevent blade damage. Conversely, if the cutting process feels sluggish or the blade isn’t engaging the material effectively, a slight increase in speed might be required to improve efficiency and cutting quality.
Balancing cutting speed, pressure, and coolant is essential for achieving optimal results and prolonging the life of the blade. The cutting speed must be adjusted based on factors such as the hardness and abrasiveness of the material, the age and condition of the equipment, the applied pressure, and the amount of coolant used. Experience plays a significant role in determining the right balance for a specific material and application. Skilled operators, who have developed a deep understanding of their equipment and the materials they work with, can fine-tune these variables to maximize cutting efficiency and minimize wear on the blade.
For those new to using diamond & cbn blades, it’s advisable to start with a more conservative approach. Using thicker kerf blades, operating at lower speeds, applying less pressure, and ensuring ample coolant flow are all strategies that can help minimize the risk of blade damage and material defects. This cautious approach allows new users to gain experience with the specific blade, setup, and application without jeopardizing the integrity of the blade or the material being cut.
As operators become more familiar with the process, they can gradually increase cutting speed, adjust pressure, and optimize coolant usage to find the most effective combination for their particular needs. By carefully monitoring the cutting process and making informed adjustments as necessary, both novice and experienced users can achieve precise, efficient cuts while extending the life of their diamond blades and ensuring the quality of their work.
Audible and Sensory Feedback – Gage How the Blade is Performing
The sounds and vibrations emitted by a blade during cutting offer real-time insights into its performance across a wide range of applications, from metalworking to ceramics and composites. This feedback helps operators immediately gauge how effectively the blade is interacting with the material, allowing for on-the-fly adjustments to optimize the cutting process.

The sound a diamond or CBN blade makes during operation is more than just background noise; it's a critical diagnostic tool. A high-performing blade operates with a consistent, low-noise profile, indicating smooth and uniform cutting. This steady sound not only reflects the quality of the blade but also serves as a vital cue for assessing both the blade's condition and the cutting process.
When the blade produces a consistent acoustic signature, it signals that the blade is cutting as intended without encountering any significant issues. However, changes in sound—such as a higher-pitched tone or fluctuating volume—often indicate potential problems. These auditory cues might suggest anything from irregularities in the material being cut to uneven wear or damage to the blade itself. Recognizing and understanding these nuances allows operators to make necessary adjustments, ensuring optimal cutting conditions and extending the blade's life.
Different materials interact with the blade in unique ways, resulting in variations in the sound produced. For instance, cutting through a hard, dense metal like titanium should produce a steady hum, indicating a smooth cut. If the sound suddenly becomes high-pitched, it may suggest that the blade is encountering resistance due to the material's toughness, or that the blade is dulling. Increasing coolant flow or adjusting RPMs may help mitigate these issues.
Conversely, when cutting softer materials like aluminum or plastic, a consistent, low hum is expected. However, irregular or fluctuating sounds could signal the presence of contaminants within the material or an inconsistency in the material's density. In such cases, it’s crucial to adjust the cutting speed or pressure to maintain a smooth operation.
For materials like ceramics or composites, which are prone to chipping or cracking, a gritty or grinding sound may indicate that the blade is encountering abrasive elements within the material. This could suggest uneven wear on the blade or the need for more effective cooling or lubrication to prevent damage.
When working with layered materials or those with varying densities, such as certain composites or laminates, operators might hear irregular sounds or slight clunking noises as the blade transitions between layers. These sounds can be a sign to adjust the cutting approach, perhaps by reducing speed or applying less pressure, to avoid damaging the material or the blade.
In all these scenarios, understanding the auditory feedback from the cutting process is essential for maintaining cutting efficiency and blade longevity. Whether you're working with metals, ceramics, composites, or other materials, paying attention to the sounds emitted during cutting can provide valuable insights that help you make real-time adjustments, ensuring optimal performance and preventing potential issues.

After Cutting Process Has Been Completed
After completing a cutting operation, it’s important to follow a systematic process to ensure safety, maintain equipment, and evaluate the quality of the work. First, turn off the machine and allow the blade to come to a complete stop before moving any material or making adjustments. Once the machine is fully powered down, carefully remove the cut material and inspect it for quality. Check for signs of chipping, rough edges, or deviations from the intended cut to ensure the dimensions and finish meet the desired specifications.
Next, clear away any debris, dust, or chips from the cutting area and machine. Using appropriate tools, such as a brush or vacuum, remove material residue from the blade, machine components, and workspace. This step helps maintain a clean and safe environment and prevents debris from affecting future cuts.
After cleaning, inspect the blade for signs of wear, damage, or dullness. Look for chips, cracks, or excessive wear on the diamond or CBN abrasive section. Also, check the machine’s key components, such as the spindle, flanges, and guards, to ensure they are in good condition and functioning properly. If your machine uses a coolant system, check the coolant levels and ensure the coolant is clean and effective. Top up or replace the coolant as necessary, and clean any coolant residue from the machine and workspace. Depending on the condition of the blade, you may need to perform maintenance tasks, such as dressing the blade to expose fresh cutting edges. If the blade shows significant wear or damage, consider replacing it before the next operation.
After completing the cutting operation and turning off the machine, it’s important to not only inspect the blade but also to properly remove, clean, and store it. Once the blade has come to a complete stop, carefully remove it from the machine, ensuring that you handle it with care to avoid damaging the cutting edges or other components. Leaving the blade sitting inside the coolant can lead to corrosion, especially if the coolant contains water or other chemicals that can deteriorate the blade over time. After removing the blade, thoroughly clean it to remove any coolant, debris, or material residue. Use a soft brush or cloth to gently clean the diamond or CBN segments and the blade core. Ensure that all traces of coolant are wiped away, particularly from areas where it could cause rust or corrosion.
Once the blade is clean, dry it completely with a lint-free cloth or allow it to air dry in a well-ventilated area. It’s essential that the blade is fully dry before storing it to prevent any moisture from causing rust or damage. Store the blade in a dry, safe place, preferably in a blade case or on a clean, dry surface where it won’t be exposed to dust, moisture, or physical damage. By removing the blade, cleaning, and drying it after each use, you help extend its lifespan and maintain its cutting performance. Proper storage prevents rust and corrosion, ensuring that the blade is ready for the next use and performs optimally in future cutting operations.
If you are finished with the machine for the day or need to step away, secure the workspace by locking out the machine or removing the power source to prevent unauthorized use. Ensure that all tools and materials are stored properly. It’s also helpful to record details of the cutting operation, including the type of material cut, the blade used, and any observations about the cutting process. Documenting the condition of the blade and machine after the operation helps track equipment performance and plan for maintenance or replacement.
Finally, reflect on the cutting process to identify any areas for improvement. Consider whether the cutting speed, blade type, or setup could be optimized for better results in future operations. If another cutting operation is scheduled, prepare the machine and workspace, replace or maintain the blade as needed, adjust the machine settings, and complete all safety checks. By following these steps after each cutting operation, you help ensure that your equipment remains in good working order, the workspace stays safe and clean, and the quality of your work is consistently high.
Continuous Monitoring & Trouble Shooting
Troubleshooting cutting issues requires continuous monitoring of the cutting process to identify and address problems before they escalate. By understanding the signs to watch out for, their potential causes, their impact on cutting performance, and implementing the right solutions, you can maintain optimal cutting efficiency and prevent costly downtime or damage.
Explore our illustrated Diamond & CBN Blade Trouble Shooting Guide. This comprehensive guide highlights key signs to watch for during the cutting process, identifies their potential causes, explains their impact on cutting performance, and offers recommended solutions to resolve these issues and prevent them from occurring in the first place.

Continuous monitoring of the cutting process is essential to catch issues early. This involves paying close attention to the sound, feel, and visual cues during cutting. Regular checks and adjustments based on what you observe will help you maintain the blade’s performance and extend its life.
Changes in cutting speed are often the first indication of a problem. If the cutting speed slows down despite maintaining the same feed rate and RPM, it could be due to a dull blade, material that is harder than expected, or insufficient coolant flow. Slower cutting speeds can lead to increased wear on the blade and machine, as well as a decline in cut quality. To resolve this, it is important to inspect the blade for wear, ensure the blade type is suitable for the material, and check that the coolant is being applied properly.
Unusual vibrations or wobbling of the blade during operation can signal improper blade mounting, a warped blade, or an issue with the machine’s spindle or flanges. Such instability can result in uneven cuts, increased wear on the blade, and a potential safety hazard. If this occurs, stop the machine immediately and inspect the blade’s mounting. Ensure that the blade is securely and properly seated, and check the machine components for damage or wear.
Grinding, squealing, or other unusual noises during cutting often indicate that something is wrong. These sounds could be a sign of a misaligned blade, a blade that is too dull, or a blade encountering more resistance than expected. Ignoring these noises can lead to poor cut quality and possible blade or machine damage. The appropriate response is to check the blade’s alignment, ensure it’s the right type for the material, and inspect for any signs of wear or damage.
If the material shows more chipping or roughness than usual, this might suggest that the blade is either too dull or not suitable for the type of material being cut. It could also be a sign that the feed rate is too high or the material is not properly secured. Increased chipping can compromise the quality of the final product and may require additional finishing work. To prevent this, reduce the feed rate, use a blade designed for finer cuts, and make sure the material is securely clamped.
An overheating blade can lead to discoloration, reduced cutting efficiency, and potential blade warping. Overheating is often caused by inadequate coolant flow, incorrect cutting speed, or a dull blade. The impact of overheating includes faster blade wear and possible damage to both the blade and material. To mitigate this, ensure the coolant system is working effectively, adjust the cutting speed to match the material, and replace the blade if it’s worn.
If the blade stalls or the material binds during cutting, this is a clear sign of a problem. Binding can occur due to insufficient blade tension, a dull blade, or trying to cut too quickly. The consequences include potential damage to the blade, machine, and material. To resolve this, check the blade tension, slow down the feed rate, and make sure the blade is sharp and appropriate for the material.
To prevent cutting issues from arising, regular maintenance and proper setup are key. This includes routine blade inspections, ensuring the machine is calibrated correctly, and using the appropriate blade and settings for each material. Regularly check the coolant system to make sure it’s functioning effectively, and keep the machine and work area clean to avoid debris buildup that could interfere with the cutting process.
Additionally, training operators to recognize the early signs of cutting problems and respond promptly can help minimize the impact of these issues.


