Material Holding Methods
-
Posted by
 Ayan Sadyk
How to Select the Right Material Mounting or Fixturing Method for Your Application
Selecting the appropriate material mounting or fixturing method is essential for achieving precision, consistency, and efficiency in your cutting or machining operations. The choice depends on several factors, including material dimensions, desired cut depth, material properties, and specific application requirements.
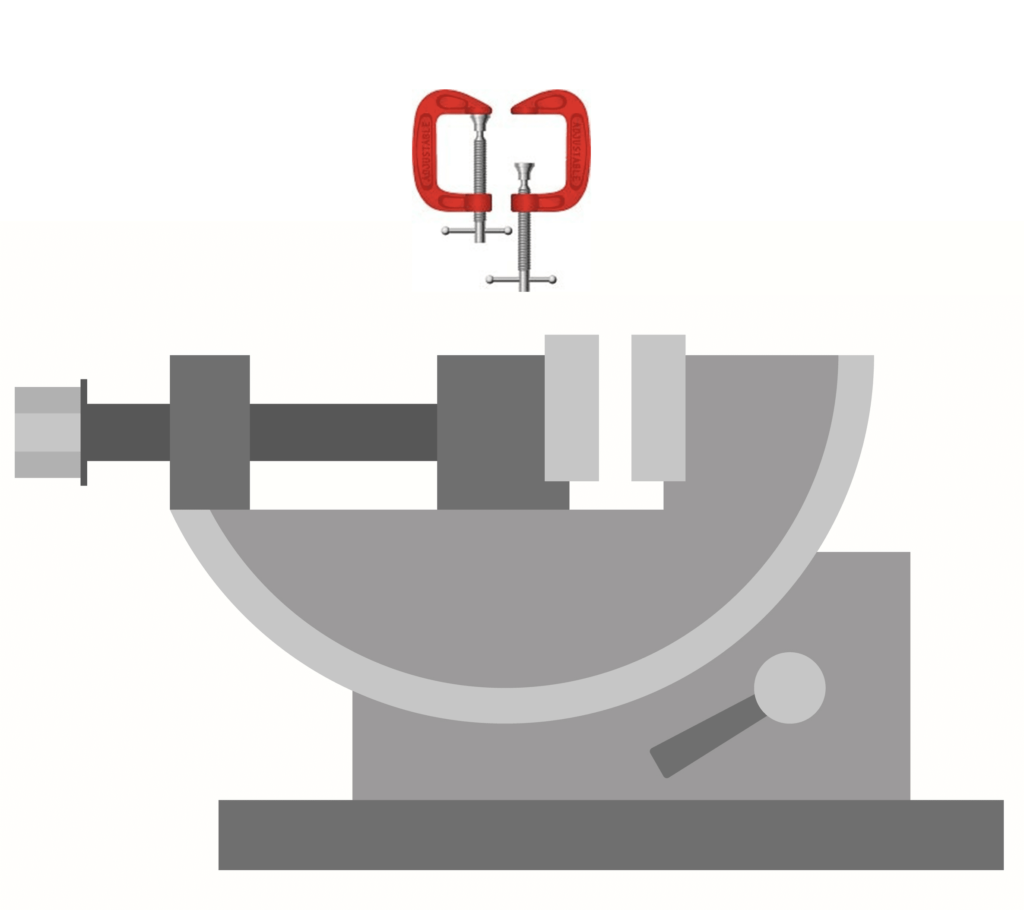
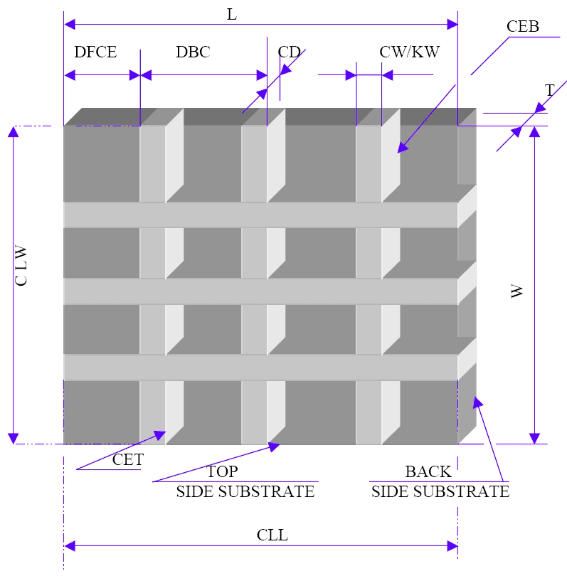
Assess Material Dimensions
The size and shape of your material significantly influence the choice of mounting method. Proper assessment ensures the material is held securely and precisely, minimizing movement and potential damage during cutting or machining. Here's a more detailed look at how material dimensions impact mounting choices:
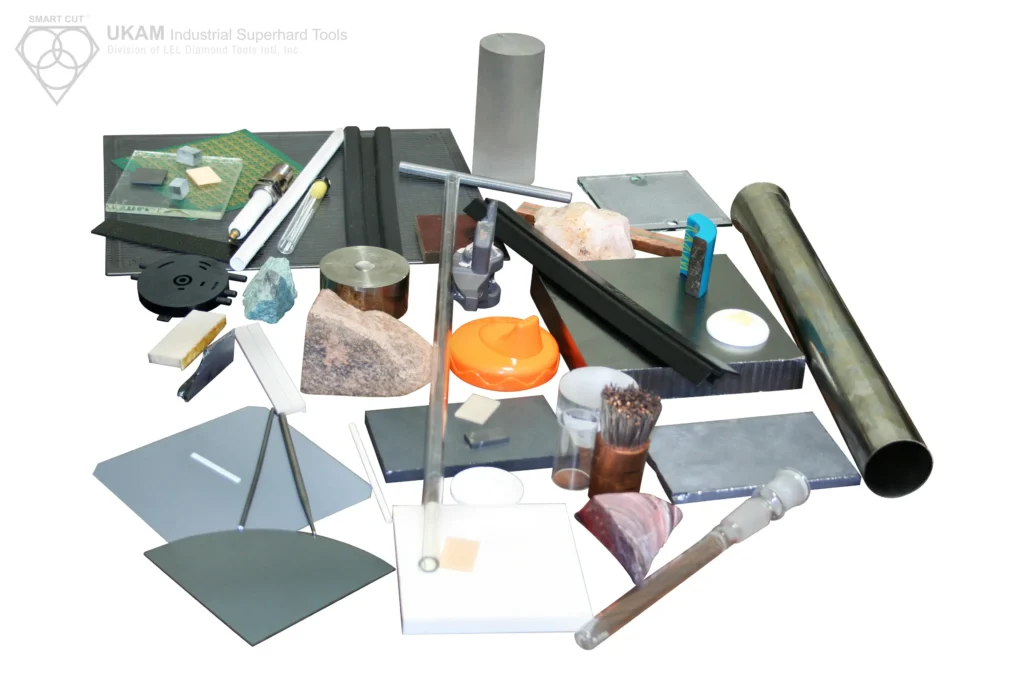

Large, Flat Materials
For large, flat materials, mechanical clamps or fixtures are typically the most effective mounting methods. These provide stable support that can handle the weight and surface area without causing deformation. Key considerations include:
-
 Stability: Mechanical clamps offer robust support, essential for maintaining the material's position during cutting or machining.
-
 Even Pressure Distribution: Clamps and fixtures designed for large surfaces ensure even pressure across the material, preventing warping or bending.
-
 Ease of Adjustment: Many clamps are adjustable, allowing for precise positioning of the material. This is crucial for achieving accurate cuts, especially with large pieces where even minor misalignments can lead to significant errors.
-
 Safety: Properly secured large materials reduce the risk of movement during cutting, which can enhance operator safety and protect the equipment from damage.
Small or Irregularly Shaped Materials
Smaller or irregularly shaped materials pose unique challenges in mounting. Wax or tape are often preferred for these types of materials due to their flexibility and gentle holding properties. Important factors to consider include:
-
 Secure Hold: Wax and tape can conform to the contours of irregular shapes, providing a secure hold without the need for excessive pressure that could damage the material.
-
 Protection: These materials are less likely to scratch or damage delicate surfaces, making them ideal for fragile or sensitive materials.
-
 Ease of Use: Applying wax or tape is straightforward and can be quickly adjusted as needed. This is beneficial in situations where the material needs to be frequently repositioned or where precision adjustments are required.
-
 Cost-Effectiveness: Wax and tape are generally cost-effective solutions, especially for small-scale operations or when dealing with numerous small or uniquely shaped pieces.
Complex Geometries and Custom Fixtures
Materials with complex geometries or unique shapes may require custom fixtures to ensure stable mounting. Custom fixtures are designed to match the specific contours and dimensions of the material, providing tailored support that standard clamps or mounts cannot offer. Considerations include:
-
 Design Specificity: Custom fixtures are designed to fit the exact shape of the material, ensuring maximum contact and stability.
-
 Precision: These fixtures can be engineered to provide precise alignment, essential for high-tolerance applications.
-
 Material Compatibility: Custom fixtures can be made from materials that match the hardness or softness of the workpiece, preventing damage during the mounting process.
Consider Desired Cut Depth
The desired cut depth is a crucial factor in selecting the appropriate material mounting or fixturing method. The depth of the cut directly impacts the stability required to hold the material securely, ensuring precision and safety during the cutting or machining process.
Shallow Cuts
For shallow cuts, surface mounting methods like tape or wax are often sufficient. These methods offer several advantages for light-duty applications where the cutting depth is minimal:
-
 Adequate Stability: Tape and wax provide enough stability for shallow cuts, ensuring the material remains in place without the need for heavy-duty fixtures.
-
 Ease of Application: These methods are easy to apply and adjust, making them ideal for quick setups and minor adjustments.
-
 Gentle Holding: Tape and wax are less likely to damage delicate materials, providing a gentle but secure hold that prevents movement during cutting.
-
 Flexibility: These materials can conform to various shapes and surfaces, making them suitable for a wide range of applications.
When using tape or wax for shallow cuts, it is essential to ensure that the material is free from contaminants and that the tape or wax is applied evenly to avoid air bubbles or gaps that could compromise stability.
Deep Cuts
Deeper cuts require a more robust and secure mounting method to prevent any movement during the cutting process. In these scenarios, mechanical clamps or specialized fixtures designed for firm holding are recommended. Key considerations include:
-
 Strong Hold: Mechanical clamps provide a strong, stable hold that can withstand the forces exerted during deep cutting. This prevents the material from shifting, ensuring precision.
-
 Adjustability: Many mechanical clamps are adjustable, allowing for precise positioning of the material. This is particularly important for deep cuts, where even slight movements can lead to significant errors.
-
 Safety: Secure clamping reduces the risk of the material moving unexpectedly during the cutting process, enhancing operator safety and protecting the cutting equipment from potential damage.
-
 Consistency: Robust clamping ensures consistent results across multiple cuts, maintaining uniformity and quality in the final product.
Specialized Fixtures
In addition to standard mechanical clamps, specialized fixtures may be necessary for certain applications, particularly when dealing with deep cuts. These fixtures can be custom-designed to match the specific requirements of the material and the cutting process. Advantages of specialized fixtures include:
-
 Customization: Fixtures can be tailored to fit the exact shape and size of the material, providing maximum stability and support.
-
 Precision: Custom fixtures are designed to hold the material precisely in place, reducing the risk of movement and ensuring accurate cuts.
-
 Versatility: Specialized fixtures can be designed for specific tasks, such as holding materials with complex geometries or providing support for multi-directional cuts.
Evaluate Material Properties
Evaluating material properties is essential when selecting the appropriate mounting or fixturing method. Key properties such as hardness, brittleness, and the material's shape and geometry influence the choice of mounting method to ensure stability, precision, and protection during the cutting or machining process.
Hardness
The hardness of a material significantly affects how it should be secured. Hard materials require strong, stable clamping to prevent movement during cutting. Mechanical clamps are often the best choice because they provide the necessary force to hold the material firmly in place. To avoid surface damage, it is advisable to use mechanical clamps with padded jaws or soft inserts. These provide a secure grip without scratching or marring the material's surface. Additionally, even pressure distribution is critical to prevent stress concentrations that could lead to cracking or other damage, especially when working with very hard materials like metals or ceramics.
In contrast, softer materials can deform easily under pressure, so gentle mounting methods such as wax or soft tape are preferable. These methods provide adequate hold without exerting excessive force. Wax and tape can conform to the material's surface, holding it securely while minimizing the risk of deformation or indentation. These methods also allow for minor adjustments and repositioning without damaging the material, which is beneficial for precision applications.
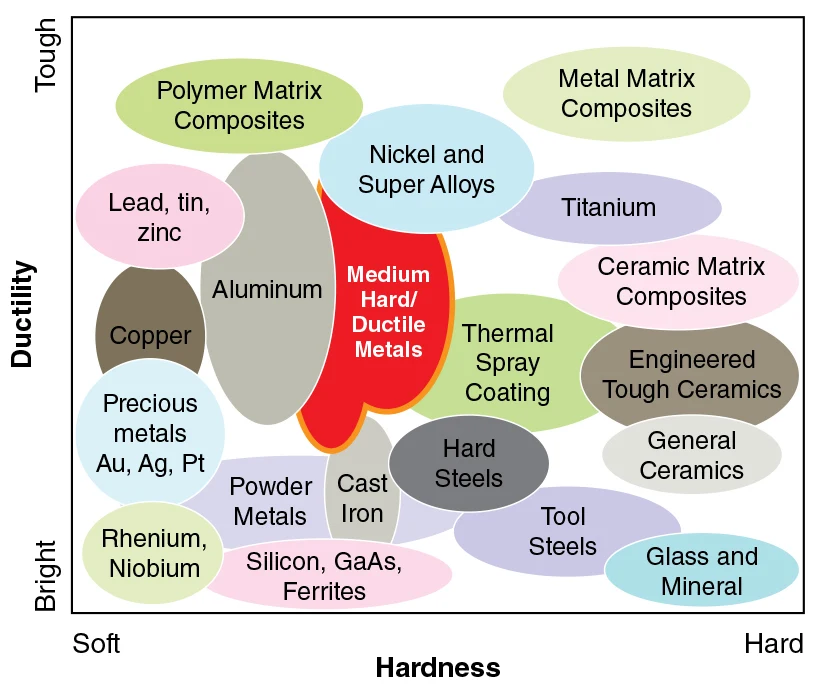
Brittleness
Brittle materials require particularly careful handling to prevent cracking or chipping. Soft fixtures or mounting methods like wax or soft foam distribute pressure evenly across the material's surface, minimizing stress points that could lead to cracks or chips. Materials like foam or silicone can cushion the material, absorbing vibrations and shocks that might occur during cutting or machining. While providing a secure hold, these methods avoid the rigid clamping that could otherwise cause brittle materials to fracture.
Special care should be taken when positioning brittle materials in their mounts to avoid sudden impacts or uneven pressure. Additional support structures or custom fixtures might be necessary to stabilize the material, especially if it has a complex geometry or thin sections that are prone to breakage.
Shape and Geometry
The shape and geometry of the material can complicate the mounting process and may necessitate specialized fixtures. Materials with irregular or complex shapes may require custom fixtures designed to match their contours. These fixtures provide tailored support and stability, ensuring the material remains secure during cutting. Custom fixtures can be engineered to hold the material in precise alignment, which is crucial for high-tolerance applications where even slight misalignments can lead to significant errors. These fixtures can be adapted to accommodate various shapes and sizes, offering versatility for different projects and materials.
For materials with standard shapes (e.g., rectangular, cylindrical), mechanical clamps or standard fixtures can provide effective and straightforward mounting solutions. Adjustable clamps and fixtures can be used to hold materials of different sizes and shapes, providing flexibility for various applications.
Determine Application-Specific Requirements
Selecting the right material mounting or fixturing method involves understanding the specific requirements of your application. Different applications have unique demands that influence the choice of mounting method. Here, we explore several key considerations, including precision, speed, surface finish, and adaptability to complex processes.
High-Precision Applications
High-precision applications require mounting methods that ensure stability and minimize vibrations. Mechanical fixtures with fine-tuning adjustments are ideal for these scenarios. These fixtures allow for precise positioning of the material, ensuring that even the smallest movements are controlled. This is critical in applications where tolerances are tight, and any deviation can lead to significant errors. Additionally, vibration-free mounting is essential to maintain the accuracy of the cutting or machining process. Techniques such as using vibration-dampening materials or isolating the machine from external vibrations can further enhance stability.
High-Speed Operations
In high-speed operations, the efficiency of the mounting method can significantly impact productivity. Robust and quick-release clamping systems are advantageous as they reduce setup time and facilitate faster transitions between different tasks. These systems are designed to hold materials securely even at high operational speeds, preventing movement that could compromise precision. The ability to quickly and easily secure and release materials can lead to substantial time savings, particularly in production environments where speed is a critical factor.
Achieving a Smooth Surface Finish
For applications where achieving a smooth surface finish is a priority, ensuring that the material is mounted without any tilt or unevenness is crucial. Soft mounting methods, such as using wax or soft tape, can help reduce surface damage by providing a gentle hold that conforms to the material's contours. These methods help distribute pressure evenly, preventing localized stress that could lead to surface imperfections. Additionally, the material should be meticulously cleaned and free of contaminants before mounting, as dust or debris can cause surface irregularities during the cutting or machining process.
Adaptability to Complex Processes
Some applications involve complex cutting or machining processes that require the material to be repositioned or reoriented multiple times. In such cases, adaptable mounting systems are essential. Custom fixtures designed to accommodate specific shapes and sizes can provide the necessary support and flexibility. These fixtures should be easy to adjust and capable of holding the material securely in various orientations. This adaptability ensures that the material remains stable throughout the process, regardless of how it is positioned.
Environmental Considerations
The working environment can also influence the choice of mounting method. Factors such as temperature, humidity, and the presence of contaminants can affect both the material and the mounting method. For instance, adhesives like tape or wax may lose their effectiveness in high temperatures or humid conditions. In such environments, mechanical clamping methods might be more reliable. Additionally, maintaining a clean working environment is crucial to prevent contaminants from compromising the mounting process and the quality of the cut or machined surface.

Comparison of Different Material Mounting Methods for Diamond & CBN Tools
Here's a detailed comparison table outlining the various material mounting methods, their attributes, advantages, disadvantages, and ideal applications:
MECHANICAL CLAMPING/FIXTURING

TAPE MOUNTING WITH VACCUM CHUCK
DOUBLE SIDED ADHESIVE TAPE
WAX/GLUE MOUNTING TO MEDIA

WAX/GLUE MOUNTING TO MEDIA
|
Mounting Method |
Attributes |
Advantages |
Disadvantages |
Ideal Applications |
|---|---|---|---|---|
|
Mechanical Clamps/Fixtures |
|
|
|
|
|
Wax Mounting |
|
|
|
|
|
Tape Mounting |
|
|
|
|
|
Custom Fixtures |
|
|
|
|
|
Soft Fixtures (Foam/Silicone) |
|
|
|
|
|
Vacuum Fixtures |
|
|
|
|
MECHANICAL CLAMPING/FIXTURING
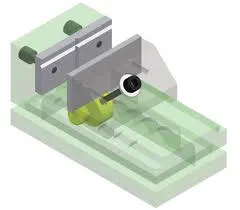
Mechanical clamping is a crucial method for securing materials during machining, particularly when dealing with thick or irregularly shaped geometries unsuitable for vacuum chucks or other mounting methods. It offers significant advantages for standardized or flat materials, such as ease of use and efficient loading and unloading. However, mechanical clamping can also present challenges, including the risk of chipping and material blowout at the exit point during cutting or drilling operations. This issue arises due to the lack of firm support at the backside of the material at the cutting zone, leading to a higher chipping rate when the diamond tool exits the cut or hole. Additionally, the thickness of the mechanical clamps over the material can cause vibrations, negatively impacting cut quality.

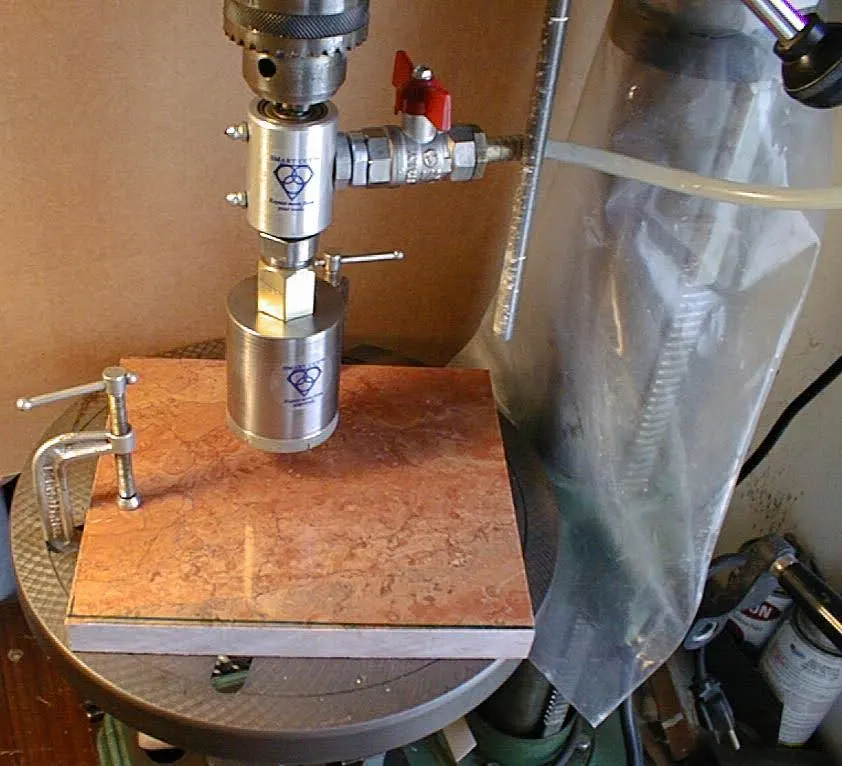
When securing material in a chuck or clamping fixture, it must remain stationary during processing. Any movement can damage or break the diamond tool or the material itself. The operator must also avoid overtightening, as this can damage both the chuck/holding fixture and the material. Brittle materials, such as those in the glass and refractory families, can fracture if overtightened, while harder, denser materials like silicon carbide may cause dents in the chuck if excessive force is applied. These dents or nicks can affect subsequent materials drilled in the same chuck, leading to damage and potential cracks.
Using a vise is not always suitable for certain materials and shapes. Soft or thin materials can be damaged or bowed by a vise. For more fragile and sensitive applications, a vacuum chuck combined with specialized material-holding tape or mounting the material on a substrate with a vise may be more appropriate. Numerous vice types and designs are available from various manufacturers to accommodate different part dimensions and shapes and fit various types of machinery.
Mechanical clamping remains an essential method for holding materials in place during machining operations, especially for those with uneven shapes or geometries unsuitable for other mounting methods like waxing or gluing. This method uses various clamps and fixtures to secure the material firmly on the dicing machine’s worktable, providing stability and precision during cutting.
Advantages of Mechanical Clamping
One of the primary advantages of mechanical clamping is its versatility in handling materials with irregular shapes. By adjusting clamps to fit the material’s unique geometry, mechanical clamping ensures the material remains stationary during the dicing process. This adaptability makes mechanical clamping a preferred choice for a wide range of applications where traditional mounting methods are impractical.
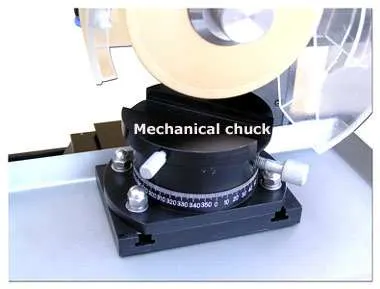
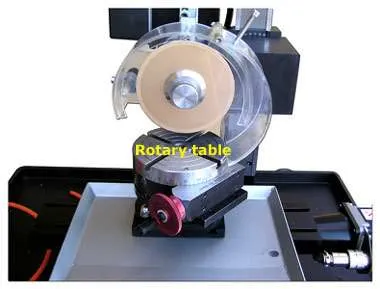
Mechanical clamping also offers significant benefits for more standardized or flat materials. It enhances operational efficiency through quick loading and unloading, eliminating the need for drying or curing time associated with adhesive-based methods. This efficiency is particularly valuable in high-volume production environments where minimizing downtime is crucial. Additionally, mechanical clamping systems can be easily adjusted and repositioned, making them suitable for applications requiring frequent changes in material or cutting specifications. This flexibility reduces setup time and enhances overall productivity, enabling operators to transition swiftly between tasks without extensive reconfiguration.
Challenges of Mechanical Clamping
Despite its advantages, mechanical clamping presents certain challenges, notably the potential for chipping at the bottom of the cut. This problem occurs because the backside of the material lacks firm support at the cutting area, leading to increased chipping rates when the blade exits the material. To mitigate this issue, using a sacrificial backing material can provide additional support to the underside of the material being cut, absorbing cutting forces and reducing chipping. Selecting a backing material that is easy to remove or does not adhere strongly to the material can further streamline the process.

Optimizing clamping pressure is another strategy to stabilize the material and minimize movement during cutting. However, care must be taken to avoid excessive pressure that could deform or damage the material. Using adjustable clamps and fixtures that can be precisely controlled helps find the optimal balance between stability and pressure. Enhancing blade and spindle alignment is also critical in reducing chipping. Ensuring that the blade is perfectly aligned with the material minimizes lateral forces that contribute to chipping. Regular maintenance and calibration of the dicing machine are essential for maintaining alignment and achieving consistent, high-quality cuts.
Implementing mechanical clamping effectively involves selecting appropriate fixtures and clamps based on the material's geometry and cutting requirements. Customized fixtures may be necessary for materials with uneven shapes, while adjustable clamps and modular fixturing systems offer the flexibility needed for standardized materials. Operators should be trained in the proper setup and adjustment of mechanical clamping systems. Understanding material properties and cutting dynamics aids in making informed decisions about clamping pressure and positioning. Regular inspection and maintenance of the clamping system ensure reliable performance and longevity.
Mechanical clamping remains an essential method for securing materials during machining operations, offering versatility, efficiency, and flexibility. By addressing its challenges through strategies such as using sacrificial backing materials, optimizing clamping pressure, and maintaining proper alignment, operators can enhance cut quality and overall productivity. Proper training and regular maintenance further ensure that mechanical clamping systems continue to deliver reliable and high-quality results in various machining applications.
Key Considerations for Mechanical Clamping:
-
 1. Material Support: Ensure the backside of the material has adequate support to minimize chipping and blowout. Implementing sacrificial backing materials can help absorb the exit force of cutting or drilling operations.
-
 2. Clamping Pressure: Use an adjustable torque wrench to control the clamping pressure accurately. This helps prevent over-tightening and potential damage to both the material and the fixture.
-
 3. Vibration Dampening: Introduce vibration-dampening materials or pads between the clamps and the material to reduce the risk of vibrations, enhancing the quality of the cut or drill.
-
 4. Fixture Maintenance: Regularly inspect and maintain the clamping fixtures to prevent wear and tear. Replace worn-out parts to ensure consistent performance and avoid introducing damage to the material.
-
 5. Customization: For irregularly shaped or delicate materials, consider custom-designed clamps and fixtures tailored to the specific geometry and material properties. This customization can significantly enhance the stability and precision of the operation.
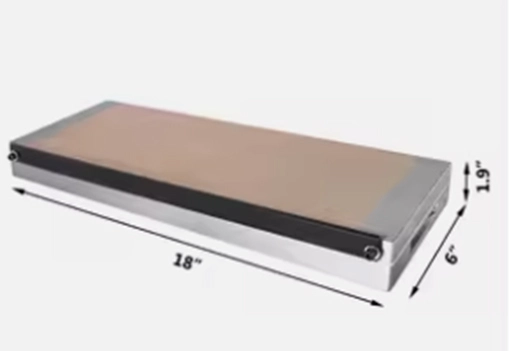
Magnetic Chucks:
Suitable for ferrous materials, magnetic chucks provide a uniform clamping force without the risk of damaging the material. They are ideal for flat and thin materials where traditional clamping might introduce deformation.
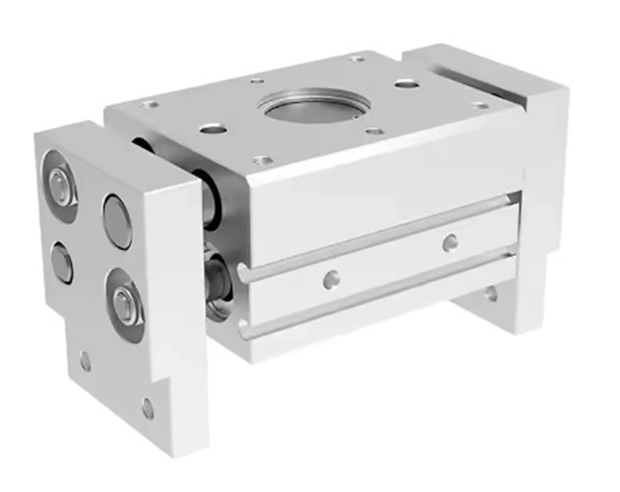
Pneumatic Clamping:
Pneumatic clamps use air pressure to hold the material in place, offering a quick and reliable method for securing materials with varying thicknesses. They can be adjusted easily to accommodate different clamping pressures.
Specialized Fixtures:
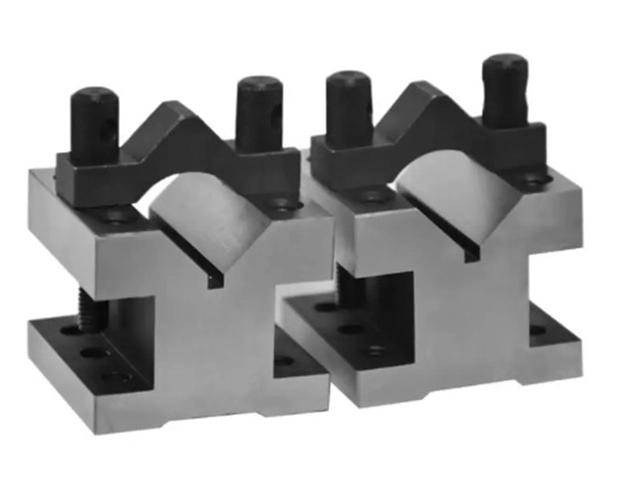
V-Blocks:
V-Blocks are specifically designed to hold and support round materials such as tubing or rods for cutting or drilling. They come in various sizes and are typically clamped directly to the machine table, providing a stable base for precision operations.
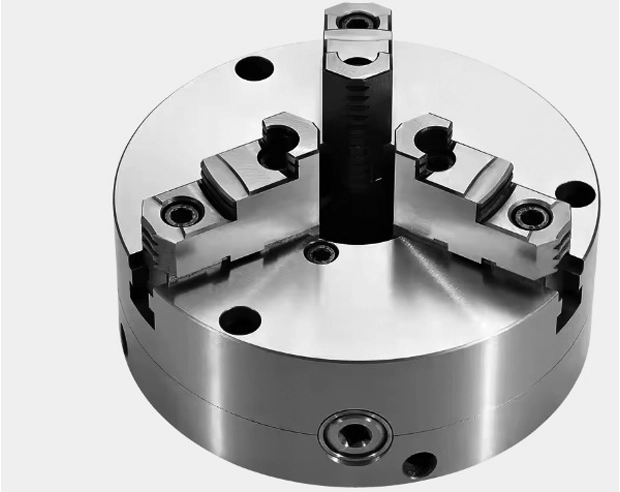
Rotary Chucks:
For operations requiring rotational symmetry, rotary chucks can hold cylindrical materials securely while allowing them to rotate. This is particularly useful for grinding and turning operations.
Modular Fixtures: Modular fixtures offer flexibility by allowing components to be reconfigured for different tasks. These fixtures are particularly useful in a production environment where quick changeovers between different material shapes and sizes are required.
Advantages:
-
 1. Accommodates Irregular Shape Materials: Mechanical clamping is versatile and can secure materials with irregular shapes that other methods may struggle to hold.
-
 2. Holds Substantially Thicker Materials: This method is particularly effective for clamping thicker materials that may not be suitable for vacuum or adhesive mounting methods.
-
 3. Cost-Effective: Mechanical clamping is generally inexpensive and does not require sophisticated equipment, making it an economical choice.
-
 4. Readily Available: Mechanical clamping fixtures and tools are widely available and can be sourced easily from various suppliers.
-
 5. Flexible Holding Characteristics: Different types of mechanical clamps can be used to provide varying levels of clamping force, accommodating a wide range of material properties and thicknesses.
-
 6. No Lip Effect: This method avoids the "lip effect" seen in some mounting techniques, where a raised edge can form around the material.
-
 7. Accommodates Non-Flat Substrates: Materials that are not perfectly flat can still be securely mounted using mechanical clamps.
-
 8. Versatile Base Media: Different hardness base media can be utilized to control tool wear and simultaneously dress the tool, enhancing tool longevity and performance.
-
 9. Suitable for Small and Micro Parts: Mechanical clamping can effectively hold very small and micro parts that may not be feasible to secure with other methods.
Disadvantages:
-
 1. Occasional Chipping and Material Blowout: Mechanical clamping can lead to chipping and blowout at the exit of the material during cutting or drilling due to insufficient support at the backside.
-
 2. Possible Vibration: The use of mechanical clamps can introduce vibrations, which may negatively impact the quality of the cut or drill.
-
 3. Limited by Material Dimensions: The size and shape of the material can limit the effectiveness of mechanical clamping. Larger or more irregularly shaped materials may require custom fixtures.
-
 4. Application Limitations: Mechanical clamping is generally more suitable for lower speeds and feed rates. High-speed operations can exacerbate issues like vibration and material damage.
-
 5. Risk of Over-Tightening: There is a risk of over-tightening, which can damage both the clamping fixture and the material, especially with brittle materials.
-
 6. Maintenance Requirements: Regular maintenance of the clamping fixtures is necessary to ensure they remain in good working condition and do not introduce defects into the material.
Holding Fixture / Chuck Padding and Tape Mounting with Vacuum Chuck
Padding within a holding fixture or chuck plays a crucial role in preventing damage to both the material being held and the chuck itself. It serves several functions, including protecting the material, shielding the chuck from damage, preventing material shifting when pressure is applied, and buffering against damaged or nicked areas of the chuck. By incorporating appropriate padding, the risk of chipping, cracking, or other damage to the material and fixture is significantly reduced, leading to more consistent and high-quality results.
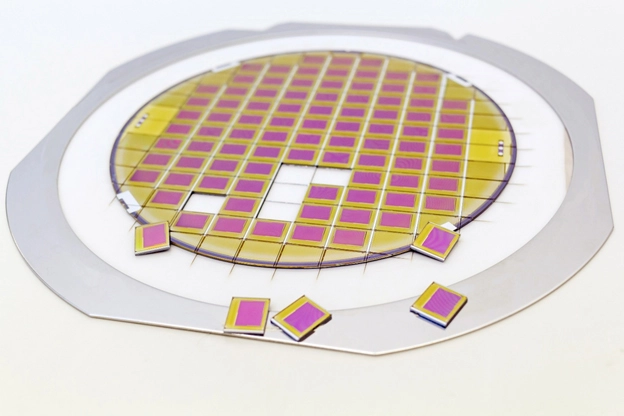

Vacuum chucks use atmospheric air pressure to press the material down against the chuck surface, providing a reliable and non-invasive clamping method. Tape mounting is a widely used technique for securing thin material substrates and wafers, especially those with thicknesses under 1 mm. This method is favored for its ease of use, simplicity in handling, and the wide variety of tapes available. Tapes come in different specifications, thicknesses, compositions, and adhesion levels to suit almost any application.
The most commonly used tape for dicing applications is PVC tape with a thickness of 0.003" (0.076mm), which combines a PVC sheet with an adhesive top layer. Thicker tapes, up to 0.010" (0.25mm), are also available for special applications, although they are not suitable for die bonding systems. Tapes have varying adhesion characteristics, with common ranges from 215-315 fr/25 mm, depending on the material and application. For example, silicon wafers typically use tape with a thickness of 0.010” (0.25mm), whereas thick alumina substrates require tapes around 0.080" (2.03mm).
Selecting the appropriate tape often involves some trial and error. Considerations include the duration the material will remain on the mounting tape before and after processing and the material's thickness. Very thin dies work well with waxes and medium-strength tapes, while thicker wafers are better suited for medium to high-strength tapes. It is crucial to minimize the depth to which the drill penetrates the mounting media, recommended not to exceed twenty-five microns, to prevent premature tool failure and chipping due to media agglomeration.
Double-Sided Adhesive Tape
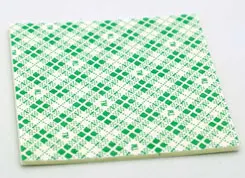
Double-sided adhesive tape has long been utilized to hold thin parts during many application such as cutting, drilling, grinding and polishing. This method of material mounting can be highly effective, especially when horizontal shear forces are minimal. It provides a straightforward and clean way to secure materials without the need for complex fixtures or clamps.
However, the geometry and composition of many materials can limit the effectiveness of tape in numerous applications. Materials with irregular shapes or uneven surfaces may not adhere well, reducing the tape's holding power and potentially leading to slippage or movement during processing. Additionally, double-sided tape may struggle with heavier or thicker materials where the shear forces exceed the adhesive strength.
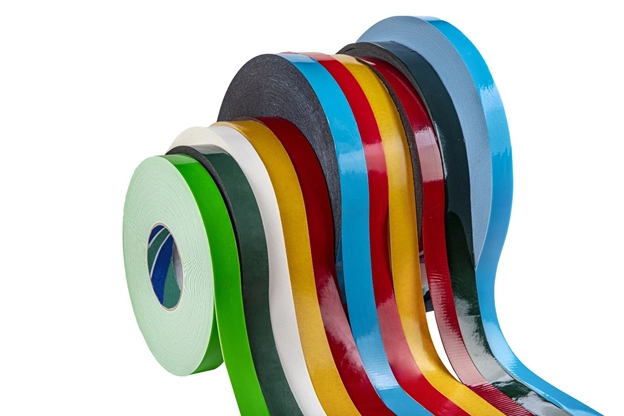
A significant drawback of using double-sided tape is the time and effort required for its removal. The removal process can be particularly cumbersome, potentially leading to delays in production. Furthermore, very thin parts and substrates can lose their flatness and rigidity during the tape removal process, compromising the material's integrity and making subsequent operations more challenging.
Despite these limitations, double-sided adhesive tape remains a valuable tool in specific contexts. For instance, it is ideal for applications involving delicate or fragile materials where traditional clamping methods might cause damage. The adhesive provides a uniform pressure distribution, which can be beneficial for maintaining the surface quality of thin parts.
Best Practices for Using Double-Sided Adhesive Tape:
-
 1. Material Compatibility: Ensure the tape is compatible with the material's surface composition and geometry. Test the adhesive on a small area to check for adequate bonding strength.
-
 2. Surface Preparation: Clean the material's surface thoroughly before applying the tape. Any dust, oil, or residue can weaken the adhesive bond.
-
 3. Application Pressure: Apply consistent and even pressure when placing the material onto the tape to ensure a secure bond. Use a roller or similar tool to eliminate air bubbles and enhance adhesion.
-
 4. Tape Selection: Choose the appropriate tape thickness and adhesive strength based on the material's weight, surface area, and the forces involved in the operation. Tapes with higher tackiness are suitable for heavier materials, while thinner tapes are better for fine, delicate parts.
-
 5. Removal Process: To minimize the risk of damaging thin parts during tape removal, use a gentle peeling motion and consider using solvents or heat to assist in loosening the adhesive. This approach can help maintain the material's flatness and rigidity.
In addition to traditional uses, double-sided adhesive tape can be employed in innovative ways, such as temporary mounting for precision alignment in assembly processes. For applications where tape might fall short, consider alternatives like vacuum chucks or specialized holding fixtures that offer more robust support without compromising the material's integrity.
Vacuum chucks, for example, provide a non-invasive method of securing materials, leveraging atmospheric pressure to hold parts firmly in place. This method is particularly useful for flat, thin substrates that might be damaged by adhesive removal. Similarly, custom-designed fixtures can offer tailored solutions for irregularly shaped or delicate materials, ensuring optimal stability and precision during machining or grinding operations.
TAPE MOUNTING
Tape is most common and frequently used mounting methods for many wafers and thin substrate applications. This method can also be used for many other applications such as slicing, drilling, and grinding. Tapes are preferred very thin wafers and substrates, because of their ease of use, ease of handling, and fact that it can also be used later in die mounting process. Large variety of tapes are available today. Low strength, medium strength, and high strength tapes Mounting is done manually or utilizing wafer mounting systems.
Tapes are available with different adhesives with what is called “tackiness characteristics”. Adhesion characteristics of the most common tapes are 215-315 fr/25 mm. Tape thickness varies depending on application and material being diced. For example for cutting silicon wafers tape thickness of .010” (0.25mm) is typically used, where for thick alumna substrates tape thickness of .080 (2.03mm) is implemented
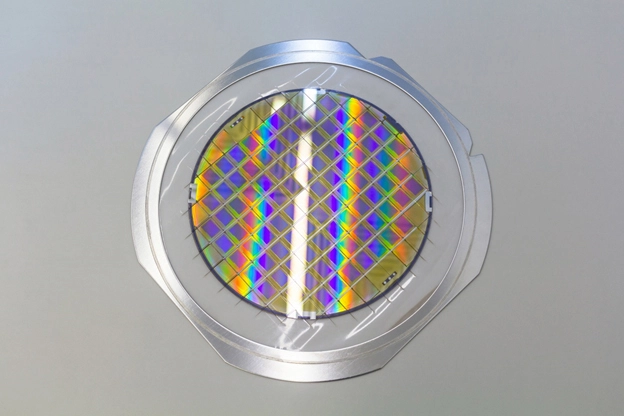
Low strength adhesive tapes are not recommended for cutting small dies, as well as large production applications. For these applications most users use medium and high strength adhesive tapes. Determining which tape to use for your application, sometimes may involve some trial and error.
For example the length of time the material or wafer will stay in contact with the mounting tape before and after machining will determine whether to use medium or high strength tapes.
Wafer/material thickness is another consideration when selecting the right mounting adhesive. Very thin dies work well with waxes and medium strength tapes. Whereas, thicker wafers work better with medium to high strength tapes.
Cutting too deep into the mounting media will cause the blade to “load”. Minimize the depth in which the blade touches the mounting media. It is recommended to cut no more thane twenty five microns into the media. Cutting too deep into the media will cause premature blade failure. The blade can also agglomerate with the cutting media, resulting in chipping.
Selecting the Right tape for your application
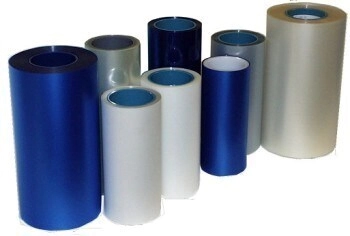
Selecting the right tape is crucial, as the correct choice can make or break a project. There are numerous options available, ensuring a tape for nearly every application. The key is understanding the characteristics of each type of tape and how they can be beneficial or counterproductive for your specific needs. tapes fall into two main categories: Standard and UV release. Most tapes are PVC-based films, and their adhesives are typically acrylic.
Standard Tapes:
These tapes are usually blue and lack a backing film, meaning the adhesive is exposed when the tape is peeled. They come in various thicknesses, from 80 microns to 130 microns, and different levels of tackiness. The adhesion level is measured in grams per millimeter (g/mm); the higher the number, the tackier the tape. The primary difference between standard tapes and UV release tapes is that standard tapes do not require UV light exposure to release the part. This can be advantageous or disadvantageous, depending on the application. For instance, using standard tape for a thick silicon wafer diced into very small pieces may result in the pieces coming off the tape during the dicing process, which could be disastrous. Conversely, if you have a standard-thickness wafer diced into larger pieces, it can be easily handled with standard blue tape without issues and without needing UV exposure. The type of material also plays a role, as some materials are more challenging to adhere to than others.
UV Release Tapes:
These tapes are typically clear and also come in various thicknesses. They have a backing film that needs to be peeled off before application. UV release tapes vary in tackiness before and after UV light exposure. This feature is essential when dealing with very thin wafers diced into small pieces; if the tape remains highly tacky even after UV exposure, it can be difficult to remove the fragile pieces. Generally, UV release tapes are ideal when strong adhesion during dicing is required, but an easy release is desired once exposed to UV light.
The thickness of the tape is critical because it affects the appropriate cut depth. Ensuring the correct tape thickness will prevent numerous issues with the final product. To determine the right tape, consider the material, material thickness, desired cut depth, blade thickness, and final die size. Evaluating these factors will help you select the appropriate tape for your application.
Another important consideration is that most dicing tapes, whether standard or UV release, require curing time. This means they need to sit for at least four hours before dicing to allow the adhesive to fully bond with the material. A common complaint is that parts come off the tape when the wafer is mounted and diced immediately. This issue can also be caused by air bubbles trapped between the part and the tape.
Holding Mediums for Tape and Wafer: Film Frame and Ring
two main mediums are widely utilized to hold the tape and the wafer in place: film frame and ring. Each has its specific applications and advantages depending on the machine and system requirements.
Using Film Frame
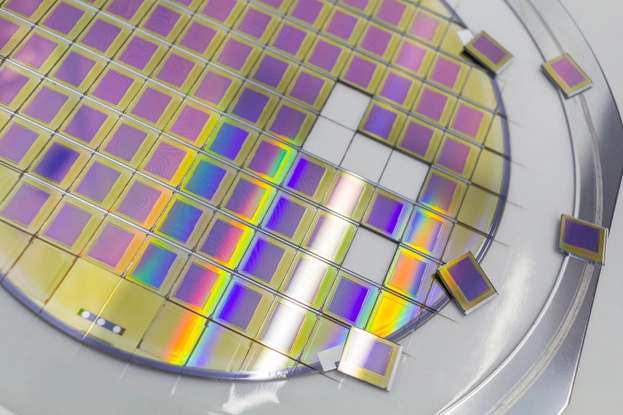
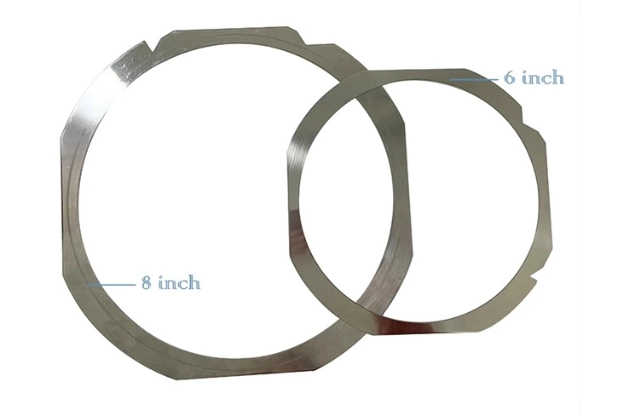
A film frame is a metal frame commonly used in various applications to hold wafers on the worktable or area. This medium caters to machines and systems that only accept this type of holding mechanism. Made from a single piece of metal, the tape adheres to the underside of the frame. Typically, the film frame is round, measuring about 0.050 inches thick, with notches at the bottom that fit into the machine's work area. The metal frame provides a sturdy and stable platform, ensuring that the wafer remains securely in place during the dicing process.
Using Ring
The ring is another material used to hold the tape and wafer. Unlike the film frame, the ring is a plastic hoop composed of two parts, similar to an embroidery ring. It consists of a small and a large diameter ring that assemble together, holding the tape between them while slightly stretching it once in place.
The ring mechanism securely holds the tape in a manner similar to how an embroidery hoop holds fabric. For example, an 8-inch diameter ring is commonly used for 6-inch and smaller wafers. The ring offers flexibility and ease of use, making it suitable for various applications.
Wax/Glue Mounting to Media
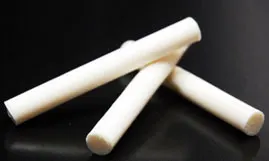
Wax or glue mounting is a time-tested, reliable method for holding very small and difficult-to-clamp materials during processing. This technique is particularly advantageous when dealing with thin material substrates or wafers, offering improved holding characteristics and ensuring the material remains stable and secure during machining or other operations. Here are some key benefits and considerations of wax/glue mounting:
Advantages
-
 1. Improved Holding Characteristics: Wax or glue provides a strong bond, particularly useful for thin and brittle materials that are challenging to secure with traditional clamping methods. This ensures the material stays in place during operations, reducing the risk of movement and resulting in more precise work.
-
 2. No Lip Effect: This mounting method allows for deeper cutting or drilling into the base material without creating a raised edge, resulting in a better surface finish, especially on the backside of the material.
-
 3. Compensation for Non-Flat Substrates: Wax or glue can fill in gaps and irregularities, allowing substrates that are not perfectly flat to be securely mounted. This adaptability helps in achieving a stable and uniform mounting surface.
-
 4. Control of Tool Wear: Different hardness base media, such as glass or ceramic, can be used with wax or glue to control tool wear and simultaneously dress the tool. This dual functionality can enhance tool life and performance.
-
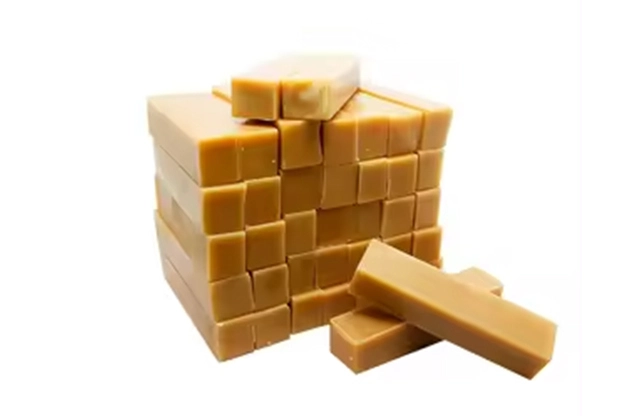
 5. Variety of Waxes: There is a large variety of waxes available, made from natural materials like animal, insect, mineral, and vegetable sources, as well as synthetic materials. These are available in various forms, including lumps, molded bricks, flakes, chips, and powders, providing options to suit different applications.
Characteristics of Waxes:
-
 Melting Point: The temperature at which the wax becomes fluid, which is critical for the mounting and removal process.
-
 Flash Point: The temperature at which the wax can vaporize to form an ignitable mixture in air.
-
 Specific Gravity: The density of the wax relative to water, affecting how it interacts with the material and base media.
-
 Structure: The molecular arrangement of the wax, influencing its adhesion and strength.
-
 Hardness and Brittleness: These properties determine the wax’s ability to hold the material without cracking or breaking.
-
 Flexibility and Elasticity: The ability of the wax to deform under stress and return to its original shape, which helps in absorbing vibrations and shocks during machining.
-
 Surface Characteristics: These include properties like dryness, stickiness, oiliness, and slipperiness, affecting the ease of application and removal.
Disadvantages:
While wax mounting is effective, it can be relatively messy. The process of applying and especially removing the wax can be time-consuming and requires thorough cleaning to ensure no residue remains on the material. This cleanup is crucial to avoid contamination in subsequent processes.
Best Practices for Wax/Glue Mounting:
-
 1. Material Preparation: Clean the material and base media thoroughly before applying wax or glue to ensure a strong bond.
-
 2. Uniform Application: Apply the wax or glue evenly to avoid creating air pockets or uneven surfaces that can compromise the stability of the mounting.
-
 3. Controlled Heating: When using wax, control the heating process to melt the wax evenly without overheating, which can affect its properties and adhesion.
-
 4. Gentle Removal: Use appropriate solvents or controlled heating to remove the wax without damaging the material. Avoid excessive force that could cause cracks or breakage.
Innovative Uses and Alternatives:
For materials that require an even higher level of precision and stability, consider using advanced mounting techniques such as vacuum chucks or custom-designed fixtures. These methods can complement wax/glue mounting by providing additional support and minimizing the risk of damage during high-precision operations.
Colleting Devices
In the past two to three years, there has been a significant expansion in the variety of fixtures available for holding micro and miniature parts. This growing diversity includes various innovative solutions designed to securely hold very small components during machining and other precision operations. Among these, collets stand out as the simplest and most cost-effective method for securing microparts.
Collets are cylindrical holding devices that use radial compression to grasp and hold a workpiece firmly. They are particularly advantageous for their simplicity, reliability, and precision. Standard 1C collets, which are available with diameters as small as 0.010", provide an excellent solution for holding tiny parts. These collets offer a wide range of sizes, making them versatile for different applications. Additionally, 5C collets, though not as small as 1C collets, are also available and provide similar functionality, albeit with fewer standard size options.

Advantages of Colleting Devices:
-
 1. Precision and Accuracy: Collets provide a high degree of concentricity, ensuring that the workpiece is held securely and accurately. This is crucial for operations that require tight tolerances and precision.
-
 2. Versatility: Collets can hold a wide range of part sizes and shapes, making them suitable for various applications, from micro-manufacturing to high-precision machining.
-
 3. Cost-Effectiveness: Compared to other holding fixtures, collets are relatively inexpensive while offering excellent performance. This makes them an economical choice for many applications.
-
 4. Ease of Use: Collets are easy to set up and use, requiring minimal adjustments. This simplicity reduces setup time and increases efficiency in production processes.
-
 5. Firm Grip: The radial compression mechanism ensures a firm grip on the workpiece, reducing the risk of slippage and improving the stability during machining.
In addition to traditional collets, recent innovations in colleting devices have introduced new materials and designs that enhance performance and adaptability. For instance, flexible collets made from advanced polymers can accommodate slight variations in part size, providing a more forgiving yet secure grip. Moreover, modular collet systems allow for quick changes between different collet sizes and types, increasing versatility and reducing downtime.
Considerations for Choosing Colleting Devices:
-
 1. Material Compatibility: Ensure the collet material is compatible with the workpiece material to avoid damage or excessive wear.
-
 2. Size Range: Select collets that cover the required size range for your specific applications. Custom collets may be necessary for non-standard sizes.
-
 3. Clamping Force: Consider the required clamping force to ensure the collet can hold the workpiece securely without causing deformation.
-
 4. Operating Conditions: Evaluate the operating conditions, such as temperature and exposure to chemicals, to choose collets that can withstand these environments.

ARE YOU USING RIGHT TOOLS
FOR YOUR APPLICATION?
LET US
HELP YOU
HAVING ISSUES WITH
YOUR CURRENT TOOLS?
Knowledge Center
How to Selecting Right Diamond Tools for your application
How to properly use Diamond Tools
Why use diamond
Diamond vs CBN (cubic boron nitride) Tools
What is Diamond Mesh Size and how to select best one for your application
What is Diamond Concentration and which to use for your application
Diamond Tool Coolants Why, How, When & Where to Use
Get to Know the Diamond Tool Bond Types and Which to use for your application
How to Properly Use Diamond Carving Points

Ayan Sadyk is a materials scientist and process engineer with over two decades of experience in the industrial diamond tooling sector. His expertise lies in integrating ultra-thin diamond blades, CBN wheels, and advanced cutting systems into precision manufacturing workflows for applications in optics, semiconductors, and technical ceramics.
With a background in materials behavior and surface integrity, Mr. Sadyk brings a data-driven, application-specific approach to cutting and grinding process development. He has worked closely with manufacturers and R&D facilities across Eastern Europe, North America, and the Middle East, helping optimize tool life, surface finish, and process stability.
As an author, he focuses on bridging materials science with tooling innovation—writing on topics such as blade wear mechanisms, thermal effects in hard material sectioning, and adaptive process design.


