Table of Contents
ToggleTolerances, accuracy, and repeatability are essential concepts in the fields of engineering, manufacturing, and measurement. They all relate to the precision and consistency of a process, system, or measurement
Trusted by Tens of Thousands of Manufacturers, Laboratories,
Research Institutions Worldwide
Since 1990

Established in 1990
Understanding Tolerances, Accuracy, and Repeatability for Industrial Diamond Tools and Equipment
In manufacturing precision is key. And When it comes to diamond & cbn tools this is even more important. For this reason it's crucial end users regardless of their background to understand the concepts of tolerances, accuracy, and repeatability. These factors are essential for achieving reliable performance and high-quality and consistent results, especially in industries like advanced materials, ceramics, optics, research and development, and precision engineering. Checking tolerances involves a combination of methodologies, instruments, and adherence to established standards.
This article will cover the definitions, importance, and roles of tolerances, accuracy, and repeatability in the context of diamond & cbn tools. We will explore their applications in various industries, discuss standard measurement techniques, and explain how these parameters interrelate to affect diamond & cbn tool performance and your end product results.
Aspect | Tolerances | Accuracy | Repeatability |
|---|---|---|---|
Definition | Permissible limits of variation in a physical dimension or measurement. | How close a measured value is to the true or intended value. | Ability of a process or measurement to produce consistent results over multiple trials. |
Importance | Ensures proper fit, function, and performance of components. | Ensures that the outcome matches the intended or true value. | Ensures consistency in repeated measurements or processes. |
Role in Diamond Tools | Critical for fitting and functionality of tools and equipment, affecting cutting, drilling, and grinding. | Vital for achieving desired cutting, drilling, or grinding outcomes, especially with delicate or valuable materials. | Essential for consistent performance in manufacturing, ensuring components fit together correctly. |
Applications | Manufacturing, assembly, and quality control. | Precision cutting, drilling, grinding, and material processing. | Manufacturing consistency, experimental validation, and product quality control. |
Measurement | Specified as a range, typically ±X inches or mm. | Measured as a deviation from the true value, often expressed in percentage or absolute terms. | Measured as the standard deviation of multiple measurements. |
Correlation | Influences and is influenced by accuracy and repeatability; tighter tolerances usually imply higher accuracy and repeatability requirements. | Directly correlated with tolerances and repeatability; poor accuracy can result from improper tolerances or lack of repeatability. | Directly correlated with tolerances and accuracy; poor repeatability can affect perceived accuracy and lead to tolerance issues. |
Emphasis | Emphasized in ensuring components fit and function together properly, with critical applications requiring tighter tolerances. | Emphasized in achieving desired outcomes, particularly important in high-precision applications. | Emphasized in ensuring consistent quality, particularly important in high-volume or high-stakes manufacturing. |
What are tolerances for Industrial Diamond & CBN Tools?
Tolerances - Tolerances refer to the permissible limits of variation in a physical dimension or measurement. In other words, it's the range within which a specific measurement is considered acceptable. Tolerances can be classified into unilateral and bilateral:
-
 Unilateral Tolerance: Allows variation in only one direction (either above or below the nominal dimension).
 -
 Bilateral Tolerance: Allows variation in both directions (above and below the nominal dimension).
Tolerances are a critical concept in engineering and manufacturing, encompassing the permissible limits of variation in a physical dimension or measurement. Essentially, tolerances define the acceptable range of deviation from a specified value, ensuring that components fit and function correctly. Tolerances are often expressed as a plus-minus value relative to a nominal or target dimension.
Tolerances can be categorized into two main types: unilateral and bilateral. Unilateral tolerance permits variation in only one direction, either above or below the nominal dimension. For example, if a shaft is specified with a nominal diameter of 10.000 inches with a unilateral tolerance of +0.002/-0.000 inches, the acceptable diameter range would be 10.000 to 10.002 inches. Bilateral tolerance allows variation in both directions, above and below the nominal dimension. For instance, if a part is specified with a nominal dimension of 5.000 inches with a bilateral tolerance of ±0.001 inches, the acceptable range would be 4.999 to 5.001 inches.
Why are tolerances important?
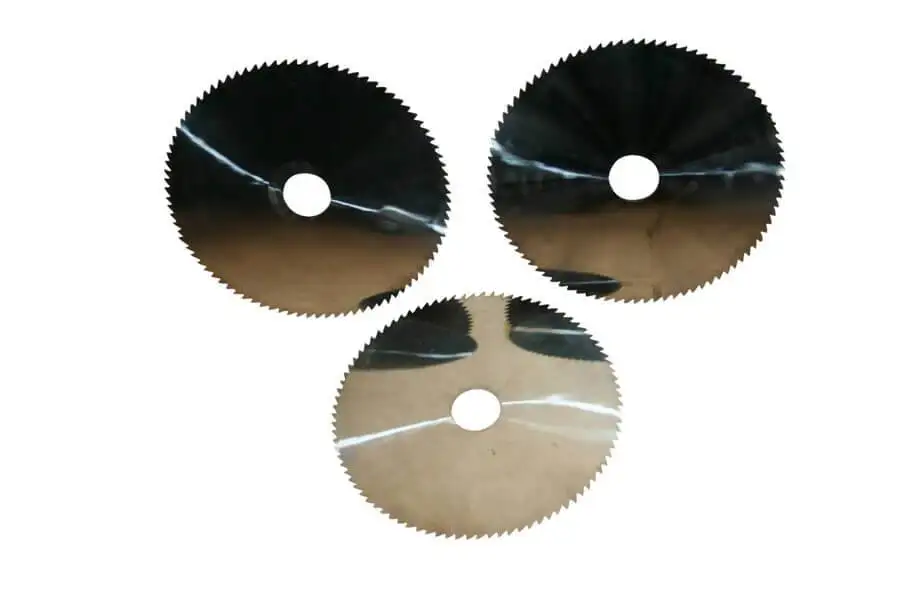
In the domain of industrial diamond tools, precise tolerances are essential for several reasons. Firstly, they ensure precision and accuracy. Diamond tools, such as blades, drills, and grinding wheels, are often used in high-precision applications where tight tolerances are necessary to achieve the desired results. For example, a diamond blade used in semiconductor manufacturing might need a thickness tolerance as tight as ±0.001 inches to prevent damage to delicate components and ensure clean cuts.


Secondly, proper tolerances help maximize the performance of diamond tools. For instance, a diamond grinding wheel with an incorrect tolerance might vibrate excessively, leading to uneven wear, poor surface finish, and inefficient material removal. In equipment like precision cutting saws, maintaining tight tolerances ensures that the components fit together correctly, which minimizes vibrations, reduces wear and tear, and enhances cutting accuracy.
Thirdly, maintaining appropriate tolerances contributes to longer tool life. Diamond tools that are manufactured to precise specifications experience less stress during operation, which reduces the risk of premature failure. For example, diamond micro-drills used in electronics manufacturing need to fit precisely within their holders to avoid excessive radial runout, which can cause the drill to break or produce inaccurate holes.
Lastly, tight tolerances are a hallmark of quality in industrial diamond tools. Components that fit within specified tolerances are less likely to suffer from defects or inconsistencies, which is vital in industries like aerospace, where component failure can have catastrophic consequences. For instance, diamond-coated components used in aerospace applications must adhere to stringent tolerances to ensure they can withstand extreme conditions without failure.
In various applications and industries, tolerances play a crucial role. The aerospace industry relies on diamond tools with precise tolerances for machining advanced materials like composites and titanium alloys. Tight tolerances ensure that components fit together seamlessly and operate safely under extreme conditions. In optics manufacturing, diamond tools are used to shape and polish lenses and mirrors.
Tight tolerances are essential to achieve the required optical precision, which is crucial for high-quality imaging systems. In advanced materials research and development, diamond tools are used to cut and shape innovative materials like graphene and ceramics. Precise tolerances ensure that these materials are not damaged during processing, enabling accurate experimentation and product development.
ANSI Standard Tolerances for Diamond Wheels

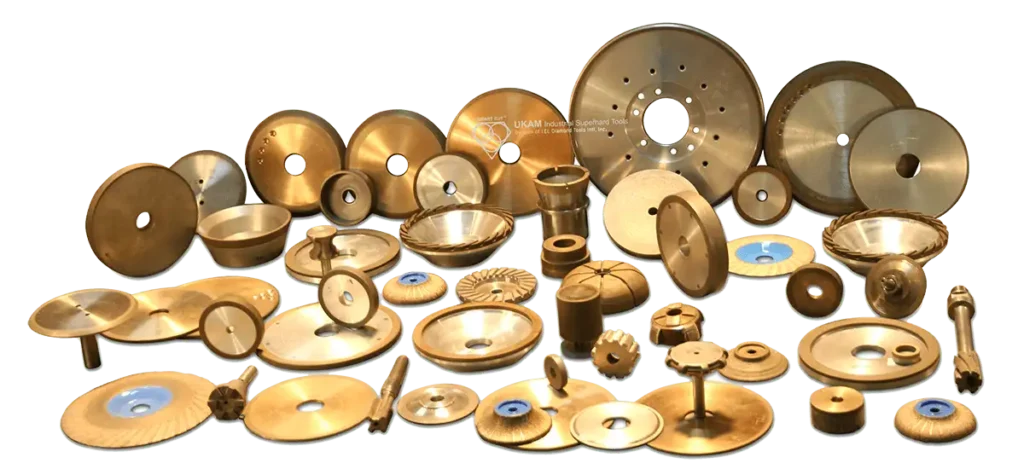

Outside Diameter (OD) Tolerances
The standard tolerance for the outside diameter (OD) of diamond wheels according to ANSI B7.1 is typically +0.050 inches / -0.000 inches. This means the wheel's diameter can exceed the specified measurement by up to 0.050 inches but cannot be smaller than the specified dimension. Ensuring precise OD tolerances is critical to ensure the wheel fits properly within the machine housing and provides the necessary cutting area.
Arbor Hole Tolerances
For arbor holes, the tolerance is generally set at +0.001 inches / -0.000 inches. This ensures that the arbor hole, which fits onto the machine spindle, is slightly larger but not smaller than specified. A properly sized arbor hole ensures a snug fit, preventing wobbling and ensuring stability during high-speed operations.
Rim Thickness Tolerances
The rim thickness tolerance is typically +0.002 inches / -0.001 inches. This precise control over the rim thickness ensures the tool's cutting or grinding edge is maintained within specified limits, promoting consistent performance and durability. The rim is the critical part that directly interacts with the material, so maintaining its thickness within these tight tolerances is essential for effective operation.
Core Thickness Tolerances
Core thickness tolerances are generally +0.001 inches / -0.001 inches. The core is the central part of the wheel that provides structural support and balance. Maintaining tight tolerances on the core thickness ensures the wheel can withstand operational stresses without deforming or failing, thereby maintaining its integrity and balance during high-speed rotation.
Runout Tolerance
Runout measures the deviation of the wheel’s surface as it rotates, ensuring the wheel does not wobble or exhibit eccentric movement. Runout is divided into two categories:
-
 Axial Runout: Deviation in the wheel’s face parallel to the axis of rotation.
 -
 Radial Runout: Deviation in the wheel’s circumference perpendicular to the axis of rotation.
Typical runout tolerances are around 0.001 inches. Excessive runout can lead to poor cutting performance, increased wear, and potential safety hazards.
Measurement Techniques
-
 Dial Indicators: Used to measure both axial and radial runout by positioning the indicator against the wheel’s surface as it rotates.
 -
 Runout Gauges: Specialized devices designed to measure runout precisely, often integrated into the machine setup.
Side Clearance Tolerance
Side Clearance ensures that the sides of the wheel are parallel and evenly spaced. This prevents binding, reduces friction, and ensures smooth operation. Proper side clearance is essential to avoid excessive heat generation and wear.
Measurement Techniques
-
 Thickness Gauges: Used to measure the parallelism and uniformity of the wheel sides.
 -
 Micrometers and Calipers: Measure the distance between the wheel sides at various points to ensure uniform clearance.
Balancing Tolerance
Balancing Tolerance ensures that the wheel's mass is evenly distributed to prevent vibrations during operation. An unbalanced wheel can cause vibrations, noise, and even damage to the machine and workpiece.
Measurement Techniques
-
 Balancing Machines: These machines detect and correct imbalances in the wheel. They measure the distribution of mass and indicate the amount and location of material to be added or removed to achieve balance.
 -
 Dynamic Balancing: This involves rotating the wheel at operational speed to detect imbalances and correct them dynamically.
Bore Taper Tolerance
Bore Taper tolerance ensures that the taper of the wheel's bore matches the machine spindle’s taper. This secure fit is crucial for stable and precise operation.
Measurement Techniques
-
 Taper Gauges: Used to measure the angle of the taper in the bore to ensure it matches the specified taper.
 -
 Coordinate Measuring Machines (CMMs):Provide precise measurements of the bore taper, ensuring it conforms to specifications.
Diamond Core Drills & Tools Tolerances
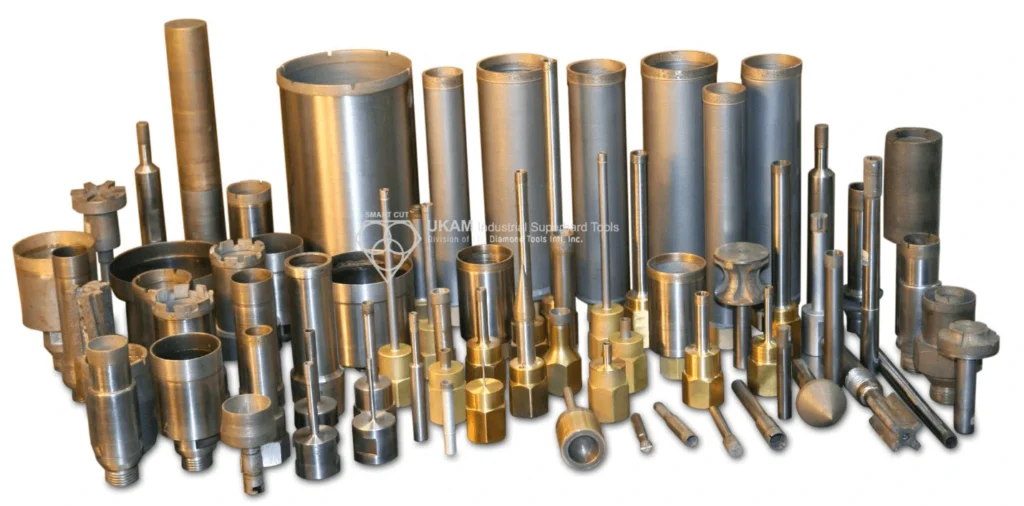
Diameters:
-
 D (Outside Diameter):The outermost diameter of the drill bit. Tolerance for this dimension ensures the bit fits properly in the drill chuck or holder.
 -
 D1 (Inside Diameter):The diameter of the inner cavity or bore of the drill bit. Ensures proper passage for the drilled material.
 -
 D2 (Shank Diameter or Thread Diameter): The diameter of the shank or threaded portion of the bit. Ensures a secure fit in the chuck or collet.
 -
 D3 (Shank Inside Diameter): If the shank is hollow, this is the inside diameter.
Heights:
-
 H (Total Drill Length):The overall length of the diamond drill from end to end.
 -
 H1 (Diamond Depth): The height of the diamond section, the tool will continue to operate until the diamond section is completely wornout
 -
 H2 (Drilling Depth): The maximum depth the diamond drill can reach during operation.
 -
 H3 (Shank Length): The length of the shank that fits into the drill chuck or holder.
Thickness:
-
 TH (Drill Tube Wall Thickness):The thickness of the drill tube wall, ensuring structural integrity.
 -
 TH1 (Outside Diameter Diamond Section Relief): The thickness of the material around the diamond section.
 -
 TH2 (Inside Diameter Diamond Section Relief): The thickness of the inner wall around the diamond section.
Tolerances:
Typical tolerances for these dimensions might include:
-
 D (Outside Diameter): Tolerance could be +0.00050 inches to .050”/ -0.000 inches.
 -
 D1 (Inside Diameter): Tolerance typically around ±0.005 to .050” inches to ensure a precise fit.
 -
 D2 (Shank Diameter): Tolerance of +0.001 inches / -0.000 inches for a secure fit.
 -
 H (Total Length): Tolerance might be ±0.005 inches to ensure consistency in length.
 -
 TH (Wall Thickness): Tolerance could be ±0.005” inches to maintain structural integrity.
Concentricity Tolerance - Concentricity ensures the alignment of the diamond drill's outer and inner diameters with the central axis. Proper concentricity minimizes vibration and wear during high-speed rotation, enhancing the precision of drilling.
Surface Finish Tolerance - The surface finish of both the cutting edge and the shank must meet specified roughness levels to ensure smooth operation, efficient cutting, and secure holding in the chuck. Surface finish is measured in terms of average roughness (Ra).
Chamfer Tolerance - Chamfer dimensions on the cutting edges or shank ensure proper entry and seating in the workpiece or chuck. Precise chamfer tolerances help in reducing chipping and improving the tool's lifespan.
Roundness Tolerance - Roundness ensures that the cross-sectional shape of the drill is perfectly circular. This is critical for minimizing eccentric rotation and maintaining balance during operation.
Thread Tolerance - If the shank includes threads, the thread pitch, depth, and angle must meet precise tolerances to ensure secure and stable attachment to the drilling equipment.
Clearance Tolerances - Clearances, especially at the tip and along the cutting edges, must be maintained to ensure smooth chip evacuation and reduce heat buildup during drilling.
Runout refers to the deviation of the drill's rotational surface from a perfect circle, which includes both axial and radial runout. Maintaining tight runout tolerances is crucial for ensuring the precision and stability of the drill during high-speed operations.
Perpendicularity Tolerances ensures that the axis of the drill is perpendicular to its base or mounting surface. This is critical for accurate drilling and preventing skewed holes.
Cylindricity Tolerance measures how closely the shape of the cylindrical part of the drill (such as the shank) approaches a true cylinder. This ensures consistent performance and fit within the machine chuck.
Profile Tolerance controls the variation in the profile of the drill, particularly the cutting edge geometry. This ensures that the cutting edges are uniform and effective in material removal.
Total Indicated Runout TIR combines both axial and radial runout into a single measurement. It ensures that the drill rotates smoothly without significant deviation, critical for high-speed operations.
International & American Standards for Diamond & CBN Tools
ISO 6104:2005 focuses on the characteristics and test methods for diamond cutting-off wheels. It specifies the dimensions, tolerances, and marking requirements to ensure that these wheels meet specific quality and performance criteria. This standard outlines acceptable variations in thickness, diameter, and concentricity to ensure uniformity and prevent performance issues. The bore diameter tolerances are also defined to guarantee a proper fit on the spindle, preventing mounting problems. Additionally, ISO 6104:2005 details the methods for testing and verifying these parameters, providing guidelines for conducting inspections and recording results.
ISO 6103:2005 addresses the dimensions and tolerances for diamond grinding wheels, with a particular focus on balance and safety. It specifies permissible tolerances for bore diameter, wheel thickness, and wheel diameter, ensuring proper fit and functionality. The standard also sets limits for permissible unbalances to ensure smooth and safe operation, free from excessive vibration. ISO 6103:2005 includes methods for static testing of grinding wheels, detailing how to measure and report results to ensure compliance with the specified parameters.
ANSI B7.1 is a comprehensive standard that provides safety requirements for the design, use, and maintenance of abrasive wheels, including diamond tools. It covers various aspects such as design and construction requirements, tolerances for dimensions like diameter, thickness, and bore size, and guidelines for mounting and use. The standard emphasizes the importance of maintaining these tolerances to ensure safe operation. It also specifies requirements for balancing wheels and operating them at the correct speeds, along with regular inspection and maintenance guidelines to check for wear, damage, and other safety issues. ANSI B7.1 includes detailed safety instructions to prevent accidents and injuries, covering personal protective equipment (PPE) and safe working practices.
DIN Standards (e.g., DIN EN 13236) set out the safety requirements for superabrasive products, including diamond tools. These European standards cover both the manufacturing and use of these products to ensure they are safe for operators and effective in their applications. They define acceptable dimensions and tolerances, ensuring uniformity and compatibility with various machines and applications. Safety requirements for design and use are specified to prevent accidents and ensure safe operation. The standards provide methods for testing various parameters to ensure compliance, including static and dynamic testing procedures. Proper marking and labeling of diamond tools are required to indicate critical information such as maximum operating speed and product specifications. Additionally, the standards specify requirements for balancing and mounting to ensure smooth and safe operation. Manufacturing guidelines are included to ensure the quality and safety of the diamond tools, covering material selection, production techniques, and quality control measures.
What tolerances are most relevant for diamond & cbn tools?
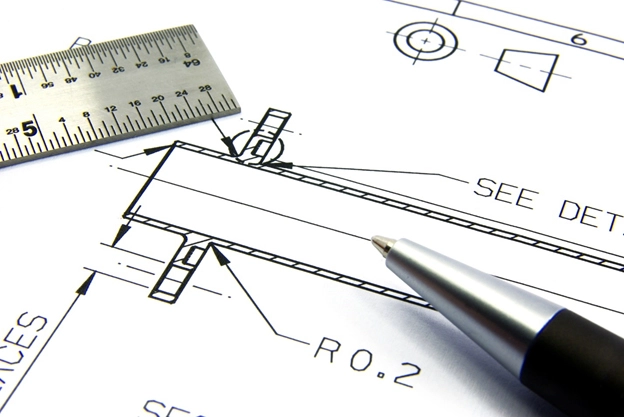
Different diamond & cbn tools have different dimensions and parameters and hence tolerances that need to be measured depending on the tool type, shape, diameter, application, and other dimensions. Here are some of the tolerances that are relevant for diamond & cbn tools
1. Dimensional Tolerances
Dimensional tolerances refer to the allowable variation in the physical size of the tool, such as its diameter, thickness, or length. These tolerances are crucial because they directly affect the fit, alignment, and function of the tool. In diamond saw blades, for instance, thickness tolerance is critical to ensure that the blade fits correctly into the machine and that the cut produced is of the desired width. For diamond drills, the diameter tolerance affects how snugly the drill fits into its chuck or holder, which in turn impacts the drilling precision and stability.
2. Runout Tolerances
Runout tolerances include both axial and radial runout. Axial runout measures how flat a rotating tool, like a diamond grinding wheel, remains relative to its axis of rotation. Radial runout measures how centered the tool remains while rotating. These tolerances are particularly important for rotary tools, where excessive runout can lead to uneven cuts, vibrations, and reduced tool life. Axial and radial runout tolerances are critical in applications where precision is paramount, such as in the production of semiconductor wafers or high-performance mechanical components. In such cases, runout tolerances might need to be within a few microns to ensure optimal performance.

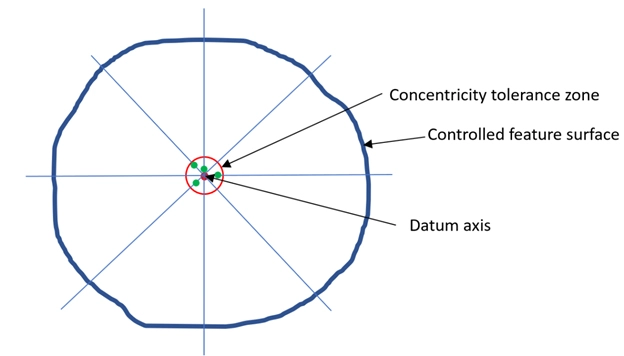
3. Concentricity Tolerances
Concentricity tolerances measure how well-centered different features of the tool are with respect to each other. For example, in a diamond drill, the tip should be concentric with the shank to ensure accurate drilling and prevent wobbling or eccentric motion. In applications requiring high drilling precision, such as electronics manufacturing or microfabrication, even slight deviations in concentricity can lead to defective components or inefficient processes.
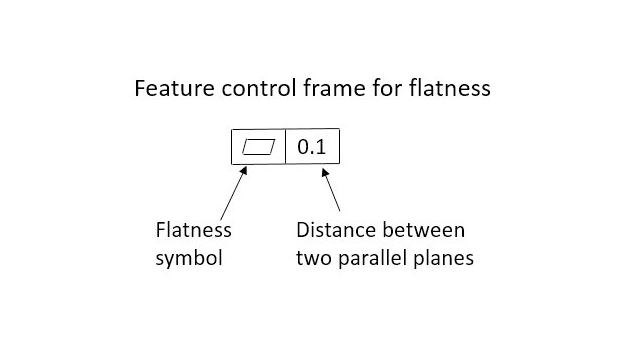
4. Flatness Tolerances
Flatness tolerances refer to how flat a surface should be. These tolerances are particularly important for diamond tools used for surface finishing, like lapping plates, grinding discs, or polishing pads. In applications where even surfaces are required, such as in optics manufacturing or metallographic preparation, maintaining tight flatness tolerances is crucial. Achieving a flat surface ensures uniform material removal or polishing, leading to high-quality finishes on components or specimens.
5. Surface Finish Tolerances

Surface finish tolerances define the permissible roughness or texture of the tool’s surface. These are important for diamond tools where the surface finish directly impacts the quality of the finished product. For example, in diamond polishing pads or grinding wheels, the surface roughness can affect the smoothness of the polished or ground surface. In high-precision industries, such as medical device manufacturing or advanced ceramics, surface finish tolerances are tightly controlled to ensure that the final product meets specific performance and aesthetic standards.
6. Bore Tolerances
Bore tolerances pertain to the allowable variation in the inner diameter of the tool’s central hole, which is crucial for tools that are mounted on arbors or spindles, like diamond saw blades or grinding wheels. If the bore is too large, the tool might not fit securely, leading to vibrations or misalignment. Conversely, if the bore is too small, the tool might not fit onto the arbor or spindle at all. Tight bore tolerances ensure a secure fit, which is vital for maintaining the tool’s stability and performance during operation.
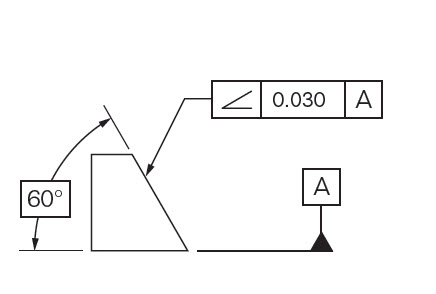
7. Angular Tolerances
Angular tolerances refer to the allowable variation in the angle of a feature relative to a reference axis or plane. These tolerances are important for diamond tools used in applications where precise angles are required, such as beveling edges, cutting angled slots, or creating chamfers. For example, in the manufacturing of optical components, the angle of a beveled edge might need to be within a fraction of a degree to achieve proper light reflection or refraction.
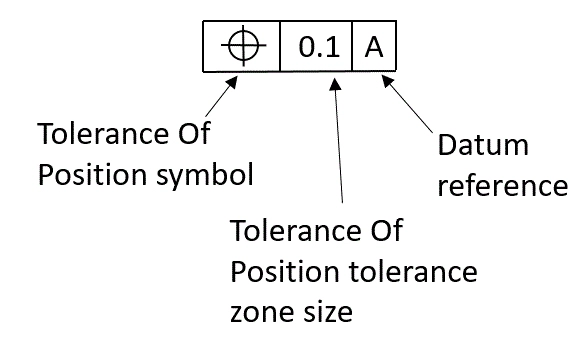
8. Positional Tolerances
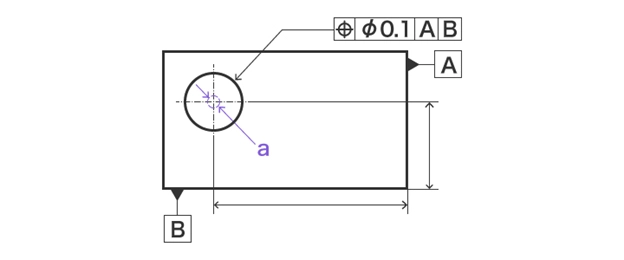
Positional tolerances control the allowable variation in the location of a feature, such as a hole or a slot, relative to a specified datum. These tolerances are crucial for diamond drills or cutting tools used to create features that need to align with other parts or components. For example, in precision assemblies like electronics or mechanical devices, the position of drilled holes must be accurate to ensure proper fit and function.
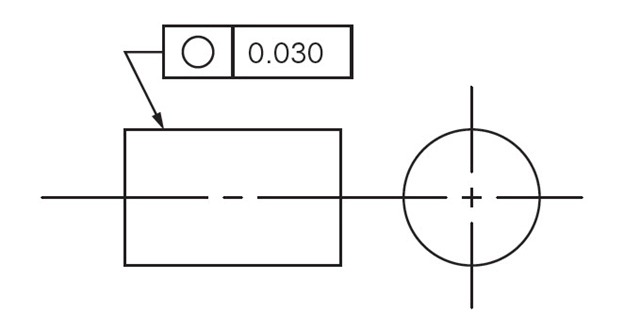
9. Circularity Tolerances
Circularity tolerances, also known as roundness tolerances, measure how closely the shape of a feature, such as a hole or a cylindrical part, conforms to a perfect circle. These tolerances are vital for diamond tools used to create or finish cylindrical or circular features, such as in shafts, bearings, or precision components. Maintaining tight circularity tolerances ensures that these parts fit and function correctly, reducing wear and enhancing performance.
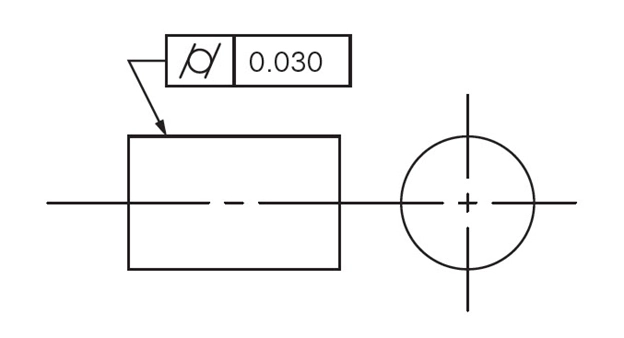
10. Cylindricity Tolerances
Cylindricity tolerances measure how closely the shape of a cylindrical feature conforms to a perfect cylinder. These tolerances are important for diamond tools used in turning, grinding, or drilling operations where cylindrical precision is required. For example, in automotive or aerospace manufacturing, the cylindricity of components like pistons or shafts affects their performance and longevity.
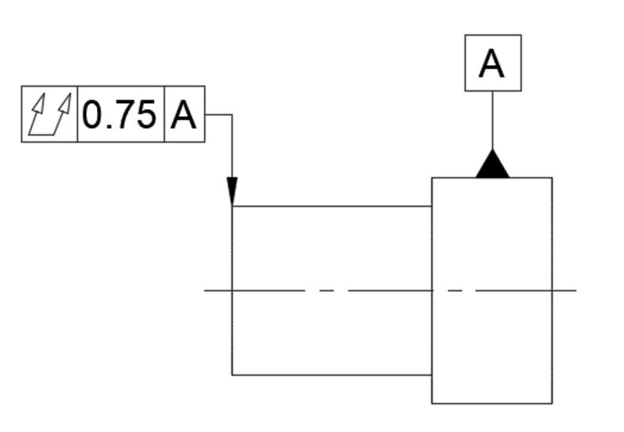
11. Total Indicated Runout (TIR) Tolerances
Total Indicated Runout (TIR) tolerances measure the combined effect of both radial and axial runout. This tolerance indicates the total deviation of a rotating feature, such as a diamond grinding wheel or a cutting disc, from its intended path. TIR tolerances are crucial for rotary diamond tools where both concentricity and flatness are important. Tight TIR tolerances ensure smooth operation, reduce vibrations, and enhance the quality of the finished product.
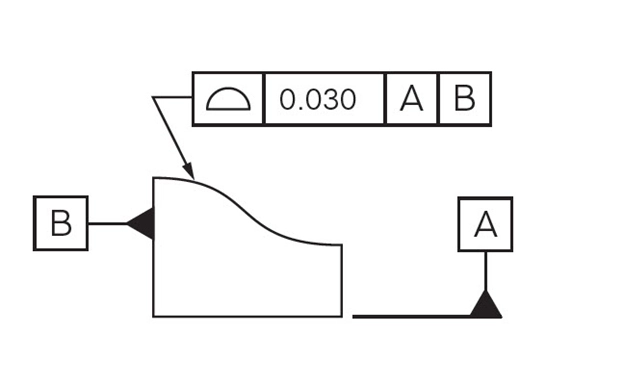
12. Profile Tolerances
Profile tolerances control the allowable variation in the shape or contour of a feature. These tolerances are used for diamond tools that need to create or match complex shapes, such as in mold-making, tool and die manufacturing, or aerospace components. For example, a diamond tool used to machine a complex aerodynamic surface might need a tight profile tolerance to achieve the desired shape and performance characteristics.
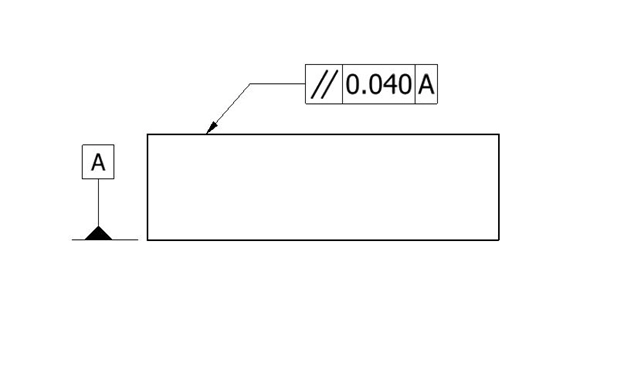
13. Parallelism Tolerances
Parallelism tolerances indicate how parallel two surfaces or features of a tool or part are relative to each other. This tolerance is important for diamond tools like cutting discs, blades, or lapping plates, where parallel surfaces ensure even cutting or polishing action. In applications like wafer slicing, metallographic preparation, or precision engineering, maintaining tight parallelism tolerances ensures that the resulting surfaces are flat and uniform, which is crucial for subsequent processing or analysis.

14. Perpendicularity Tolerances
Perpendicularity tolerances indicate how perpendicular a surface or feature is relative to a reference plane or axis. This tolerance is vital for diamond tools used in applications where perpendicular alignment is necessary, such as creating precise square edges or aligning components in assemblies. In manufacturing processes like machining, grinding, or cutting, maintaining tight perpendicularity tolerances ensures that parts fit together correctly and function as intended.
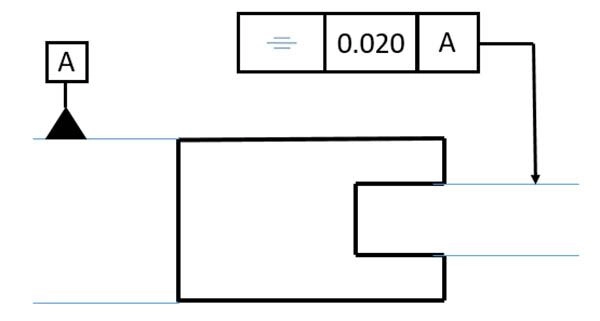
15. Symmetry Tolerances
Symmetry tolerances measure how symmetric a feature is relative to a central axis or plane. This tolerance is important for diamond tools used in applications where balanced or symmetric shapes are required, such as in rotating components or mirror-image parts. For example, in automotive or aerospace manufacturing, maintaining symmetry in components like turbine blades or engine parts helps ensure balanced operation and reduced vibration.
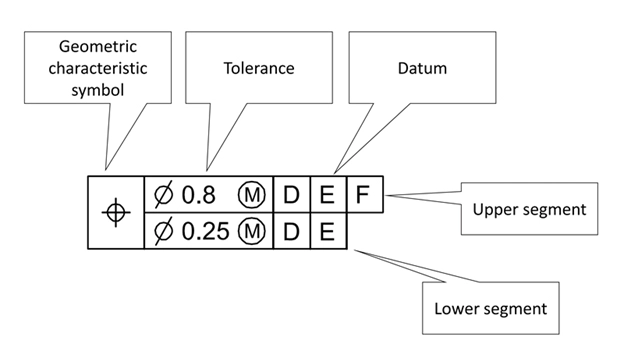
16. Composite Tolerances
Composite tolerances combine multiple types of tolerances into a single specification, allowing for more complex control of features. These tolerances are useful for diamond tools used in intricate or multi-faceted applications, such as creating complex shapes or patterns. For example, a composite tolerance might control both the position and orientation of a hole, ensuring that it is correctly located and aligned.
17. True Position Tolerances
True position tolerances control the allowable deviation of the actual location of a feature, such as a hole or a slot, from its theoretically exact position. This tolerance is crucial for diamond drills or cutting tools used to create features that need precise positioning, such as in assemblies, mechanical devices, or tooling. True position tolerances ensure that features are located accurately relative to each other or to a datum, which is essential for proper fit and function.
Aspect | Tolerances | Importance for Diamond Tools |
|---|---|---|
Dimensional Tolerances | Allowable variations in the size, such as diameter, thickness, or length of the tool. | Critical for fit and function. Tight tolerances ensure proper alignment and prevent excessive material removal or damage. |
Runout Tolerances | Deviation from perfect concentricity or flatness. Includes axial and radial runout. | Important for rotary tools like grinding wheels and cutting discs. Excessive runout can cause vibrations, uneven cuts, and tool damage. |
Concentricity Tolerances | Measure of how centered different features of the tool are with respect to each other. | Important for diamond drills and rotary tools. Ensures accurate drilling and prevents wobbling or eccentric motion. |
Flatness Tolerances | Allowable variation in flatness of a surface. | Important for lapping plates, grinding discs, or polishing pads. Ensures even material removal or polishing for high-quality finishes. |
Surface Finish Tolerances | Roughness or texture of the tool's surface. | Important for polishing pads or grinding wheels. Affects the smoothness of the polished or ground surface and overall quality. |
Angular Tolerances | Allowable variation in the angle of a feature. | Critical for tools used for beveling edges or cutting angled slots. Ensures proper fit and performance. |
Cylindricity Tolerances | Measure of how cylindrical a feature is. | Important for cylindrical components like shafts or bearings. Ensures proper fit and reduces wear. |
Parallelism Tolerances | Measure of how parallel two surfaces or features are relative to each other. | Important for cutting discs, blades, or lapping plates. Ensures even cutting or polishing action for uniform results. |
Perpendicularity Tolerances | Measure of how perpendicular a surface or feature is relative to a reference plane or axis. | Important for tools used for square edges or component alignment. Ensures proper fit and function. |
Symmetry Tolerances | Measure of how symmetric a feature is relative to a central axis or plane. | Important for balanced or symmetric shapes, such as in rotating components or mirror-image parts. |
True Position Tolerances | Deviation of the actual location of a feature from its theoretically exact position. | Critical for diamond drills or cutting tools used in precise positioning, such as in assemblies or tooling. |
Total Indicated Runout (TIR) Tolerances | Combined effect of radial and axial runout. | Crucial for rotary diamond tools. Ensures smooth operation, reduces vibrations, and enhances product quality. |
Profile Tolerances | Control the allowable variation in the shape or contour of a feature. | Useful for creating or matching complex shapes. Critical for mold-making, tool and die manufacturing, or aerospace components. |
Bore Tolerances | Allowable variation in the inner diameter of a central hole. | Crucial for tools mounted on arbors or spindles, such as saw blades or grinding wheels. Ensures secure fit and stable performance. |
Positional Tolerances | Control the allowable variation in the location of a feature relative to a datum. | Important for diamond drills or cutting tools creating features needing alignment. Ensures precise positioning and functional fit. |
True Profile Tolerances | Measure the true outline or surface of a part relative to a datum. | Vital for diamond tools creating or matching complex surfaces, such as in optical lenses or aerodynamic parts. |
Standard Engineering & Machining Tolerances
standard engineering and machining tolerances are integral to the design, production, and application of diamond & cbn tools. Standard tolerances refer to the typical allowable variations in dimensions that are generally acceptable in common engineering and manufacturing applications. These tolerances are suitable for most everyday purposes where extremely tight fits or alignments are not critical. The standard tolerances are often specified based on the nominal size of the component and can be categorized as follows:
1. General Engineering Tolerances
General engineering tolerances are commonly specified according to international standards such as ISO 2768. These tolerances are categorized into various classes, including fine (f), medium (m), coarse (c), and very coarse (v), each suitable for different applications:
-
 ISO 2768-f (Fine): This tolerance class is used for precise work with smaller nominal dimensions, typically up to 120 mm.
 -
 ISO 2768-m (Medium): The medium tolerance class is commonly used for general engineering work with nominal dimensions up to 1200 mm.
 -
 ISO 2768-c (Coarse): This class is for less precise applications with larger nominal dimensions.
 -
 ISO 2768-v (Very Coarse): This class is used for less critical parts with very large nominal dimensions.
2. ANSI/ASME Standard Tolerances
The ANSI B4.1 standard provides tolerances based on the American National Standards Institute (ANSI) system:
-
 Class X: Extremely precise tolerance, typically used for precision machining.
 -
 Class Y: Close tolerance, suitable for general engineering applications requiring more precise fits.
 -
 Class Z: Medium tolerance, commonly used for standard fits.
 -
 Class ZZ: Loose tolerance, used for parts where precise fits are not required.
High Precision Tolerances
High precision tolerances are used in applications where very tight control over dimensions is necessary. These tolerances are essential for applications involving critical alignments, minimal clearances, or specific functional requirements. High precision tolerances are often specified to a higher degree of accuracy than standard tolerances, typically within the following ranges:
1. Dimensional Tolerances
-
 High Precision Tolerances: In high precision machining or toolmaking, dimensional tolerances typically range from ±0.0001 inches (±0.0025 mm) to ±0.001 inches (±0.025 mm). Such tolerances are common in aerospace, optics, and medical device manufacturing.
2. Runout Tolerances
-
 High Precision Runout Tolerances: High precision runout tolerances, including both radial and axial runout, are often within the range of a few microns (±0.001 mm to ±0.005 mm). These tolerances are crucial for applications requiring precise rotation, such as spindle alignment or rotating machinery components.
3. Flatness Tolerances
-
 High Precision Flatness Tolerances: Flatness tolerances for high precision applications can be within a few microns over a specified area, such as ±0.0001 inches (±0.0025 mm) over a 12-inch surface. These tolerances are important for precision lapping, surface grinding, or optical component manufacturing.
4. Cylindricity Tolerances
-
 High Precision Cylindricity Tolerances: Cylindricity tolerances for high precision parts are often within ±0.0001 inches (±0.0025 mm). These tolerances are essential for components like bearings, shafts, or precision cylindrical parts where roundness and straightness are critical.
2. Accuracy
Accuracy refers to how close a measured value is to the true or intended value. In other words, it represents the degree of correctness of a measurement or the outcome of a process. Accuracy is a critical measure in engineering and manufacturing, reflecting how closely a given result aligns with the intended specification or design.
Accuracy is particularly crucial when working with diamond tools because precise cutting, drilling, or grinding often involves dealing with delicate or valuable materials. In many cases, even a small deviation from the desired measurement can lead to significant problems or damage.
In the field of optics manufacturing, achieving a specific lens shape requires tools with high accuracy to avoid optical aberrations.

Lenses and mirrors used in telescopes, microscopes, and cameras must be shaped and polished to exact specifications to function correctly. If the tools used in these processes lack accuracy, the resulting optical components may have flaws or distortions that hinder their performance.
In the case of precision cutting machines, accuracy determines the reliability of the cuts, which is essential for applications like metallography where incorrect cuts can compromise the analysis. Metallography involves studying the microstructure of metals, and precise cross-sections are necessary to obtain accurate and informative results. If the cutting machine does not provide accurate cuts, the microstructure could be misinterpreted, leading to incorrect conclusions.
Furthermore, accuracy is vital in industries like aerospace, where components must meet stringent specifications to ensure safe and reliable operation. Diamond tools used for machining critical aerospace parts, such as turbine blades or structural components, need to produce accurate and precise results to maintain the integrity of the aircraft.
In the field of advanced materials, researchers often work with innovative substances that require careful handling and precise processing. Diamond tools used for cutting or shaping these materials need to be accurate to avoid damaging the materials or altering their properties, which could undermine the intended research or application.
Accuracy is also important for ensuring the quality and consistency of manufactured products. In many industries, maintaining high accuracy is key to meeting customer expectations and regulatory requirements. For example, diamond tools used in medical device manufacturing must produce highly accurate components to ensure the safety and efficacy of the devices.
3. Repeatability
Repeatability refers to the ability of a process or measurement to produce consistent results over multiple trials or cycles. It indicates the reliability of a process or tool to deliver similar outcomes under unchanged conditions. In other words, repeatability measures how well a process can replicate its results, which is crucial in various manufacturing and scientific applications.
Repeatability is vital in industrial diamond tools because consistent performance is often necessary for manufacturing processes. If a tool or machine cannot consistently produce the same results, it may lead to product defects or process inefficiencies. For example, in composite materials processing, if a diamond saw cannot consistently produce cuts of the same width, the resulting components might not fit together properly, compromising the structural integrity or functionality of the final product.
Precision cutting saws and other equipment must offer repeatability to maintain product quality. Consistency in cutting or drilling dimensions ensures that parts fit together correctly, which is essential in industries like aerospace, where even minor deviations can lead to catastrophic failures.

Moreover, in research and development settings, repeatability ensures that experimental results are consistent, which is crucial for validating hypotheses or developing new materials. A lack of repeatability in experimental setups or cutting tools can lead to unreliable data, which undermines scientific progress.
Understanding the interplay of tolerances, accuracy, and repeatability is fundamental for manufacturers and users of industrial diamond tools. These concepts are intertwined and collectively impact the overall performance and quality of tools and equipment.
In the context of Quality Control, tight tolerances, high accuracy, and repeatability ensure that diamond tools and equipment meet the stringent requirements of various industries. Consistent and precise tools are less likely to produce defects, which is particularly important in sectors like medical device manufacturing or aerospace, where quality is paramount.
When considering Performance, the effectiveness of diamond tools, such as blades, drills, and grinding wheels, relies heavily on these factors. For example, a blade with poor accuracy might create uneven cuts, while poor repeatability could lead to inconsistent product quality. Ensuring that tools are both accurate and repeatable helps maintain the desired level of performance across different applications.
Regarding Cost Efficiency, tools and equipment that meet precise specifications reduce material waste and rework, enhancing cost efficiency. This is particularly relevant in high-cost applications like semiconductor manufacturing, where materials and processes are expensive, and any inefficiencies can lead to significant financial losses. By focusing on tolerances, accuracy, and repeatability, manufacturers can minimize waste and improve productivity.
Methodology for Checking/Measuring the Tolerances of Diamond & CBN Tools
Ensuring the precision and quality of diamond tools involves a systematic methodology that encompasses various stages of inspection and measurement. This detailed process ensures that the tools meet the required specifications and perform reliably in their intended applications.
Visual Inspection
Visual inspection is a critical initial step in checking the tolerances and overall quality of diamond tools. This process involves a thorough examination to identify any obvious defects or inconsistencies that could impact the tool’s performance. Here is a detailed look at the components and techniques involved in visual inspection:
The primary objective of visual inspection is to detect any visible defects or irregularities in the diamond tool. These defects can include chips, cracks, scratches, and other surface imperfections that could affect the tool's functionality, durability, and safety during use. Inspectors must examine the overall surface condition of the diamond tool, looking for any visible signs of wear, damage, or manufacturing defects. Special attention is given to areas prone to damage, such as the edges and corners of the tool.

Inspectors must also examine the edges of the diamond tool for chips or cracks, which can compromise the tool's cutting ability and lead to premature failure. The edges should be sharp and uniform without noticeable deformations.
7. Parallelism Tolerances
Parallelism tolerances measure how parallel two surfaces or features of the tool are relative to each other. These tolerances are important for tools like diamond cutting discs or lapping plates, where parallel surfaces ensure even cutting or polishing action. In applications like wafer slicing or metallographic preparation, maintaining tight parallelism tolerances ensures that the sliced or polished surfaces are flat and uniform, which is crucial for subsequent processing or analysis.
The bonding area where the diamond section are attached to the tool body is another crucial area to inspect. Inspectors look for signs of poor bonding, such as gaps, uneven surfaces, or detachment, and ensure that the diamond section is properly attached are attached and evenly distributed. Additionally, the geometric consistency of the tool is visually assessed, checking for obvious irregularities in shape, symmetry, and alignment to ensure conformity to its intended geometric design.

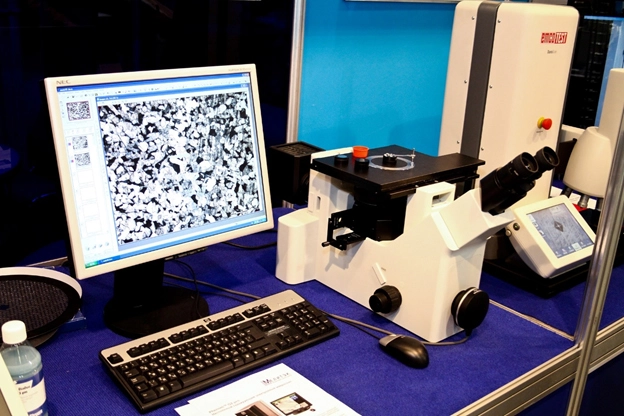
Visual inspection begins with a naked eye examination to quickly identify any major defects or inconsistencies. This initial check helps prioritize areas that need more detailed inspection. Magnification tools like loupes and microscopes are then used for closer inspection. Loupes, handheld magnifying lenses providing 5x to 20x magnification, are portable and suitable for an initial detailed examination. Microscopes, offering higher magnification (up to 100x or more),
provide a detailed view of the tool's surface, allowing inspectors to identify even minute defects. Stereo microscopes offer a three-dimensional view, useful for inspecting complex geometries and surface textures, while digital microscopes, equipped with cameras and connected to computers, allow for capturing and analyzing images of the tool surface, facilitating documentation and sharing of inspection results.
Proper lighting is crucial for visual inspection. High-intensity, adjustable lighting helps reveal surface defects that might be missed under standard lighting conditions. Ring lights and gooseneck lamps are commonly used to provide consistent and adjustable illumination during the inspection process. Comparison standards or reference samples are used to identify deviations from expected quality. These standards can be visual charts, digital images, or physical samples of acceptable and defective tools. Inspectors compare the tool being examined against these standards to determine its conformity to quality requirements.
The inspection procedure begins with the preparation phase, where the tool is cleaned thoroughly to remove any dirt, dust, or residue that could obscure defects. The inspection area is well-lit and equipped with the necessary magnification tools. An initial examination is conducted with the naked eye to quickly identify any major defects, noting areas that require further detailed inspection.

A detailed examination follows, using magnification tools to inspect the tool's surface, edges, and bonding areas. The tool is moved slowly and methodically under the magnification device to ensure a comprehensive inspection, with lighting adjusted as needed to highlight different surface features and defects.
Documentation is an important part of the inspection process. Any defects or irregularities found during the inspection are recorded using detailed notes, photographs, or videos. The findings are compared against quality standards and specifications. An assessment is then made to determine whether the tool meets the required quality standards based on the visual inspection results. An inspection report is compiled, summarizing the findings and any recommendations for further action, such as repairs or rejection of defective tools.
Dimensional Measurement
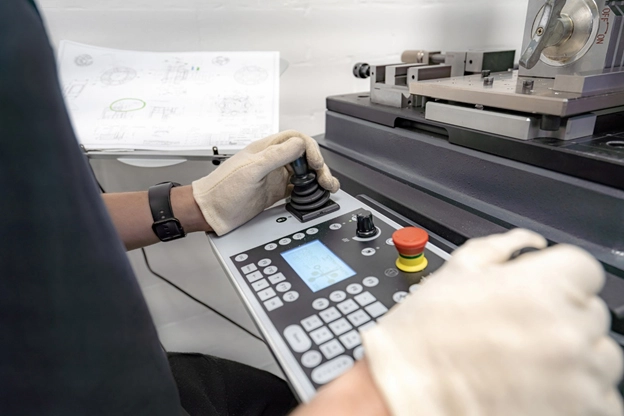
Accurate measurement of a diamond tool's dimensions is critical to ensuring its performance and reliability. This process involves the precise determination of various physical characteristics, including diameter, thickness, and other critical dimensions. High precision is essential, as even minor deviations can significantly impact the tool's functionality and lifespan.
Importance of Dimensional Accuracy
The dimensions of a diamond tool must adhere to strict tolerances to ensure proper fit, optimal performance, and safety. Accurate measurements are crucial for several reasons:
-
 Fit and Compatibility: Tools must fit perfectly with the equipment they are designed for. Any deviation in dimensions can lead to improper fitting, causing operational inefficiencies or damage to the equipment.
 -
 Performance: Precision in dimensions ensures that the tool performs as expected. For instance, a blade with the correct thickness and diameter will cut or grind materials effectively without causing excessive wear or damage.
 -
 Safety: Incorrect dimensions can lead to tool failure during operation, posing significant safety risks. Ensuring dimensional accuracy helps prevent accidents and injuries.
 -
 Consistency: Maintaining consistent dimensions across production batches ensures that all tools perform uniformly, which is vital for industrial applications where precision is paramount.
Measurement Instruments and Techniques
1. Digital Calipers
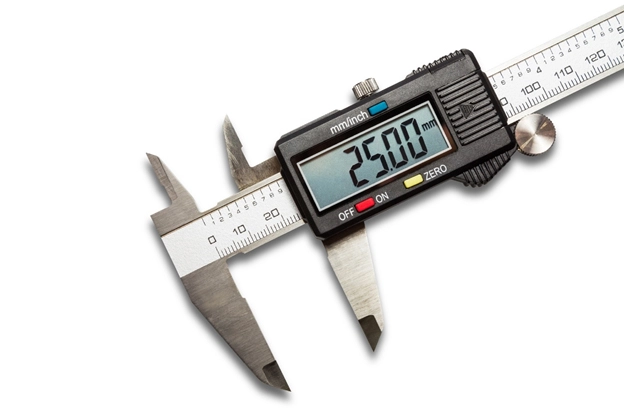
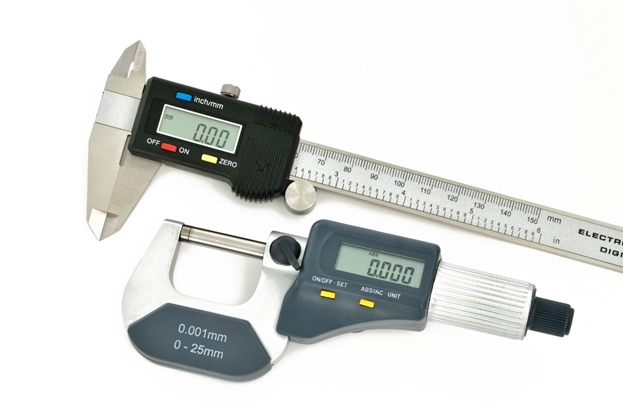
Digital calipers are versatile and widely used for measuring the diameter, thickness, and other dimensions of diamond tools. These instruments can measure internal and external dimensions as well as depths. Digital calipers offer high precision, typically down to 0.01 mm (10 micrometers), and are easy to read, reducing the likelihood of human error. They also often come with data output capabilities, allowing measurements to be recorded and analyzed electronically.
2. Micrometers
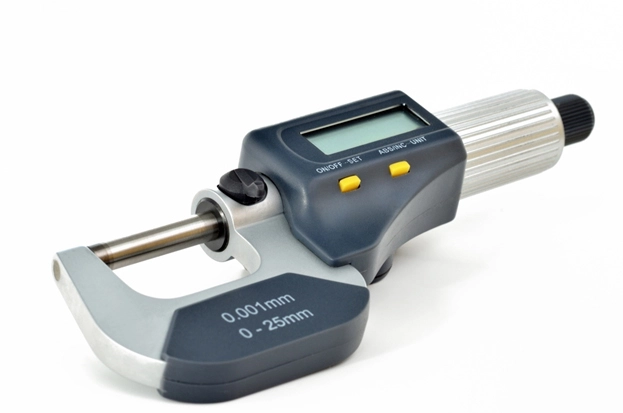
Micrometers provide even higher precision than calipers, often down to 0.001 mm (1 micrometer). They are particularly useful for measuring small dimensions with a high degree of accuracy. There are several types of micrometers, including outside micrometers for external dimensions, inside micrometers for internal dimensions, and depth micrometers for depth measurements. The thimble and spindle mechanism of micrometers ensures precise and consistent measurements.
3. Coordinate Measuring Machines (CMM)
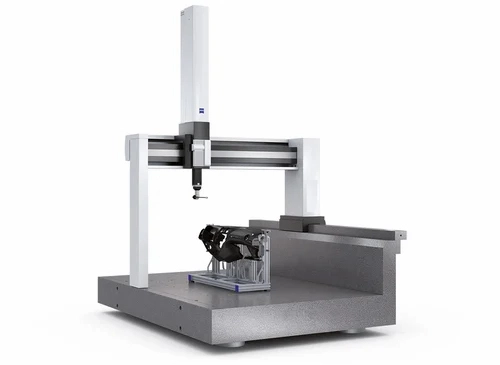
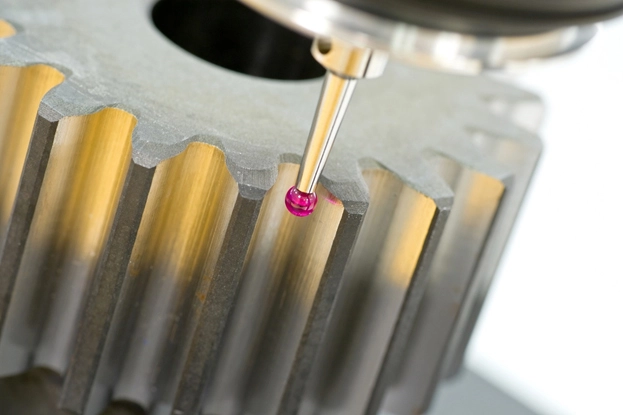
CMMs are advanced devices that provide highly accurate three-dimensional measurements. They are capable of measuring complex shapes and geometries with high precision. CMMs use a probe to touch the tool's surface at various points, creating a detailed 3D model that can be compared against design specifications. These machines are ideal for inspecting intricate designs and ensuring all dimensions are within specified tolerances.
4. Optical Comparators
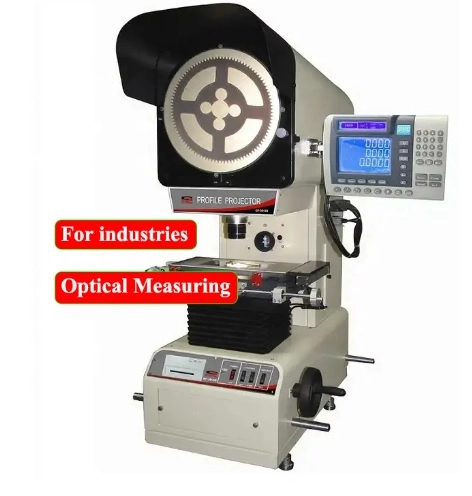
Optical comparators, also known as profile projectors, project a magnified image of the tool onto a screen, allowing inspectors to compare the tool’s profile against a standard template. This method is particularly useful for verifying the tool’s geometry and ensuring that all dimensions conform to the required specifications.
5. Laser Measurement Systems
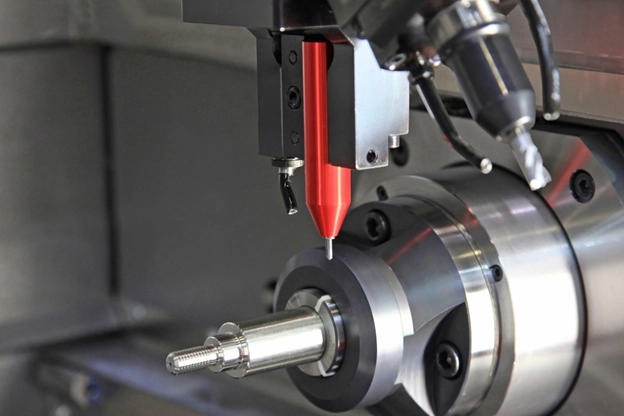
Laser measurement systems use laser beams to measure dimensions with extreme accuracy and speed. They are particularly useful for non-contact measurement, reducing the risk of damaging delicate tools. These systems can measure linear dimensions, diameters, and surface profiles with high precision.
Flatness and Parallelism
Flatness and parallelism are critical parameters in ensuring the performance and reliability of diamond tools. These measurements are essential to guarantee that the tool surfaces meet the required specifications, which is vital for their effective application in various industrial processes. Here is an in-depth look at the importance, measurement techniques, and processes involved in assessing flatness and parallelism.
Flatness refers to the degree to which a surface is perfectly flat. For diamond tools, particularly those used in cutting, grinding, and polishing, flat surfaces ensure even wear and consistent contact with the workpiece. Any deviations from flatness can lead to uneven cutting, inefficient material removal, and premature tool wear.
Parallelism involves ensuring that two surfaces are equidistant at all points. In the context of diamond tools, this means that the tool's working surfaces are parallel to each other, which is crucial for maintaining precision during operation. Non-parallel surfaces can result in uneven pressure distribution, leading to defects in the finished product and reduced tool life.
Measurement Techniques and Equipment
1. Surface Plates
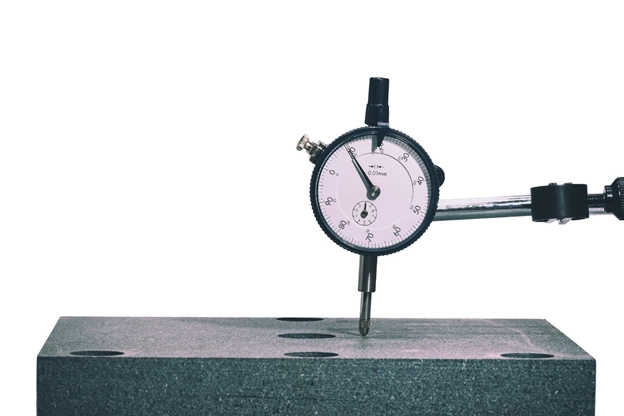
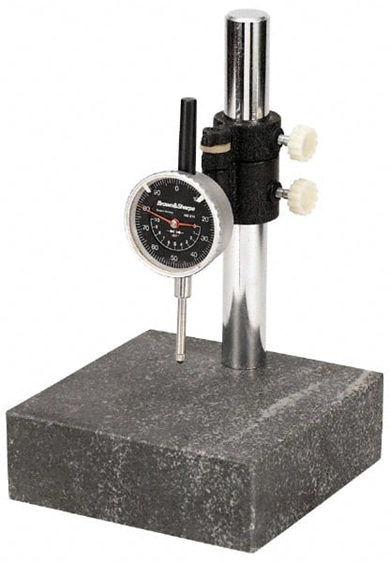
Surface plates are precision-ground flat reference surfaces used to inspect the flatness of tool surfaces. Made from materials like granite, surface plates provide a stable, flat base for measurements. Tools are placed on the surface plate, and deviations in flatness can be detected using feeler gauges or dial indicators.


2. Height Gauges
Height gauges, used in conjunction with surface plates, measure the distance from the surface plate to the tool surface at various points. This helps in assessing the flatness by comparing these measurements across the tool surface. Height gauges are precise instruments that can detect minute variations in height.
3. Flatness Gauges
Flatness gauges, such as electronic flatness meters, measure the flatness of surfaces by moving a probe across the surface and recording deviations from a reference plane. These instruments can provide a detailed map of surface flatness, highlighting areas that deviate from the specified tolerance range.

4. Optical Flats
Optical flats are high-precision glass or quartz disks with extremely flat surfaces. When placed on a tool surface and illuminated with monochromatic light, interference patterns are formed. These patterns, known as Newton's rings, indicate the degree of flatness. The pattern's regularity and spacing help determine the flatness of the tool surface.
5. Laser Interferometers
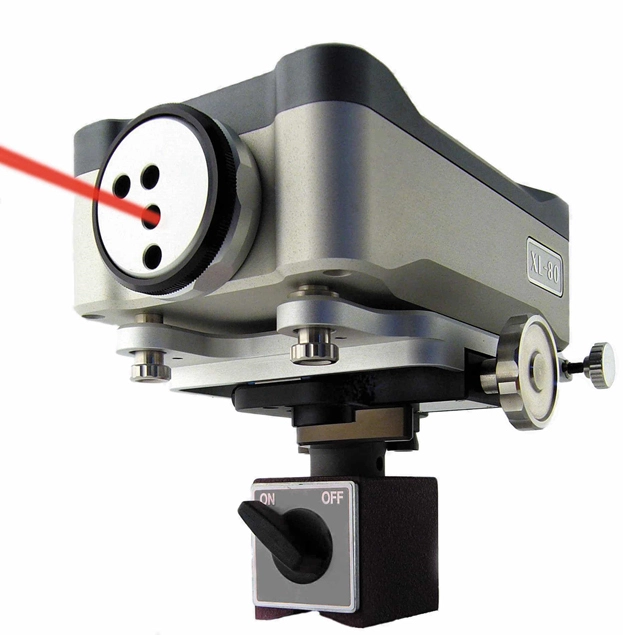
Laser interferometers use laser beams to measure flatness with high precision. The tool surface is scanned with a laser beam, and the reflected light is analyzed to detect deviations from flatness. Laser interferometry is a highly accurate method, capable of detecting sub-micron level variations.
Ensuring Parallelism
To ensure parallelism, inspectors check that the two main surfaces of the diamond tool are parallel to each other within a specified tolerance. This involves using precision instruments and techniques:
1. Micrometers and Calipers
These instruments measure the distance between the tool surfaces at various points. By taking measurements at multiple locations around the tool, inspectors can determine if the surfaces are parallel. Any variations indicate a lack of parallelism.
2. Surface Comparators
Surface comparators, often used with surface plates, provide a means to compare the distance between two surfaces. By setting a reference point and measuring deviations from this point, inspectors can assess parallelism.
3. Dial Indicators
Dial indicators measure small distances or variations in surface height. By placing the tool on a surface plate and moving the dial indicator across the tool surface, inspectors can detect variations in parallelism. The dial indicator's readings indicate whether the surfaces are parallel or if adjustments are needed.
4. Coordinate Measuring Machines (CMM)
CMMs can measure both flatness and parallelism with high accuracy. By probing multiple points on the tool surfaces, a CMM creates a detailed map of the surfaces, indicating any deviations from flatness and parallelism.
Surface Finish
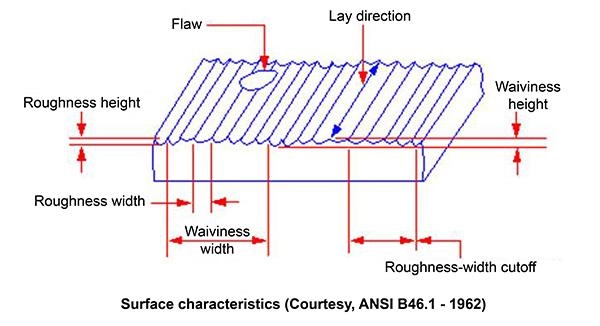
The surface finish of diamond tools is a crucial factor that significantly affects their cutting performance, efficiency, and longevity. Achieving and maintaining an optimal surface finish ensures that the tools operate smoothly, produce high-quality cuts, and have an extended service life. This detailed overview covers the importance of surface finish, measurement techniques, and the parameters involved.
-
 Cutting Performance: A smooth surface finish on diamond tools reduces friction during cutting operations, allowing for more efficient material removal. It ensures a cleaner cut, minimizes the heat generated, and reduces the risk of tool damage or workpiece deformation.
 -
 Longevity: Tools with an optimal surface finish experience less wear and tear, leading to longer tool life. A rough surface can cause increased abrasion and wear on both the tool and the workpiece, necessitating more frequent replacements.
 -
 Quality of the Finished Product: The surface finish of the tool directly impacts the quality of the workpiece's surface. A well-finished tool produces a smoother, more precise finish on the cut material, which is critical in applications requiring high precision and aesthetic quality.
Measurement Techniques and Equipment
1. Surface Roughness Testers
Surface roughness testers are the primary instruments used to measure the surface finish of diamond tools. These testers employ a stylus to trace the surface profile of the tool, measuring the variations in height. The stylus movement is converted into electrical signals, which are then analyzed to calculate surface roughness parameters.
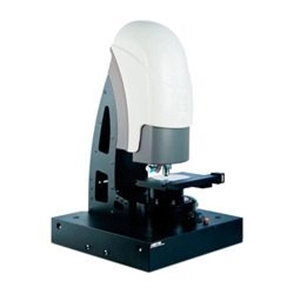
2. Profilometers
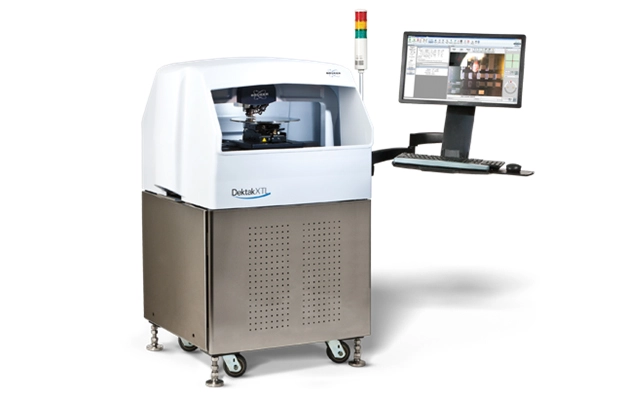
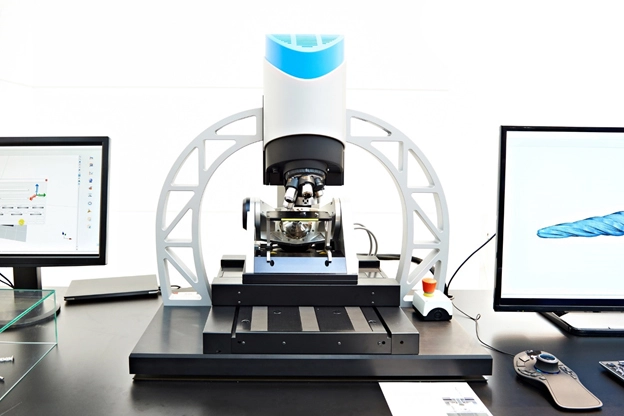
Profilometers are devices that measure the surface profile of a tool. They can be contact-based, using a stylus, or non-contact, using optical methods like laser or white light interferometry. Contact profilometers trace the surface with a diamond-tipped stylus, while non-contact profilometers use light to scan the surface, providing a detailed map of surface features.
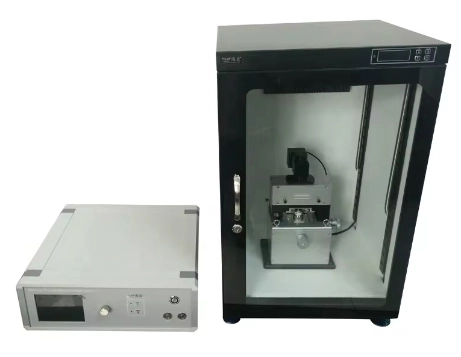
3. Atomic Force Microscopes (AFM)
AFMs provide extremely high-resolution surface finish measurements by scanning the surface with a fine probe. They can measure surface roughness at the nanometer scale, making them ideal for applications requiring ultra-smooth surfaces.
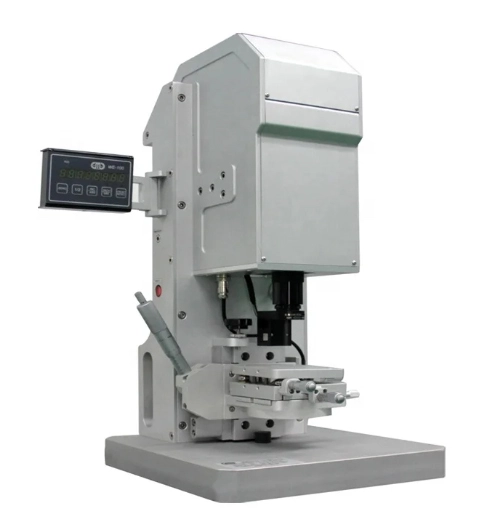
4. White Light Interferometers
These devices use the interference of light waves to measure surface topography. White light interferometers provide non-contact, high-precision measurements of surface finish, suitable for delicate or highly polished surfaces.
Surface Finish Parameters
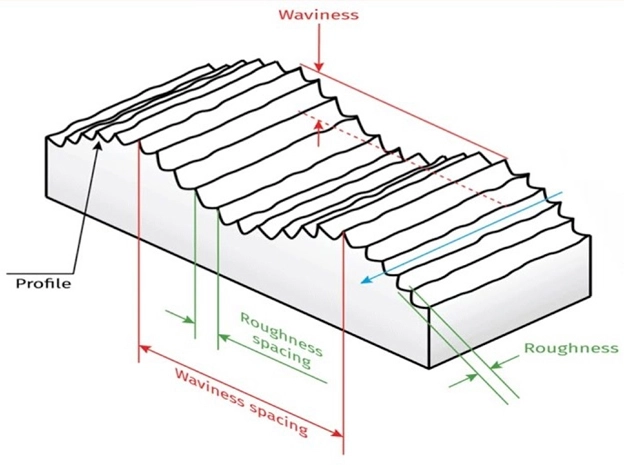
1. Roughness Average (Ra)
Ra is the most commonly used parameter for quantifying surface finish. It represents the arithmetic average of the absolute values of the surface profile deviations from the mean line. Lower Ra values indicate a smoother surface.

2. Root Mean Square Roughness (Rq)
Rq is the root mean square average of the surface profile deviations. It gives more weight to larger deviations, making it useful for assessing surfaces with significant peaks and valleys.
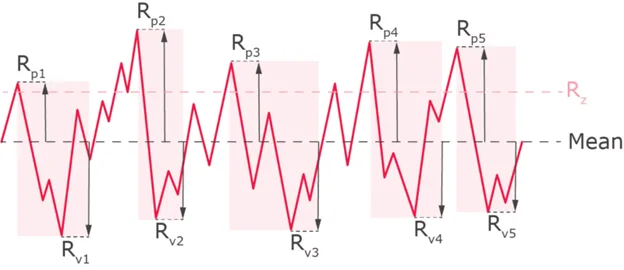
3. Maximum Peak-to-Valley Height (Rz)
Rz measures the vertical distance between the highest peak and the lowest valley within a sampling length. It provides information on the overall height variations on the surface.
4. Skewness (Rsk)
Rsk indicates the asymmetry of the surface profile. Positive skewness suggests more peaks than valleys, while negative skewness indicates more valleys than peaks.
5. Kurtosis (Rku):
Rku measures the sharpness of the surface profile. High kurtosis indicates a surface with sharp peaks and deep valleys, while low kurtosis suggests a more rounded surface profile.
Roundness and Concentricity
Roundness and concentricity are critical parameters for diamond tools that rotate at high speeds, such as diamond wheels and drills. Ensuring these parameters are within specified tolerances is essential for the smooth operation, longevity, and safety of these tools. This detailed overview covers the importance, measurement techniques, and processes involved in assessing roundness and concentricity.
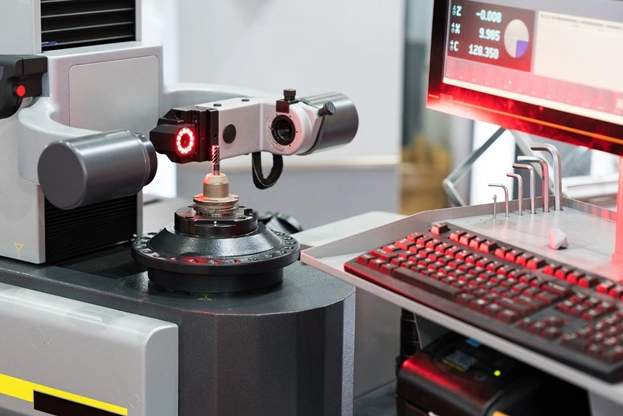
Roundness refers to how closely the shape of a tool's cross-section approaches a perfect circle. For rotating tools, deviations from roundness can cause uneven wear, reduced cutting efficiency, and increased vibration, which can lead to premature tool failure and damage to the workpiece.
Concentricity measures the alignment of the tool's axis of rotation with its geometric center. Proper concentricity ensures that the tool rotates smoothly without wobbling. Poor concentricity can cause significant imbalances, leading to vibrations, noise, and potential safety hazards during operation.
Measurement Techniques and Equipment
1. Roundness Testers (Form Testers)
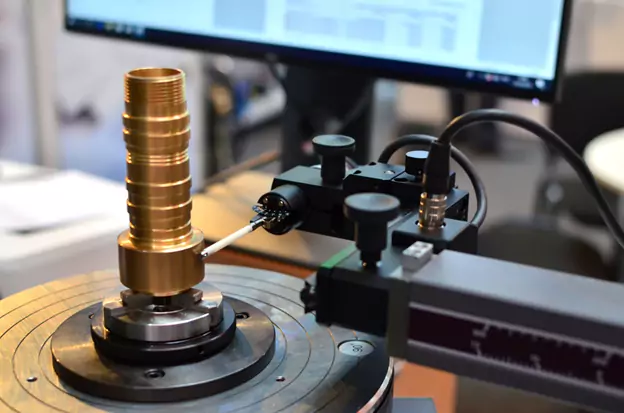
Roundness testers, also known as form testers, are specialized instruments used to measure the roundness of tools. These devices typically consist of a rotating spindle and a high-precision probe that traces the tool's surface. As the tool rotates, the probe measures deviations from a perfect circle, providing detailed data on roundness.
2. Concentricity Gauges

Concentricity gauges measure the alignment of the tool's axis of rotation with its geometric center. These gauges often use dial indicators or electronic sensors to detect deviations. The tool is mounted on a fixture, and measurements are taken at various points around its circumference to determine concentricity.
3. Coordinate Measuring Machines (CMM)

CMMs are versatile instruments that can measure both roundness and concentricity with high precision. By probing multiple points on the tool's surface, a CMM creates a detailed 3D model, which can be analyzed to assess roundness and concentricity.
4. Laser Scanners
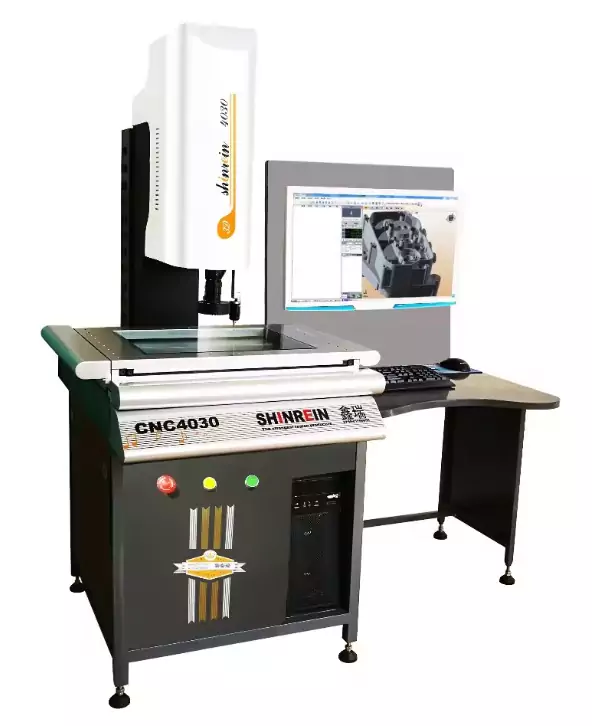
Laser scanners use laser beams to measure the tool's surface with high accuracy. These non-contact devices can quickly generate a detailed profile of the tool, identifying any deviations from roundness and concentricity.
5. Optical systems
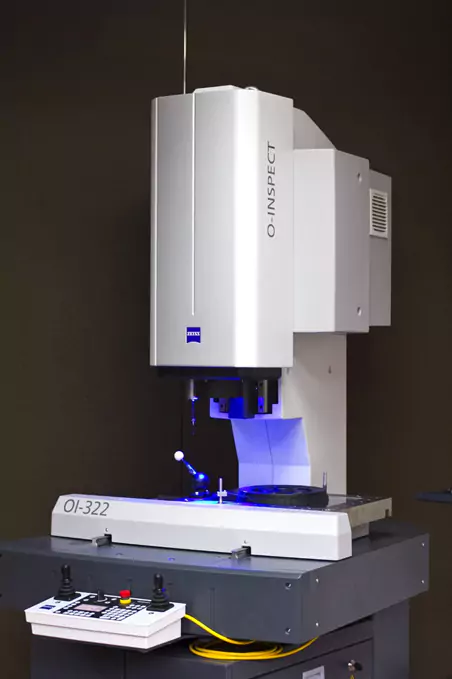
such as video measuring machines, use cameras and image processing software to measure roundness and concentricity. These systems provide non-contact measurement, which is particularly useful for delicate or highly polished surfaces.
Need Help Selecting the Right Diamond
or CBN Tool for Your Application?
Our applications engineers will review your material, machine, and cutting parameters and recommend the optimal
Diamond or CBN Tool specification/solution for your application
Free consultation. No obligation.
Trusted by Tens of Thousands of Manufacturers, Laboratories,
Research Institutions Worldwide Since 1990

Established in 1990

Carlos Sanchez is a senior technical specialist and field applications trainer with more than 17 years of experience in the use and optimization of industrial diamond tools, including ultra-thin diamond blades, core drills, and CBN grinding wheels. With a foundation in industrial engineering and technical operations, Mr. Sanchez has worked extensively with manufacturers and laboratories around the world, providing hands-on support and practical training for a wide range of cutting, grinding, and sample preparation applications.
Fluent in both English and Spanish, Carlos is known for his ability to translate complex tooling concepts into clear, actionable procedures for engineers, technicians, and production staff. His approach emphasizes real-world process improvement, tool longevity, and operator education—ensuring clients get the most out of their diamond tooling investments.
As an author, Mr. Sanchez shares field-tested insights on tool performance optimization, defect prevention, training methodologies, and troubleshooting common cutting issues.
ARE YOU USING RIGHT TOOLS
FOR YOUR APPLICATION?
LET US
HELP YOU
HAVING ISSUES WITH
YOUR CURRENT TOOLS?
Knowledge Center
Diamond Tool Coolants Why, How, When & Where to Use
Selecting the Right Coolant Method for your Diamond & CBN Tools
How to Selecting Right Diamond Tools for your application
How to properly use Diamond Tools
Why use diamond
Diamond is the hardest material known to man kind. When used on diamond/tools, diamond grinds away material on micro (nano) level. Due to its hardness Diamond will work all types of materials from hardness of 40 on Rockwell scale and up. Diamond will machine hardest material, including those materials that other conventional types of abrasives, carbide and high speed steel will not.
Diamond vs CBN (cubic boron nitride) Tools
What is Diamond Mesh Size and how to select best one for your application
What is Diamond Concentration and which to use for your application
Choosing The Correct Diamond Bond Type
How to Properly Use Diamond Tools: A Complete Guide to Performance, Safety, and Tool Life

Carlos Sanchez is a senior technical specialist and field applications trainer with more than 17 years of experience in the use and optimization of industrial diamond tools, including ultra-thin diamond blades, core drills, and CBN grinding wheels. With a foundation in industrial engineering and technical operations, Mr. Sanchez has worked extensively with manufacturers and laboratories around the world, providing hands-on support and practical training for a wide range of cutting, grinding, and sample preparation applications.
Fluent in both English and Spanish, Carlos is known for his ability to translate complex tooling concepts into clear, actionable procedures for engineers, technicians, and production staff. His approach emphasizes real-world process improvement, tool longevity, and operator education—ensuring clients get the most out of their diamond tooling investments.
As an author, Mr. Sanchez shares field-tested insights on tool performance optimization, defect prevention, training methodologies, and troubleshooting common cutting issues.


