


Upgrading Metallography Grinding with Silicon Carbide Paper


-
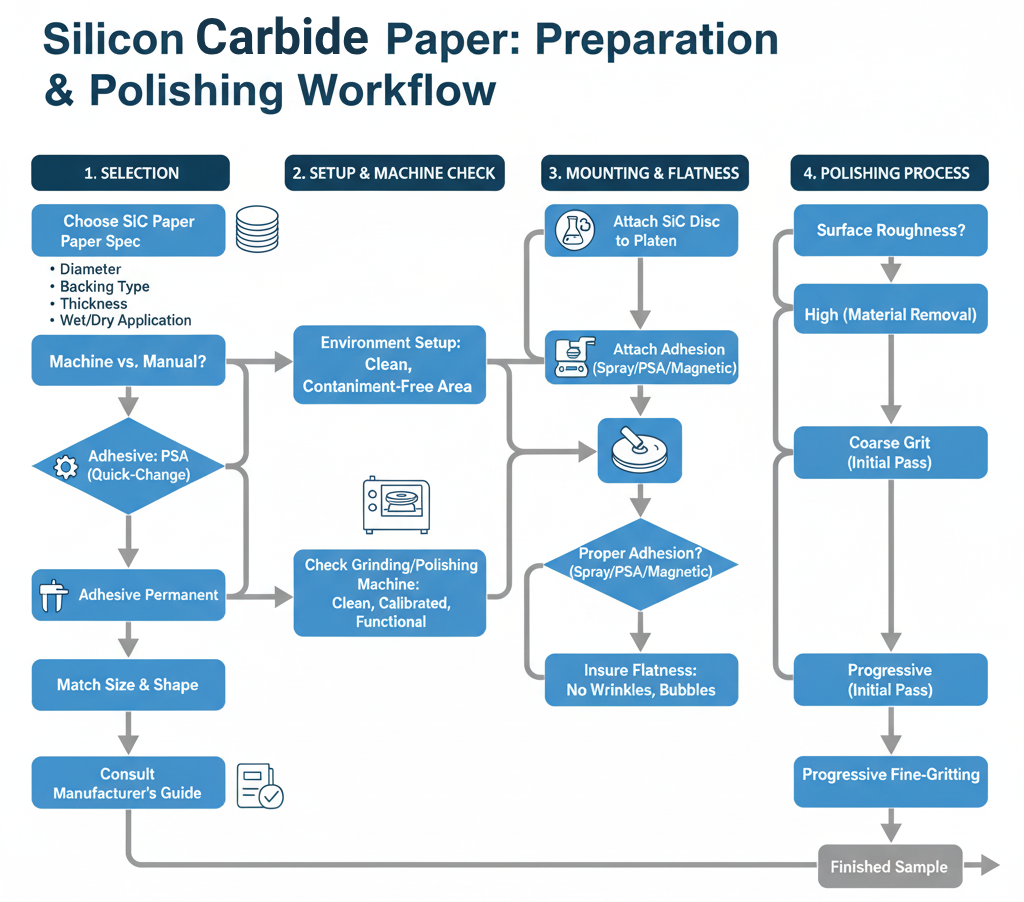
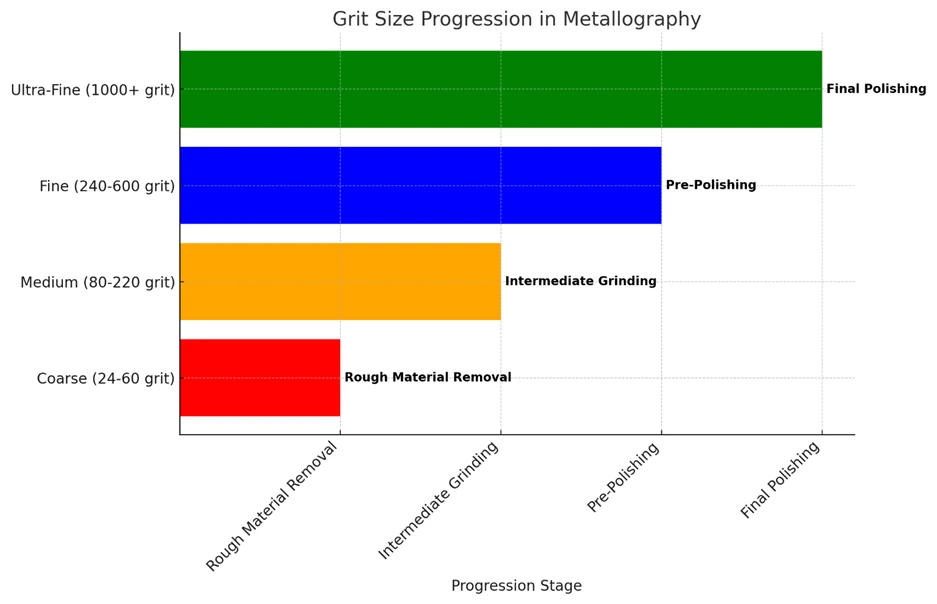
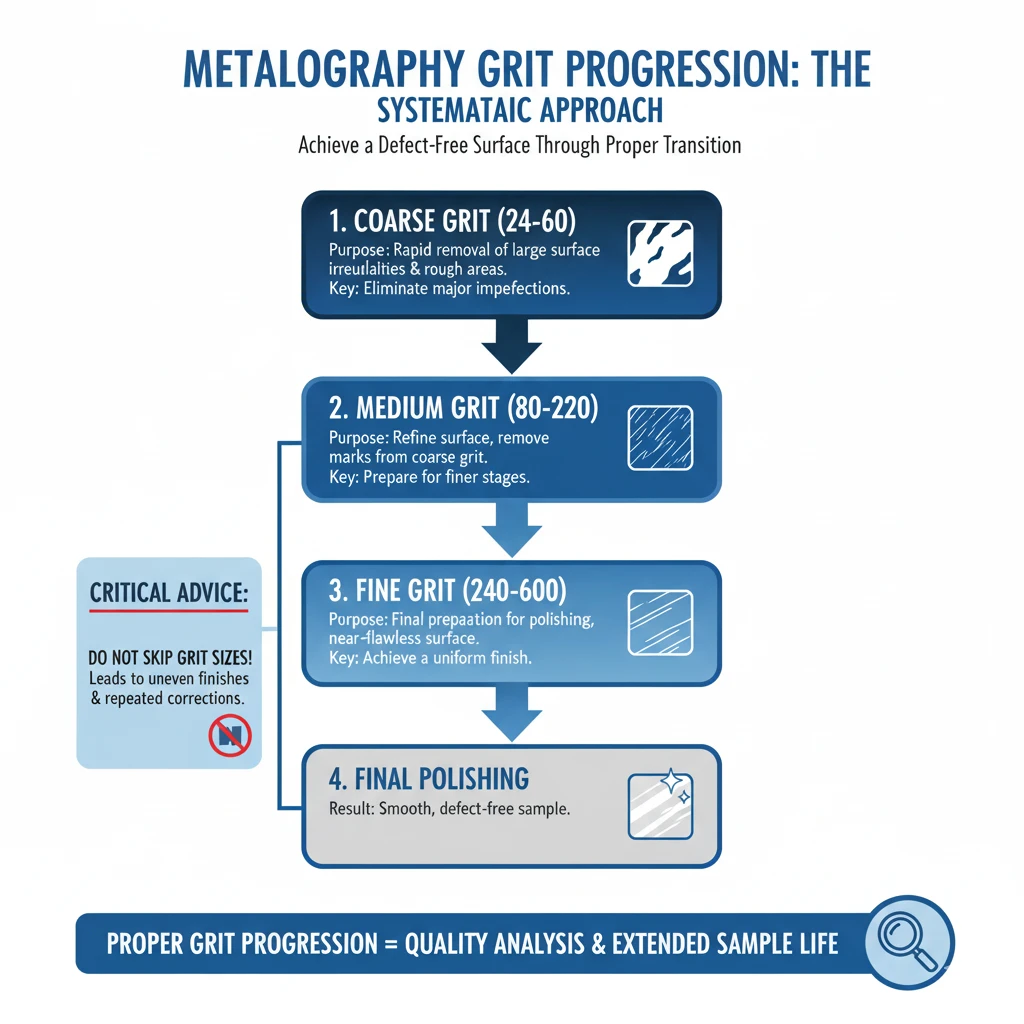
 Coarse (24-60 grit): Ideal for removing large surface irregularities or significant rough areas.
-
Medium (80-220 grit): Refines the surface by addressing marks from the coarse grit and preparing it for finer polishing.
-
Fine (240-600 grit): Prepares the sample for final polishing by leaving an almost flawless surface.

Carlos Sanchez is a senior technical specialist and field applications trainer with more than 17 years of experience in the use and optimization of industrial diamond tools, including ultra-thin diamond blades, core drills, and CBN grinding wheels. With a foundation in industrial engineering and technical operations, Mr. Sanchez has worked extensively with manufacturers and laboratories around the world, providing hands-on support and practical training for a wide range of cutting, grinding, and sample preparation applications.
Fluent in both English and Spanish, Carlos is known for his ability to translate complex tooling concepts into clear, actionable procedures for engineers, technicians, and production staff. His approach emphasizes real-world process improvement, tool longevity, and operator education—ensuring clients get the most out of their diamond tooling investments.
As an author, Mr. Sanchez shares field-tested insights on tool performance optimization, defect prevention, training methodologies, and troubleshooting common cutting issues.

How to Selecting Right Diamond Tools for your application

How to properly use Diamond Tools

Why use diamond

Diamond vs CBN (cubic boron nitride) Tools
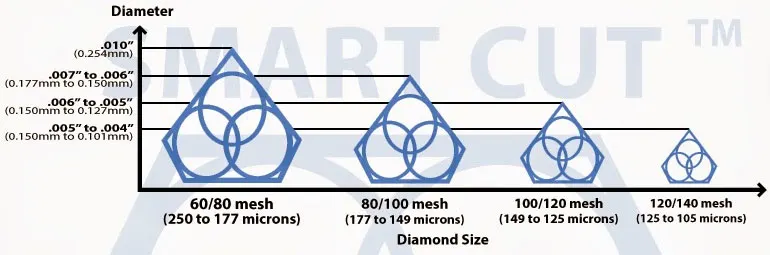
What is Diamond Mesh Size and how to select best one for your application

What is Diamond Concentration and which to use for your application

Choosing The Correct Diamond Bond Type
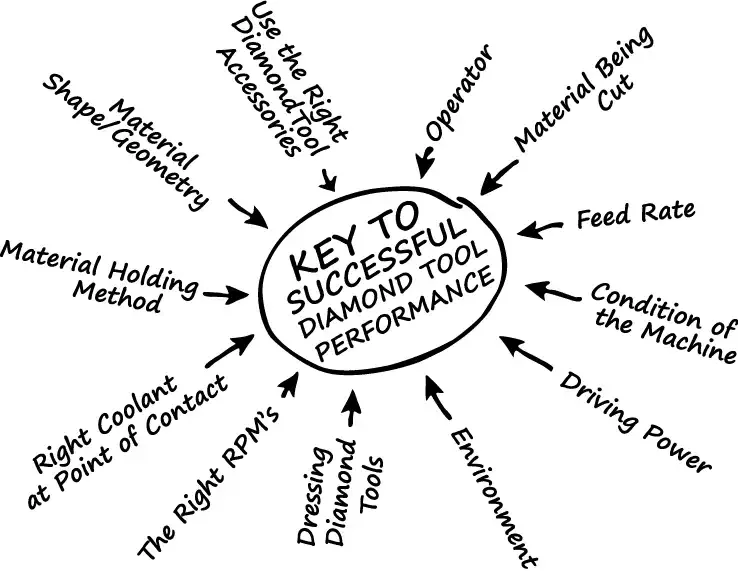
How to Properly Use Diamond Tools: A Complete Guide to Performance, Safety, and Tool Life
Carlos Sanchez is a senior technical specialist and field applications trainer with more than 17 years of experience in the use and optimization of industrial diamond tools, including ultra-thin diamond blades, core drills, and CBN grinding wheels. With a foundation in industrial engineering and technical operations, Mr. Sanchez has worked extensively with manufacturers and laboratories around the world, providing hands-on support and practical training for a wide range of cutting, grinding, and sample preparation applications.
Fluent in both English and Spanish, Carlos is known for his ability to translate complex tooling concepts into clear, actionable procedures for engineers, technicians, and production staff. His approach emphasizes real-world process improvement, tool longevity, and operator education—ensuring clients get the most out of their diamond tooling investments.
As an author, Mr. Sanchez shares field-tested insights on tool performance optimization, defect prevention, training methodologies, and troubleshooting common cutting issues.